Installation Guide - EWA system
This document contains information on how to install the components needed in the system, and what configuration steps are needed.
Documentation Change Log
-
22-10-2025: Added section for personnel registration API.
-
22-10-2025: Added deprecation notice for old Insight with links to new Insight service and removed it from installation guide.
-
09-07-2025: Introduced new Insight Web, deprecated old features, and added EWA Client installation guide since version 39.
-
03-07-2025: Added Insight Web installation guide
-
25-06-2025: Updated version manager configuration for ClientHub
-
27-05-2025: Removed endpoint for EWA API and added Insight API and its installation guide instead.
-
09-12-2024: Added feature and installation guide for EWA API.
-
05-12-2024: Updated parameters for Form module in appsetting.xml file of Export service.
-
05-12-2024: Removed parameter for Liveview Api key on Insight's Web.config and SetParameters.xml files.
-
11-10-2024: Removed database pre-requisites section to enable service broker.
-
25-04-2024: Updated Personnel Registration details into SetParameters.xml within Insight.
-
27-03-2024: Added Personnel Registration details into SetParameters.xml within Insight.
-
27-03-2024: Added information about new .NET Desktop Runtime 8.0.x requirement for ClientHub in the Requirements section.
-
26-03-2024: Updated the new PackageName of the EWA Client in the Set-AppXProvisionedDataFile script within Client Application configuration section.
-
15-02-2024: Added VersionManager API and service sections.
-
11-12-2023: Added updated information about set parameters and section for Consultation.
-
09-12-2023: Added SetParameters.xml information for corpuls widget in Insight with regards to release 24.
-
27-09-2023: Added Checklist V2 installation documentation.
-
18-09-2023: Added missing SetParameters.xml information for several components with regards to release 21.
-
16-08-2023: Re-added LiveView V2 installation documentation.
-
26-07-2023: Removed LiveView V2 installation documentation.
-
29-06-2023: Updated LiveView V2 and linked to documentation.
-
17-02-2023: Changed ClientAPI to ClientHub and linked to documentation.
-
23-05-2022: Updated Web application server(s) requirements under Server requirements.
-
24-05-2022: Updated Helseplattformen Link Patient Identity API, HP Link Patient Identity API Install or Updated and IIS Configuration.
-
23-08-2022: Updated Data Warehouse Export installation guide.
-
12-09-2022: Updated Webview2 dependency. Work around for the login issue while using EWA Client.
-
30-09-2022: Updated the guide describing how to enable or disable webview 2 in EWA Client.
-
06-10-2022: Updated the steps to Unblock MSI files on a server.
-
07-10-2022: Updated fix if getting "Access denied" message when trying to print from Insight.
-
01-12-2022: Updated known issue section for the 'Application Insights Connection String' exception.
-
02-12-2022:
- Updated known issue section for HTTPS Certificate binding getting deleted after installing ClientApi.
- Updated migration and seeding tool and export section with screenshots and removed references of 21.10
Preface
- If you are upgrading the system,please take a backup of all configuration files.
- Then you have a backup in case you overwrite anything and don’t know what the setting should be.
- The server system consists of 4 web applications, 1 database, 1 service and a client.
- This will be deployed on 2 servers and client machines:
- Server 1:
- MS SQL server
- Server 2/ HA Zone 1:
- Application server:
- Client Api:
- Sends mission data from EMCC to clients that asks for it.
- Receives journals and logs from clients to store in the database.
- EMCCIntegration:
- Receives mission data from EMCC and stores in the database
- Insight:
- Used to view/edit/delete journals, look at audit and technical log, access live view monitors and administer configuration of the system.
- Export:
- Export journal data to other endpoints. Primarily REST or SOAP service export.
- Reporting Database Export:
- Export of journal data to reporting database.
- Tools:
- Migration Utility - Used to create or update tables and data in the database
- Client Api:
- Clients:
- Client Application - Used to fill out journals
- Monitoring Unit Broker - Used to broker the connection and data transfer between monitoring devices and the client application.
- Application server:
- Another MS SQL database server if you want to host the Reporting Database on a separate server.
- Server 1:
- Some assumptions:
- The 2 servers will be in the same domain, even though they are in separate networks/VLANs
- Users that will use the tablet application and/or Insight will already be in or added to AD groups.
- The document also contains field where it is possible to fill inn configuration values to make it easier to look them up later if needed.
Server requirements
Web application server(s)
The web application servers requires IIS installed, and the following runtimes, extensions and protocols enabled:
- .NET Framework 4.7.2 Runtime (Download .NET Framework 4.7.2 | Free official downloads)
- ASP.NET Core Runtime 6.0.x Hosting Bundle (Download .NET 6.0 (Linux, macOS, and Windows)
- WebDeploy IIS extension (Web Deploy 3.6 : The Official Microsoft IIS Site)
- IIS WebSockets Protocol enabled (WebSocket | Microsoft Docs)
- Rewrite IIS extension (URL Rewrite: The Official Microsoft IIS Site)
- IIS Dynamic Content Compression enabled (Dynamic Types | Microsoft Docs)
- ASP.NET Core Runtime 8.0.x Hosting Bundle (Download .NET 8.0 (Linux, macOS, and Windows))
- .NET Desktop Runtime 8.0.x (Download .NET 8.0 (Linux, macOS, and Windows))
Note regarding .NET 8.0.x requirements
Usually web applications made with .NET will only require the ASP.NET Core Runtime Hosting Bundle, but the ClientHub application now requires the .NET Desktop Runtime 8.0.x to be installed on the server in addition to the ASP.NET Core Runtime 8.0.x Hosting Bundle.
A mixture of new functionality and normal security upgrades in the ClientHub application required us to install the Microsoft.EntityFrameworkCore.SqlServer, which in turn has a dependency chain that ultimately includes the Microsoft.Web.WebView2 package specifically when building the application targeting Windows. Usually we would build using the generic .NET target, but LocalAD packages requires the Windows target. This Microsoft.Web.WebView2 dependency is the reason why the .NET Desktop Runtime 8.0.x is required.
We will change the build targeting in the future to avoid this dependency, but that can't happen until we can remove the LocalAD packages from the project.
Prerequisite Information
This chapter contains information about what data should be collected or created before doing any installation or upgrades.
Certificates and DNS names
We recommend getting two DNS names with corresponding certificates for HTTPS to each of the web server zones. This is necessary for following the recommended upgrade path. We recommend using this structure for domain names if possible, if you have internal guidelines for DNS records you should follow them.
DMZ Zone
pepj.dmz.customerdomain.no
pepj.dmz.upgrade.customerdomain.no
Application Zone
pepj.customerdomain.no
pepj.upgrade.customerdomain.no
DMZ info table
Application info table
Database server
We recommend writing down the settings for the database server so that it does not have to be searched for when doing the installation steps. We recommend giving the database names following this guideline Bliksund.PEPJ.XX.XX where XX.XX is replaced with the version number of the system being installed.
Database info table
Recommended upgrade path
When upgrading between major versions of the system it is recommended to install the new version to run parallel to the old system and when it has been set up, do a database upgrade and change the URLs to point to the new system. This should result in the least amount of downtime for the system as the only time you have downtime is during migration of the production database.
The clients should be upgraded before the servers are finished upgrading.
You upgrade the clients by installing it like a normal installation. The data is persistent during upgrade. It handles upgrading its data itself.
Checklist for upgrading server components
Before downtime
- Make a copy of the production database. Following the name scheme for new installations.
- Install the new version of the system following the normal installation procedures but using the *.upgrade.* domain names and the database copy
- Go over each component and make sure the settings that need to be configured has the same values as in production.
- Configure the new settings that is introduced in the new version.
- Configure a test-tablet to talk with the new system and use the simulator to check that everything works.
- When everything is configured it is time to plan the downtime and final steps.
During downtime
-
Delete the database copy used for configuring the new installation.
-
Turn off IIS so that clients cannot connect.
-
Backup the production database and make a copy of it. Give it the same name as the database copy before downtime.
-
Migrate the copy of the database using the migration tool provided to the newest version.
-
Configure bindings in IIS and/or Load Balancer:
- Remove hostname from HTTPS binding on the old production site
-
Change hostname on the new production from *.upgrade.* to production hostname. If applicable, change certificate.
-
Turn on IIS and restart the application on the clients.
-
Upgrade complete.
After following these steps, you have both a backup of the old version in case of a rollback, and the downtime is reduced to a minimum.
MS SQL Database Migration
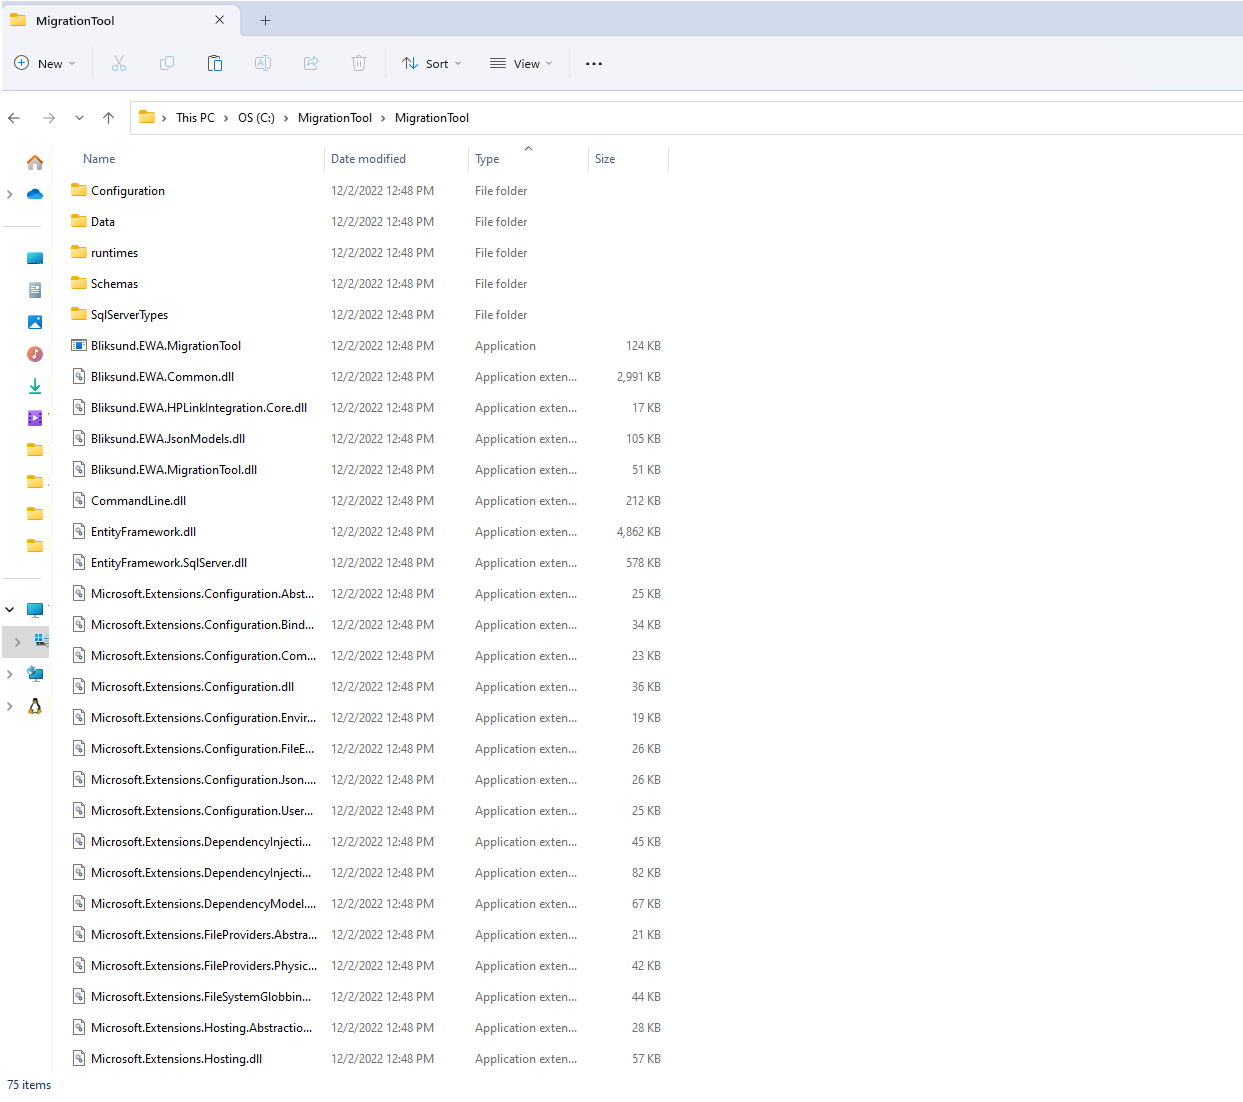 |
|---|
| Figure 1 - Files in MigrationTool |
-
Create a new database if it does not exist. Example: PEPJDatabase.
-
Create a new user with access to the database.
-
Edit the connection string for the Migration Utility in appsettings.json
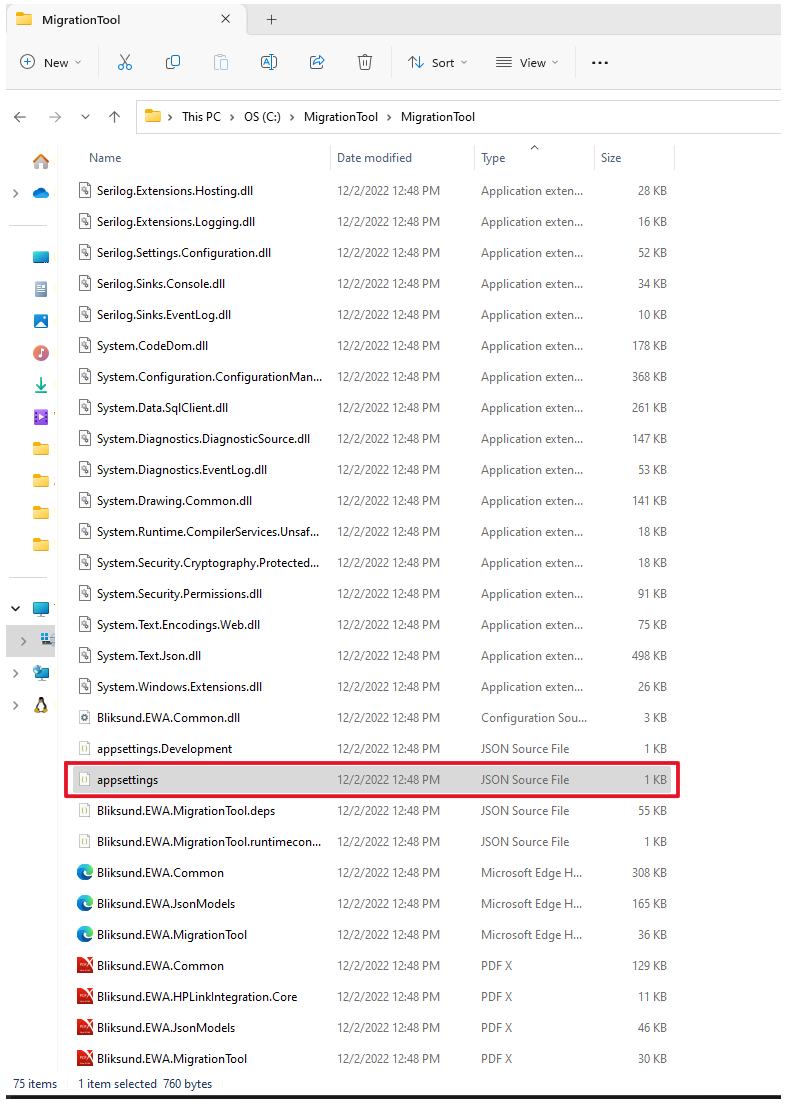 |
|---|
| Figure 2 - Location of configuration file |
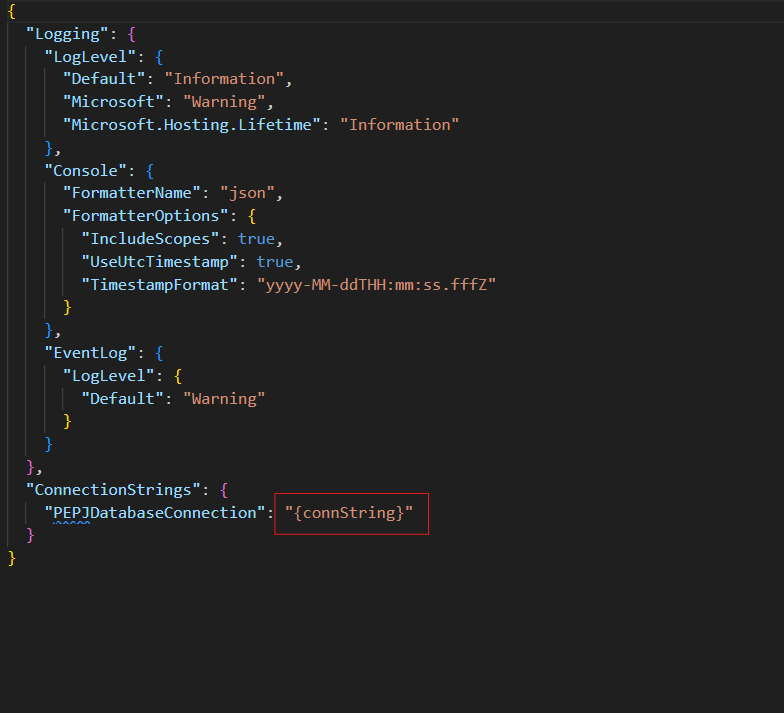 |
|---|
| Figure 3 - Location of connectionString that must be edited. |
- Run the Bliksund.EWA.MigrationTool.exe file, pick Migrate and choose "Yes"
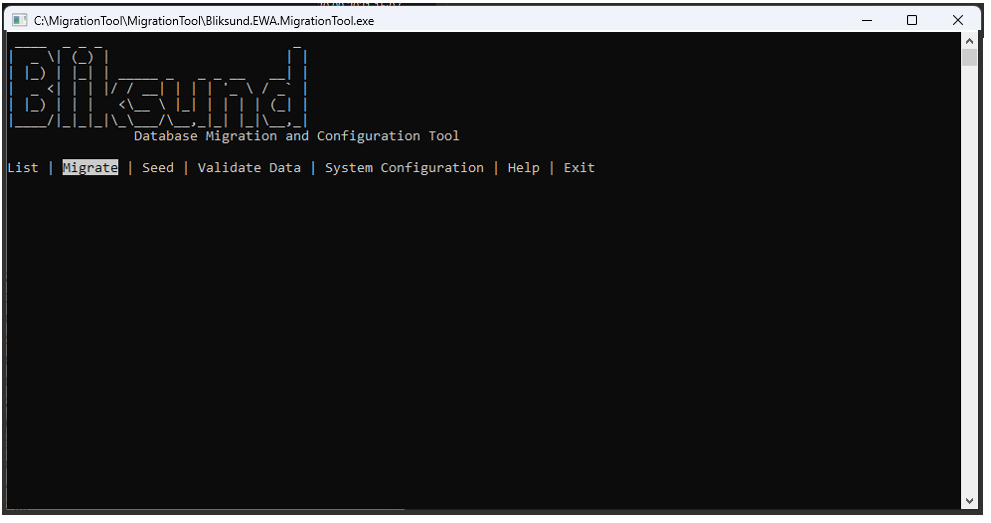 |
|---|
| Figure 4 - Migration Utility Console Application |
- When it completes and ask if you want to seed the database, pick Yes.
Seed/choose required configuration
- Choose the System Configuration item in the main menu of the Migration and Configuration Tool.
- Choose Authentication and Authorization method. See other documentation for explanation about this functionality.
- Set Role to Access Mapping. See other documentation for explanation about this functionality.
- Setting PDF settings is not required at this point, but it's possible if you don't want to do it via. Insight.
IIS Configuration
This chapter contains recommendations regarding the configuration of IIS that does not involve a specific component.
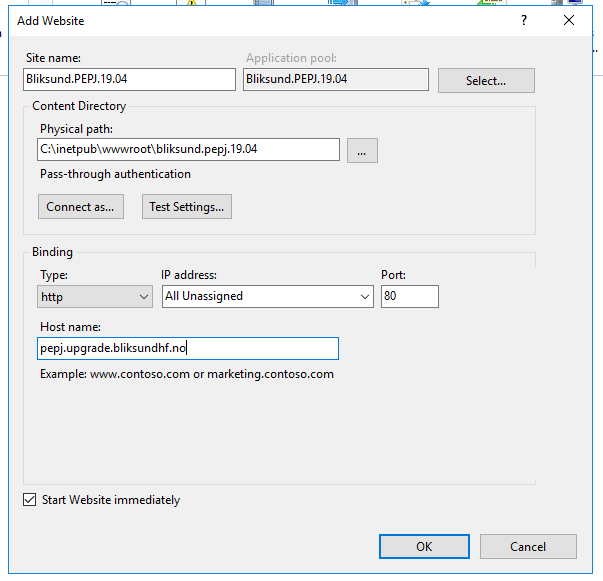
ASP.NET Core requires each AppPool to only contain a single ASP.NET Core WebApp to function. It is recommended to create an AppPool for each WebApp component from the start to make the transition to ASP.NET Core easier as we upgrade components to this runtime standard.
It is recommended to include the major and minor part of the version number for each component in the AppPool name to make upgrades and rollbacks easier.
We recommend following the naming scheme Bliksund.PEPJ.XX.XX where XX.XX is the version number being installed. Following our recommended naming scheme, you should use either pepj.dmz.customerdomain.no and pepj.customerdomain.no in the hostname on first installation and pepj.dmz.upgrade.customerdomain.no and pepj.upgrade.customerdomain.no when installing an upgrade.
 |
|---|
ClientHub
The old ClientApi has been replaced by the upgraded ClientHub component.
See ClientHub Documentation for documentation and installation guide.
Integration
Integration Install or Update
IMPORTANT: This is an ASP.NET Core project so it must be installed on a separate AppPool in IIS from the HP Link Patient Identity API component for both to function.
Using Web Deploy is the recommended way to both install and upgrade this component. Either set all the values in Bliksund.EWA.EMCCIntegration.SetParameters.xml or reuse the file when doing an upgrade.
- Edit the file Bliksund.EWA.EMCCIntegration.SetParameters.xml and either change the values that are wrong for your system or copy in the values from the file used the last time.
<?xml version="1.0" encoding="utf-8"?>
<parameters>
  <setParameter name="IIS Web Application Name" value="Default Web Site" />
  <setParameter name="PEPJDatabaseConnection-Web.config Connection String" value="Data Source={Database Server};Initial Catalog={Database Name};User ID={Database Administrator};Password={Database Administrator Password};Pooling=False;MultipleActiveResultSets=True;Application Name=EntityFramework" />
  <setParameter name="ApplicationInsights" value="" />
</parameters>
-
After SetParameters.xml have been verified to be correct for your system run the command;
Bliksund.EWA.EMCCIntegration.deploy.cmd /Tto see what changes will be done on the file system. (Files changed, added, removed) -
After this run the command;
Bliksund.EWA.EMCCIntegration.deploy.cmd /Yto do the actual changes.
Integration SetParameters.xml values
| Name | Description | Example |
|---|---|---|
| IIS Web Application Name | The name of the IIS Web Application that the component should be installed to. Should be in format {SiteName}/{WebAppPath} where {SiteName} should be the name of the IIS site the webapp should use, and {WebAppPath} is the path of the webapp under the site. | BliksundPEPJ/EMCCIntegration |
| PEPJDatabaseConnection-Web.config Connection String | The SQL connection string to the main EWA database. | See https://www.connectionstrings.com/sql-server/ for examples |
| ApplicationInsights | Optional Application Insights connection string. This line should be deleted if you do not want the application to be instrumented with application insights to Azure. | InstrumentationKey=REDACTED |
Integration v21 changes
No changes compared to v20.
Version Manager
The Version Manager system consists of a Version Manager API and a Version Manager Service (Bliksund Update Service). Comprehensive documentation can be found in the Shared collection: [here](/modules/VersionManager/Documentation/Installation and Deployment)
Version Manager API
Installation guide for the Version Manager API can be found [here](/modules/VersionManager/Documentation/Installation and Deployment)
Please make note of the API keys used in the installation process. These keys will be used in the installation of Insight and the Version Manager Service.
Version Manager Service
Installation guide for the Version Manager Service can be found [here](/modules/VersionManager/Documentation/Installation and Deployment)
Version Manager v39 changes
Improve the update mechanism for EWA Client and MUBroker services through the Bliksund Updater Service. Enhance the administrator user interface in Insight.
Version Manager v27 changes
Added.
Insight
Following a massive migration effort to newer, supported .NET framework version, this version of Insight is deprecated.
See Installation Guide - Insights Web and Installation Guide - Insights APIfor information about successor services.
Insight Web
See @Insight Web - Installation Guide for documentation and installation guide.
Insight API
See@Insight API - Installation Guide for documentation and installation guide.
Helseplattformen Link Patient Identity API
HP Link Patient Identity API Install or Update
IMPORTANT: This is an ASP.NET Core project so it must be installed on a separate AppPool in IIS from the Integration component for both to function.
Using Web Deploy is the recommended way to both install and upgrade this component. Either set all the values in Bliksund.EWA.HPLinkIntegration.PatientIdentityApi.SetParameters.xml or reuse the file when doing an upgrade.
- Edit the file Bliksund.EWA.HPLinkIntegration.PatientIdentityApi.SetParameters.xml and either change the values that are wrong for your system or copy in the values from the file used the last time.
<?xml version="1.0" encoding="utf-8"?>
<parameters>
  <setParameter name="IIS Web Application Name" value="Default Web Site" />
  <setParameter name="PEPJDatabaseConnection-appsettings.json Connection String" value="Data Source={Database Server};Initial Catalog={Database Name};User ID={Database Administrator};Password={Database Administrator Password};Pooling=False;MultipleActiveResultSets=True;Application Name=HPLinkPatientIdentityApi" />
</parameters>
-
After SetParameters.xml have been verified to be correct for your system run the command;
Bliksund.EWA.HPLinkIntegration.PatientIdentityApi.deploy.cmd /Tto see what changes will be done on the file system. (Files changed, added, removed) -
After this run the command;
Bliksund.EWA.HPLinkIntegration.PatientIdentityApi.deploy.cmd /Yto do the actual changes.
LiveView V2
The version 2 of LiveView that uses separated endpoint in backend and Blazor in frontend.
Prerequisite: The LiveView API is installed and running.
See LiveView API Installation for installation guide.
See LiveView Overview for user guide.
Checklist V2
The version 2 of Checklist that uses separated endpoint in backend and Blazor in frontend.
The new Checklist V2 provides a systematic and user-friendly way to create and track checklists, ensuring that all steps and protocols are followed accurately and efficiently for healthcare professionals.
We will use the new Form Module to store questions and responses for both checklist configuration and checklist responses (performed checklists).
Before you can use the new checklist feature in EWA, ensure that the Form Module API is installed and running.
Additionally, other modules need to be configured correctly to ensure the proper functioning of the new checklist feature.
Form Module API Installation
See Form Module API Installation for the installation guide.
Configuration in other modules for Checklist V2
Here are the other modules that require configuration for checklist v2 to work:
-
ClientHub: To match the values in the Form Module API configuration, add
FormModuleAPIPathandFormModuleApiKeytoBliksund.EWA.ClientHub.SetParameters.xmlfile. For guidance, please follow the ClientHub Installation. -
Insight: In the Web. config, add values for
FormModuleEndpointandFormModuleApiKeykeys to match with the same values in the Form Module API configuration. Please refer to the FormModule installation guide. -
ExportService: If you have manually installed the export service on your server, add values for
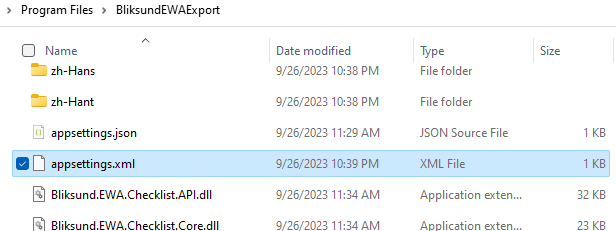
FormModuleApi__BaseUrlandFormModuleApi__ApiKeytoappsettings.xmlfile. This file is already extracted to the installation folder atC:\Program Files\BliksundEWAExport. Ensure that these values match with those in the Form Module API configuration. -
WebView2: Forms module has a dependency on WebView2. All Windows 11, the WebView2 Runtime is included as part of the operating system. Windows 10, however, doesn’t have WebView2 Runtime pre-installed in all the versions. If your Windows 10 machine doesn’t have WebView2 Runtime pre-installed in it, Download the suitable WebView2 Runtime for your machine from the below link provided.
https://developer.microsoft.com/en-us/microsoft-edge/webview2/#download-section
Checklist V2 user guide
See Checklist V2 user guide for user guide.
Consultation
The Consultation system consists of a Chat Server and changes to the ClientHub and Insight components.
Consultation has a seperate page in learn that can be found here
Consultation Installation
The installation guide for Consultation, which includes the Chat Server, can be found here
Consultation Configuration and User Guide
The configuration and user guide for Consultation can be found here
Personnel Registration API
The personnel registration API component is used by the Insight Web component. See installation guide here:Personnel Registration Installation.
Export
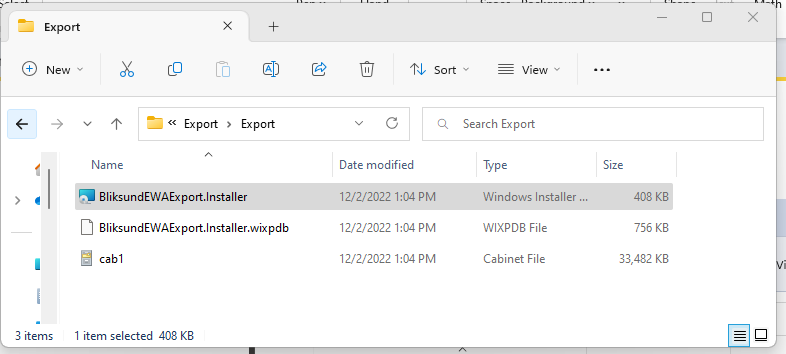 |
|---|
| Figure 8 - Installation files for Export |
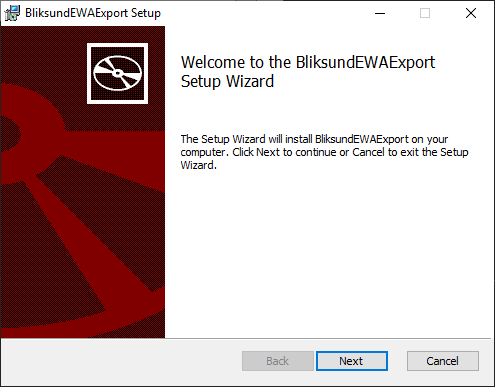
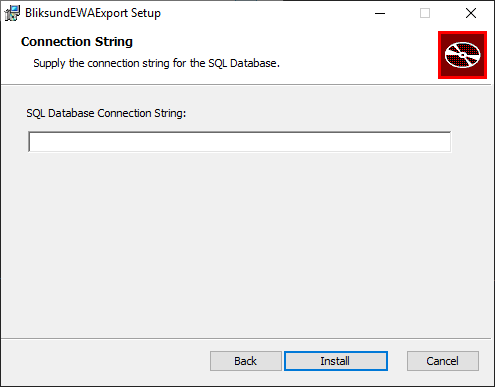
Installed with .msi installer. You will be asked to provide values for these settings.
- EWA Database Connection String
 |
|---|
 |
|---|
- Ensure that the Form Module API is installed and operational so the checklist v2 can work. If it is not, please refer to Form Module API Installation.
After generating the API key of Form Module in the previous step, insert it along with the path to the
appsettings.xmlfile:
 |
|---|
Open the appsettings.xml located at app installation folder then update the FormModuleApi__BaseUrl and FormModuleApi__ApiKey |
<?xml version="1.0" encoding="utf-8"?>
<configuration>
  <connectionStrings>
    <add name="PEPJDatabaseConnection" providerName="System.Data.SqlClient" connectionString="Populated during the installation"/>
  </connectionStrings>
  <ApplicationInsights>
    <ConnectionString></ConnectionString>
  </ApplicationInsights>
  <FormModuleApi>
    <BaseUrl>{FormModuleAPI}</BaseUrl>
    <ApiKey>{FormModuleApiKey}</ApiKey>
  </FormModuleApi>
</configuration>
- Further configuration of export is done through the Export Configuration component in Insight.
Data Warehouse Export
| Installation files for Data Warehouse Export |
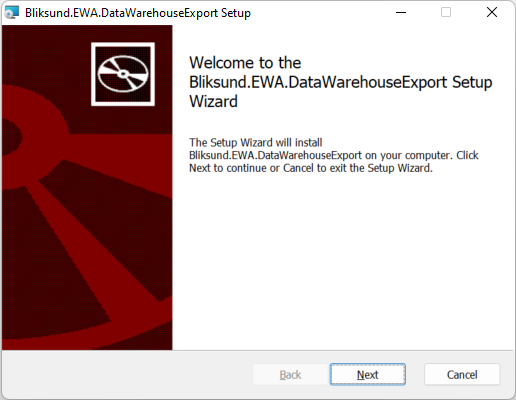
Installed with .msi installer. You will be asked to provide values for these settings.
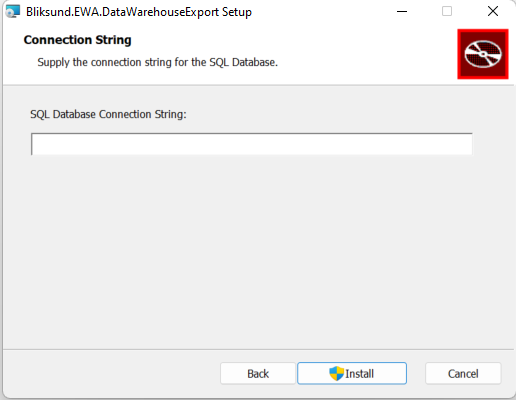
- EWA Database Connection String
 |
|---|
 |
|---|
| Insert primary EWA database connection string |
-
An administrator of the system can further configure the application by going to the Export configuration page in Insight. The Data warehouse database connection string is also configured here.
-
The application will install as a Windows service with the name 'Bliksund EWA Data Warehouse Export'.
-
The application will create a log file in the
logsfolder inside the installation folder. If you want to change the log file location, locate the filelog4net.config, and change the<file value="logs/logfile.txt" />to the new folder location.
Client Application
Installation
Older versions
To install the application remotely you can use the PowerShell command Add-AppxProvisionedPackage or DISM
Example script using DISM.
function FindAppBundleRoot($Folder) {
    return (Get-ChildItem -Path $Folder -Filter \*.msixbundle -Recurse).Directory
}

function FindAllDependencies($Folder) {
    $DependencyDir = (Join-Path $Folder "Dependencies")
    $DependencyPackages = @()
    $DependencyPackages += Get-ChildItem (Join-Path $DependencyDir "\*.appx")

    if (($Env:Processor_Architecture -eq "x86" -or $Env:Processor_Architecture -eq "amd64") -and (Test-Path (Join-Path $DependencyDir "x86"))) {
        $DependencyPackages += Get-ChildItem (Join-Path $DependencyDir "x86\\\*.appx")
    }

    if (($Env:Processor_Architecture -eq "amd64") -and (Test-Path (Join-Path $DependencyDir "x64"))) {
        $DependencyPackages += Get-ChildItem (Join-Path $DependencyDir "x64\\\*.appx")
    }

    if (($Env:Processor_Architecture -eq "arm") -and (Test-Path (Join-Path $DependencyDir "arm"))) {
        $DependencyPackages += Get-ChildItem (Join-Path $DependencyDir "arm\\\*.appx")
    }

    return $DependencyPackages
}

$Folder = FindAppBundleRoot($folderName)

Write-Host "Looking for dependencies"
$Dependencies = FindAllDependencies($Folder)
Write-Host "Found " $Dependencies.Count " dependencies"

$Bundle = Get-ChildItem (Join-Path $Folder "\*.msixbundle")

if (Test-Path ("settings.json")) {
    Write-Host "Found custom settings to attach"
    $CustomData = Get-ChildItem ("settings.json")
}

$arguments = @('/Online')
$arguments += '/Add-ProvisionedAppxPackage'
$arguments += '/PackagePath:"' - $Bundle - '"'

ForEach($dependency in $Dependencies) {
  $arguments += '/DependencyPackagePath:"' - $dependency - '"'
}

if ($CustomData) {
  $arguments += '/CustomDataPath:' - $CustomData
}

$arguments += '/SkipLicense'

DISM $arguments
Configuration
If the client application has been provisioned with DISM or Add-AppxProvisionedPackage you can replace the datafile in it to edit the configuration used by the client. This is useful if you need to change what URL the client is pointing to. This is done with the PowerShell command Set-AppXProvisionedDataFile. It is also possible to specify this file during installation when using Add-AppxProvisionedPackage together with the CustomDataPath parameter.
Example:
Set-AppXProvisionedDataFile -PackageName BliksundAS.BliksundPEPJ_24.3.580.0_neutral\_\~\_p0tfvamdv7bj6 -CustomDataPath .\\settings.json -Online
Value for -PackageName
The value for PackageName can be found by running Get-AppxProvisionedDataFile as it changes with the version and certificate used to sign the application.
Example:
(Get-AppxProvisionedPackage -Online \| Where-Object {\$\_.Displayname -eq \"BliksundAS.BliksundPEPJ\"}).PackageName -Online
The content of settings.json must be constructed like this.
{
  "Version": 2,
  "Url": {
    "Primary": "https://dev.bliksundhf.no/clienthub/develop/",
    "Training": "https://test.bliksundhf.no/clienthub/"
  },
  "Dataset": "Azure",
  "Locale": "no",
  "LockTimer": 15,
  "Logging": {
    "MinimumLevel": "Warning"
  }
}
Disable or Enable web view 2 in EWA Client
To disable or enable web view 2 in EWA Client the "UseWebView2Login" property must be set to false/true in the settings.json file.
The content of settings.json must be constructed as show below to disable web view 2.The "UseWebView2Login" property must be set to false. The option to access Windows Hello services including FIDO 2 will not be available during the sign in process if disabled.
{
    "Version":  2,
    "Url":  {
                "Primary":  "https://dev.bliksundhf.no/clienthub/develop/",
                "Training":  "https://test.bliksundhf.no/clienthub/"
            },
    "Dataset":  "Azure",
    "LockTimer":  15,
    "EncryptDatabase":  true,
    "Locale":  "no",
    "Authentication":  {
                           "OidcClientOptions":  {
                                                     "ClientId":  "4a821d50-11a1-483f-8782-e865ab3033a1",
                                                     "ClientSecret":  null,
                                                     "Authority":  "https://login.microsoftonline.com/73935988-7e75-46c2-8cc6-d2d91985f67b/v2.0",
                                                     "Scope":  "openid profile api://4a821d50-11a1-483f-8782-e865ab3033a1/Client"
                                                 },
                           "UserIdClaimType":  "preferred_username",
                           "NameClaimType":  "name",
                           "OrganizationClaimType":  "extn.OrganizationIdentification",
                           "CurrentOrganizationId":  null,
                           "UseWebView2Login":  false
                       },
    "Logging": {
      "MinimumLevel": "Warning"
    }
}
The content of settings.json must be constructed as shown below to enable web view 2.The "UseWebView2Login" property must be set to true.
{
    "Version":  2,
    "Url":  {
                "Primary":  "https://dev.bliksundhf.no/clienthub/develop/",
                "Training":  "https://test.bliksundhf.no/clienthub/"
            },
    "Dataset":  "Azure",
    "LockTimer":  15,
    "EncryptDatabase":  true,
    "Locale":  "no",
    "Authentication":  {
                           "OidcClientOptions":  {
                                                     "ClientId":  "4a821d50-11a1-483f-8782-e865ab3033a1",
                                                     "ClientSecret":  null,
                                                     "Authority":  "https://login.microsoftonline.com/73935988-7e75-46c2-8cc6-d2d91985f67b/v2.0",
                                                     "Scope":  "openid profile api://4a821d50-11a1-483f-8782-e865ab3033a1/Client"
                                                 },
                           "UserIdClaimType":  "preferred_username",
                           "NameClaimType":  "name",
                           "OrganizationClaimType":  "extn.OrganizationIdentification",
                           "CurrentOrganizationId":  null,
                           "UseWebView2Login":  true
                       },
    "Logging": {
      "MinimumLevel": "Warning"
    }
}
Insight Web
See Insight Web Documentation for documentation and installation guide.
Insight API
See Insight API Documentation for documentation and installation guide.
Appendix
Example Connection String
| Authentication type | ConnectionString |
|---|---|
| SQL user with password | Data Source=database_server;Initial Catalog=database;User ID=username;Password=password;Pooling=False;MultipleActiveResultSets=True;Application Name=EntityFramework |
| Integrated Security | Data Source=database_server;Initial Catalog=database;Integrated Security=True;Pooling=False;MultipleActiveResultSets=True;Application Name=EntityFramework |
Minimum Logging Configuration
The Minimum Logging Configuration in the settings.json file controls which logs are sent to the server based on their severity level.
This setting helps manage the log data's verbosity and performance impact.
"Logging": {
  "MinimumLevel": "Warning"
}
The levels from low to high are Debug, Information, Warning, Error, and Critical respectively.
The default value is Warning in case of no configuration for it or it is set as empty, meaning logs at the Warning, Error, and Critical levels are sent to the server.
Regardless of this setting, all logs are saved locally on the device, ensuring complete logging data is available for troubleshooting.
IIS Machine Key
Machine Key is used by IIS to encrypt and decrypt data and is in use by the OAuth authentication layer in our applications. By default, these keys are generated automatically on every iisreset / application pool restart. This presents a problem with the OAuth layer and if 2+ servers are in use with load balancing.
The keys can be set on either server, site or application level. The important part is that all ClientHub applications running on different servers have the same key, in addition that all instances of Insight is running on different servers have the same key.
To set a manual key follow these steps.
- Open IIS Manager.\
 |
|---|
- Navigate to the server settings page, then Machine Key
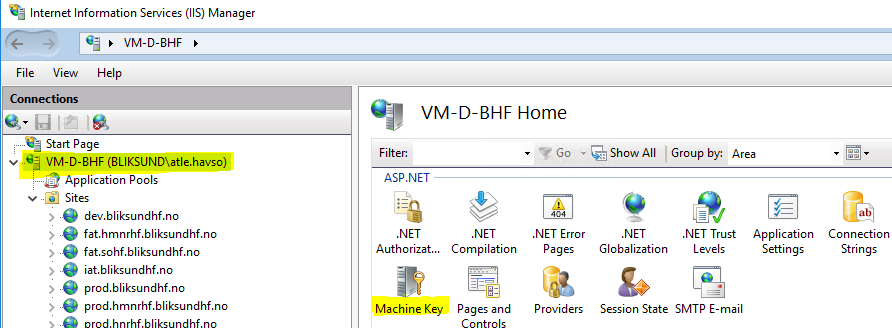 |
|---|
- Turn off Automatically generate at runtime.
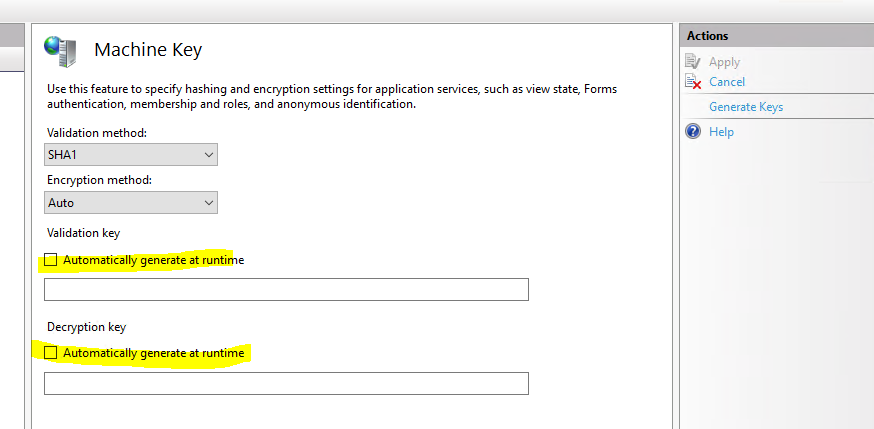 |
|---|
-
If this is the first server in a set that should have the same machine key. Go to A. If not, go to B.
a. Click on Generate Keys.
b. Paste in the keys generated on the first server.
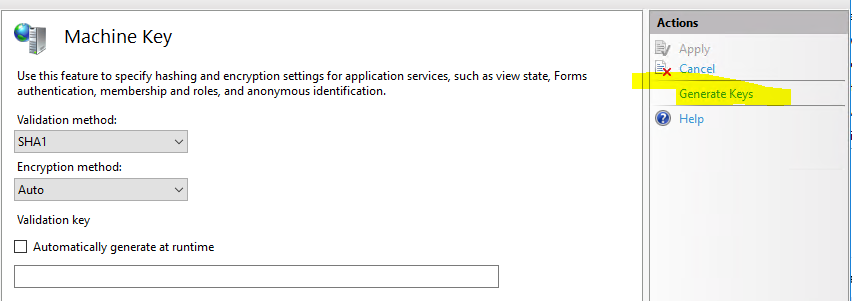 |
|---|
- Save
Known Problems
Access denied issue when opening journal to print in insight
 |
|---|
This error message is probably due to insufficient rights for the OpenHtmlToPrint folder needed to open the journal.
The folder should have been created automatically during installation and is located here
 |
|---|
If it is not created, then it needs to be created.
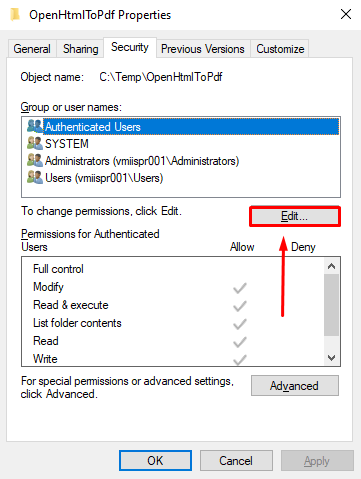
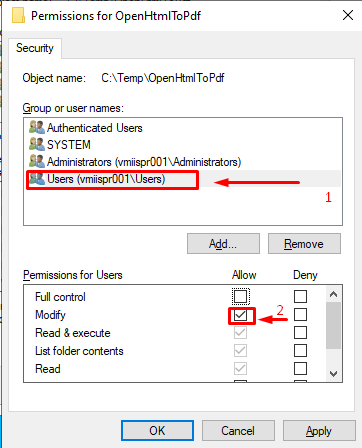
Right-click the folder, click on Properties, click on Security, click on Edit, select correct user and check the Allow box for Modify, click Apply and OK.
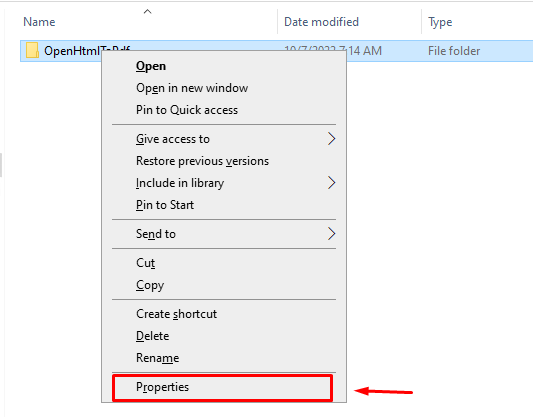 |
|---|
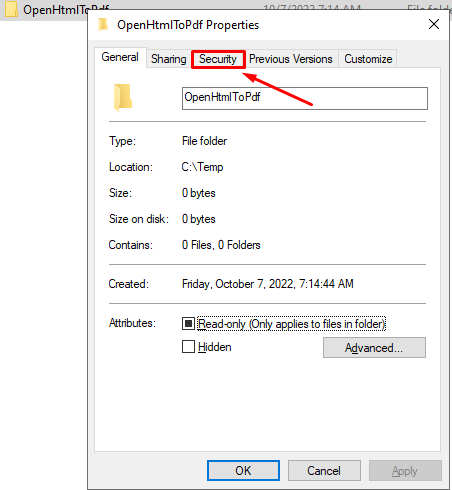 |
|---|
 |
|---|
 |
|---|
Attempting to run msi files on the server makes explorer/cmd freeze and eventually a SmartScreen error message appears
This issue is because the msi installation file is blocked by the Windows Defender SmartScreen.
Right-click the msi file, click on Properties, and check the box called "Unblock" at the bottom of the properties dialog, then click OK.
Work around for the login issue while using EWA Client
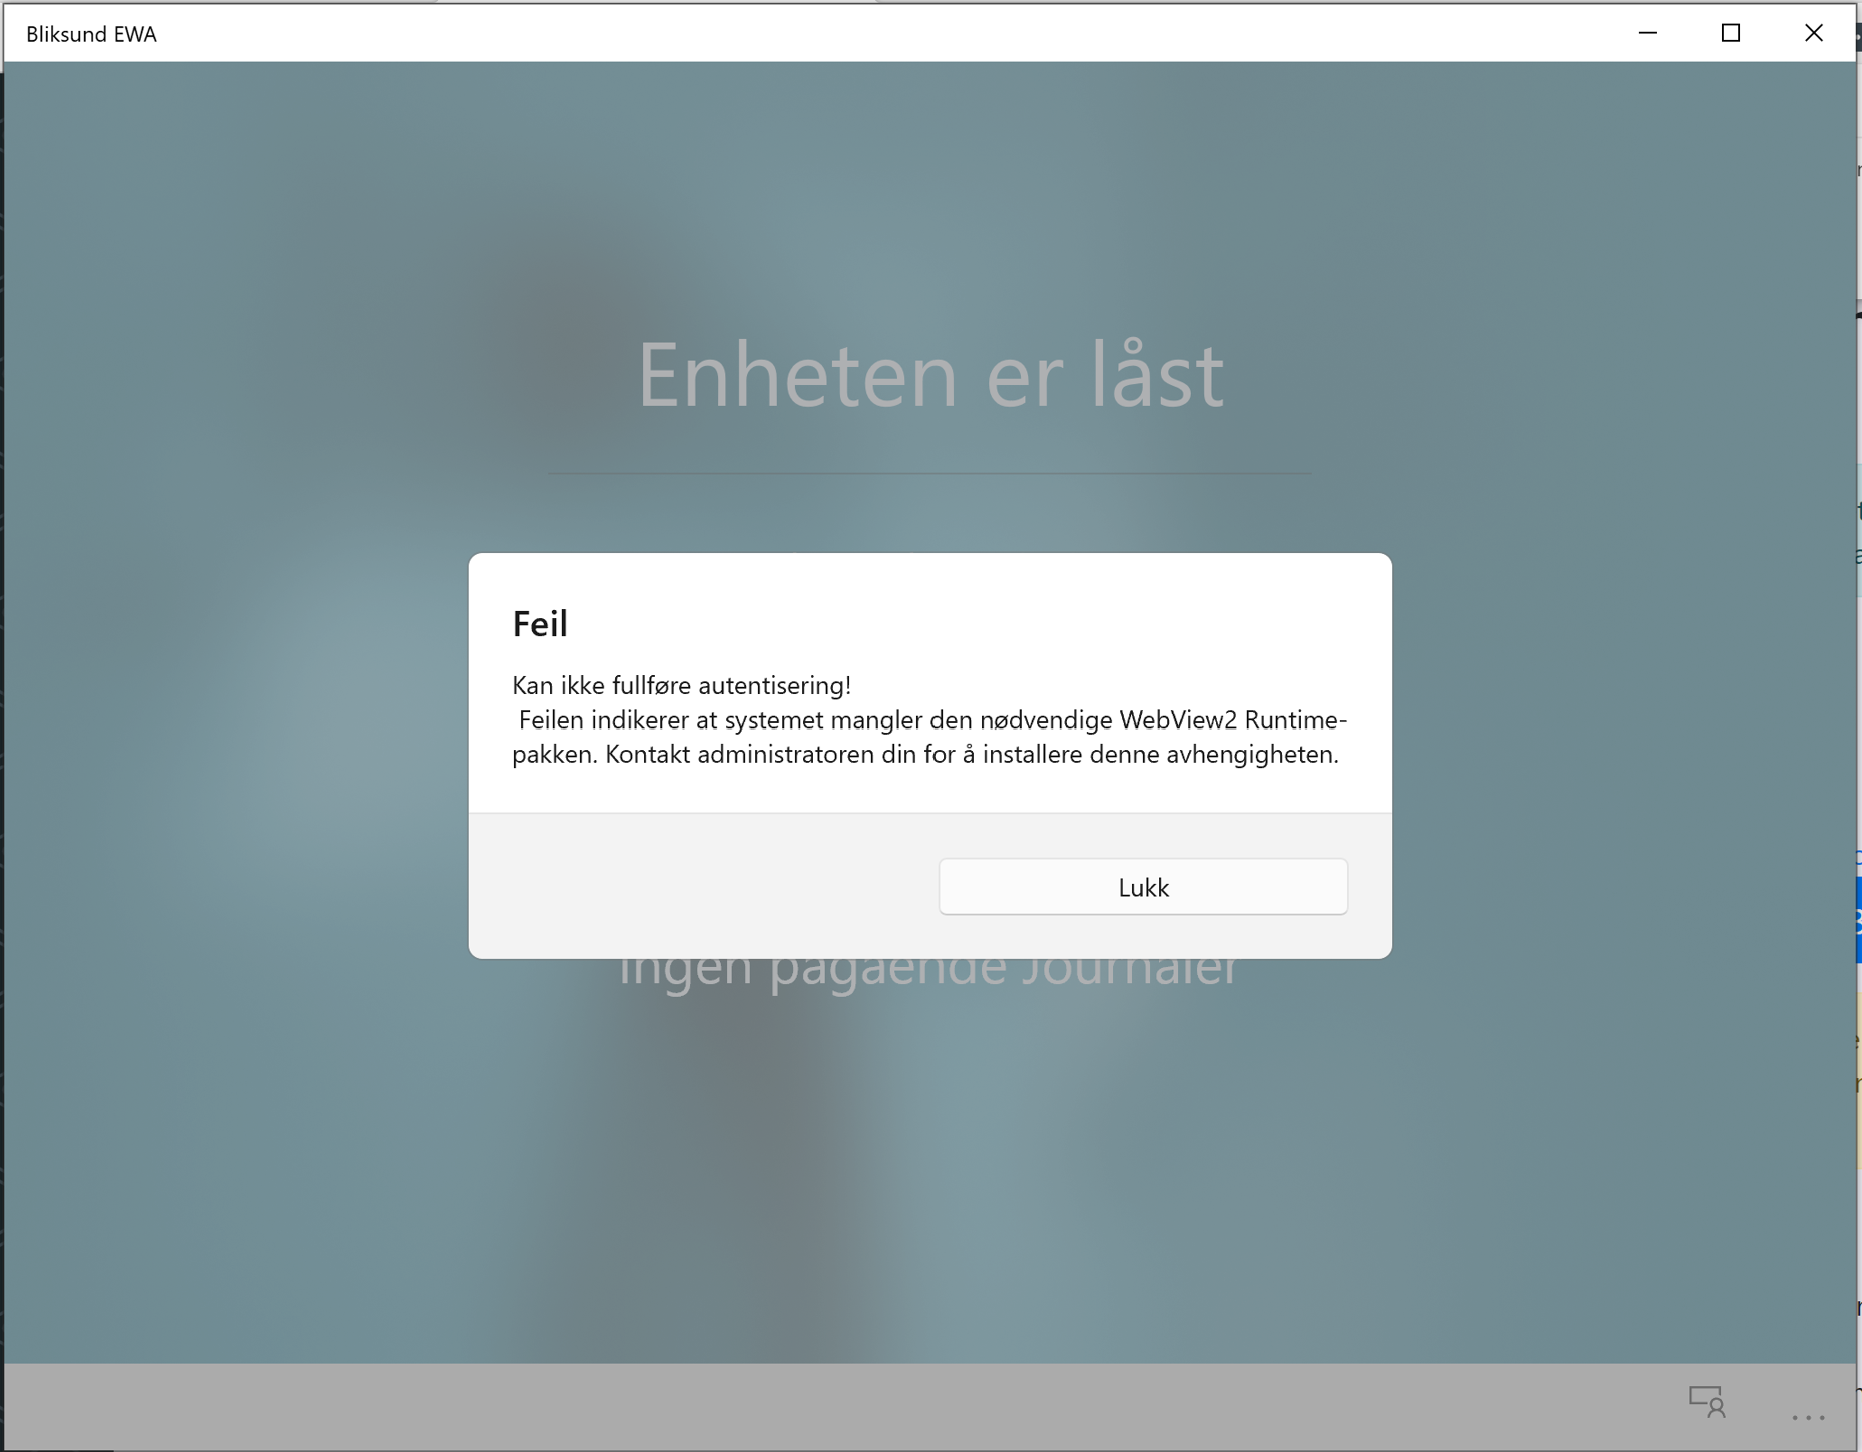
1.If you get the below error while trying to login to EWA Client, it is because of missing Web View 2 Runtime.
 |
|---|
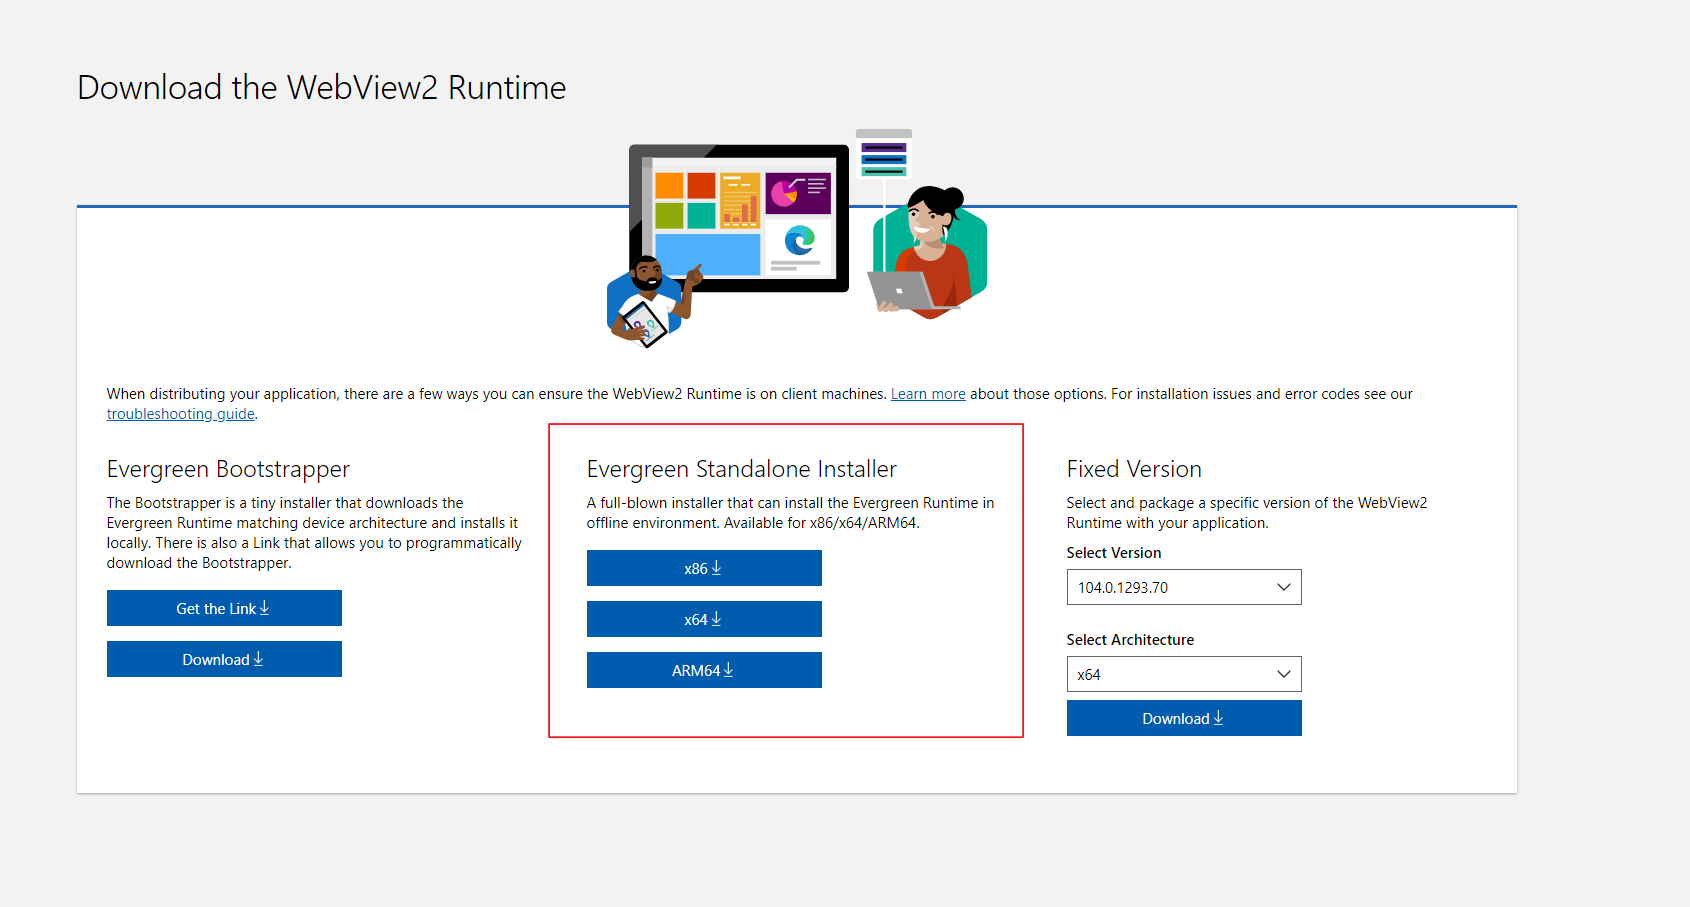
2.To fix it download the suitable WebView2 Runtime for your machine from the below link provided
https://developer.microsoft.com/en-us/microsoft-edge/webview2/#download-section
 |
|---|
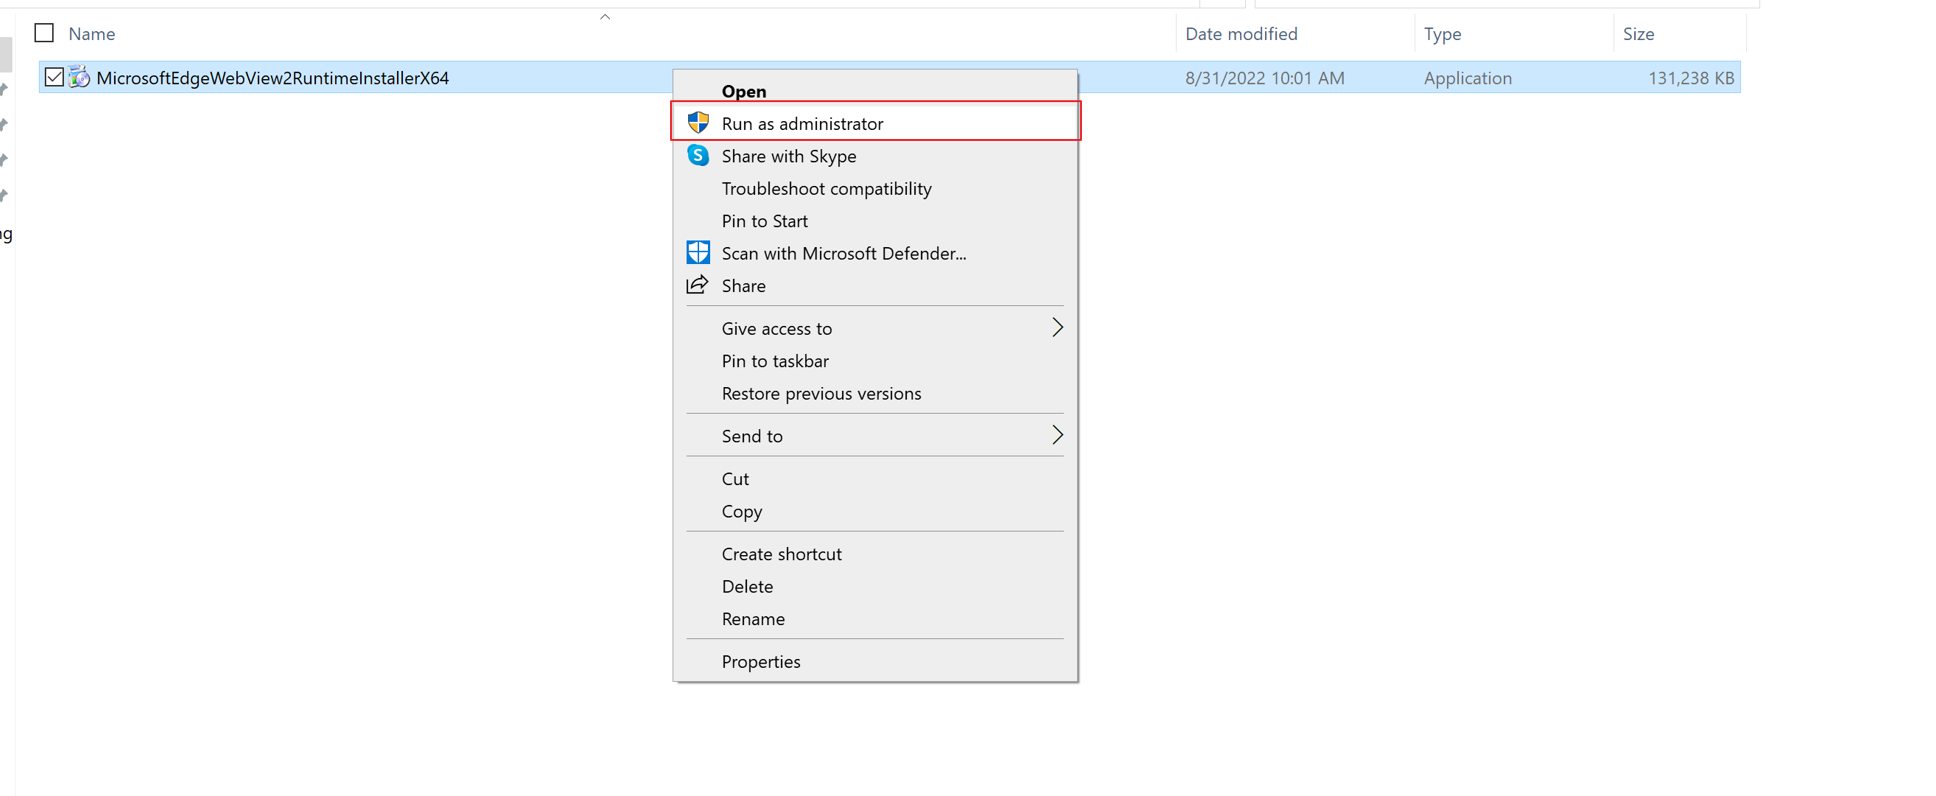
3.Install WebView2 Runtime by right clicking and selecting ‘Run as administrator’
 |
|---|
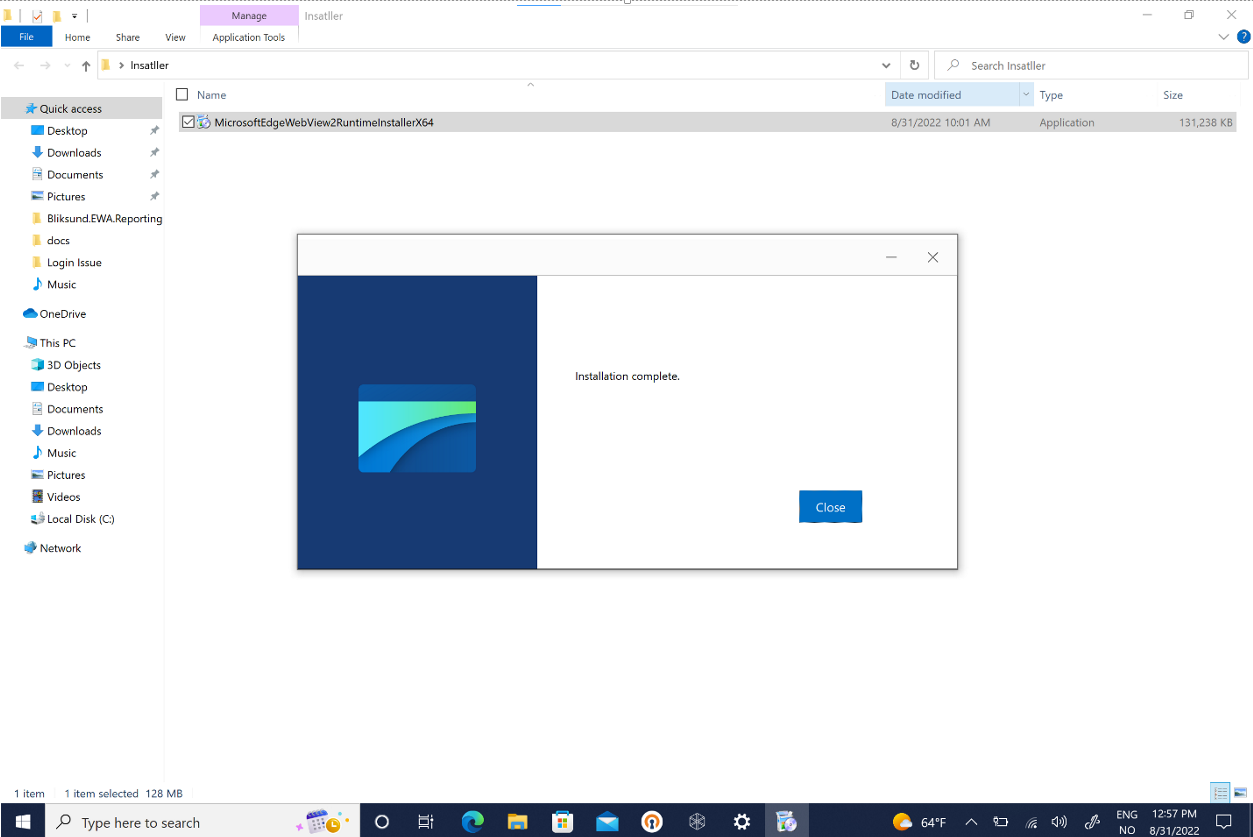
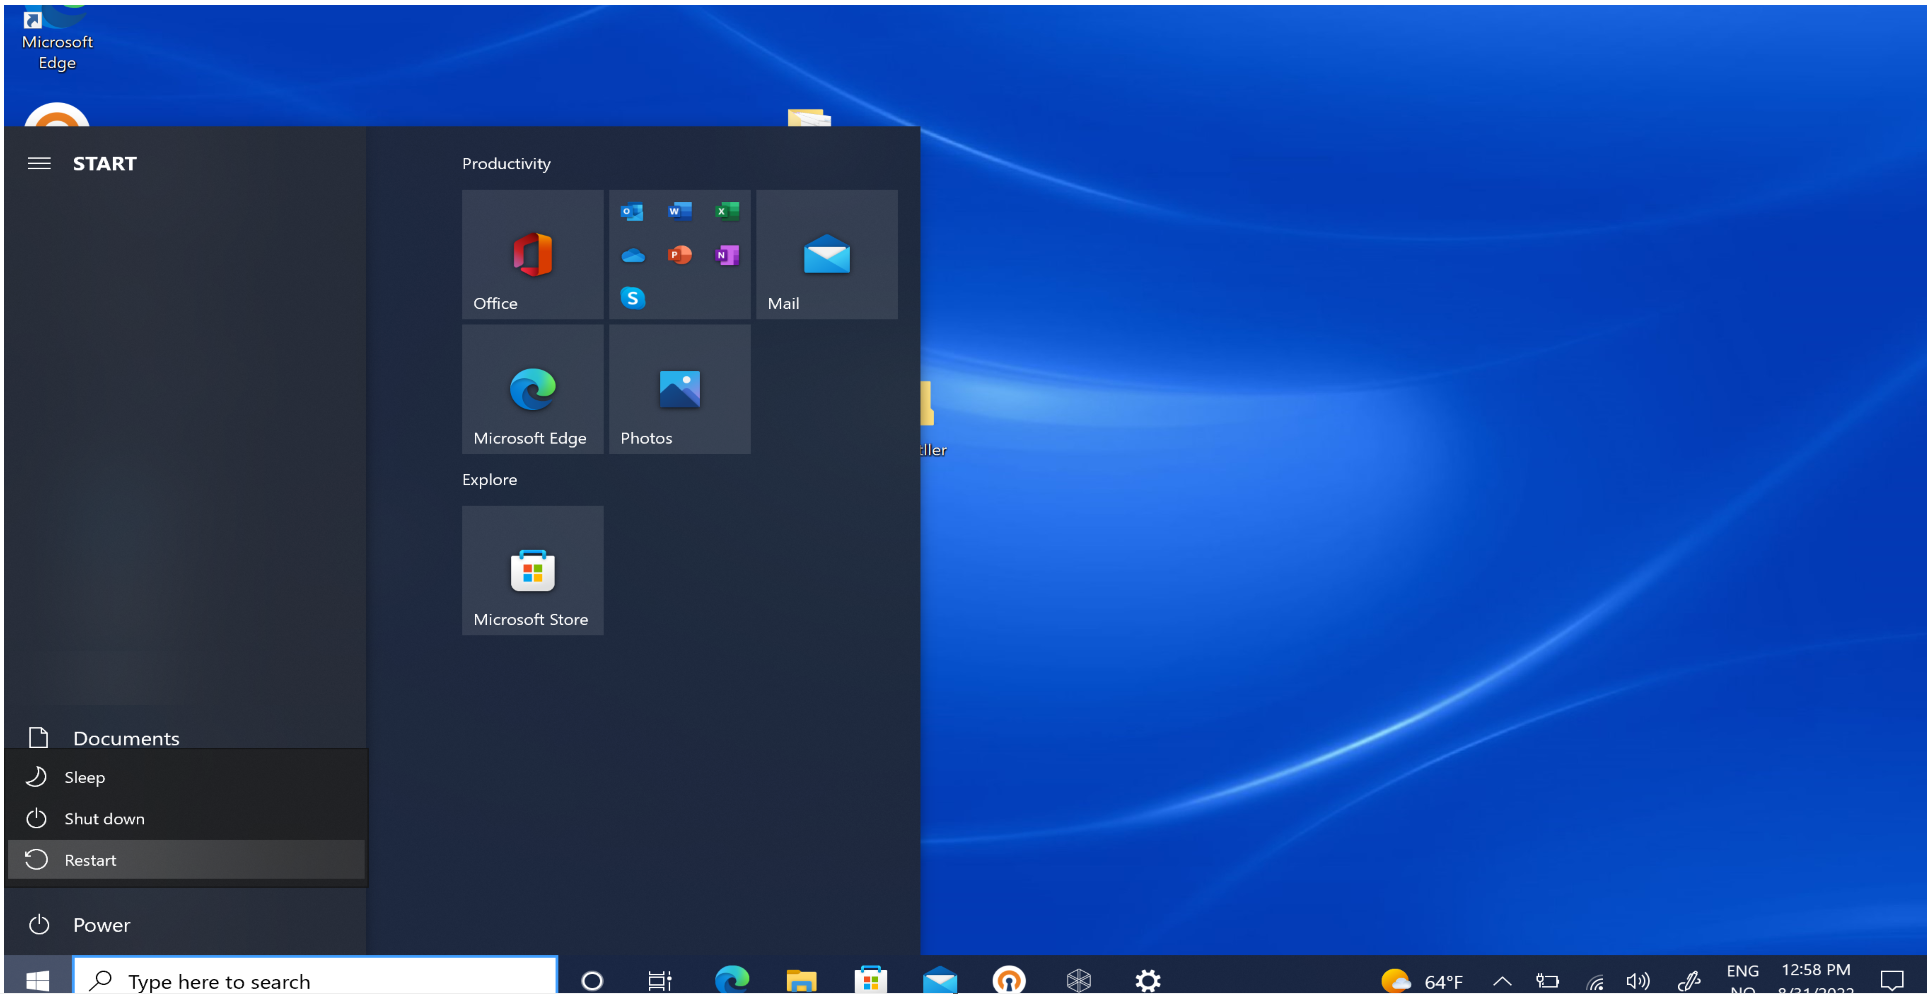
4.Once the installation is complete. Restart your PC
 |
|---|
 |
|---|
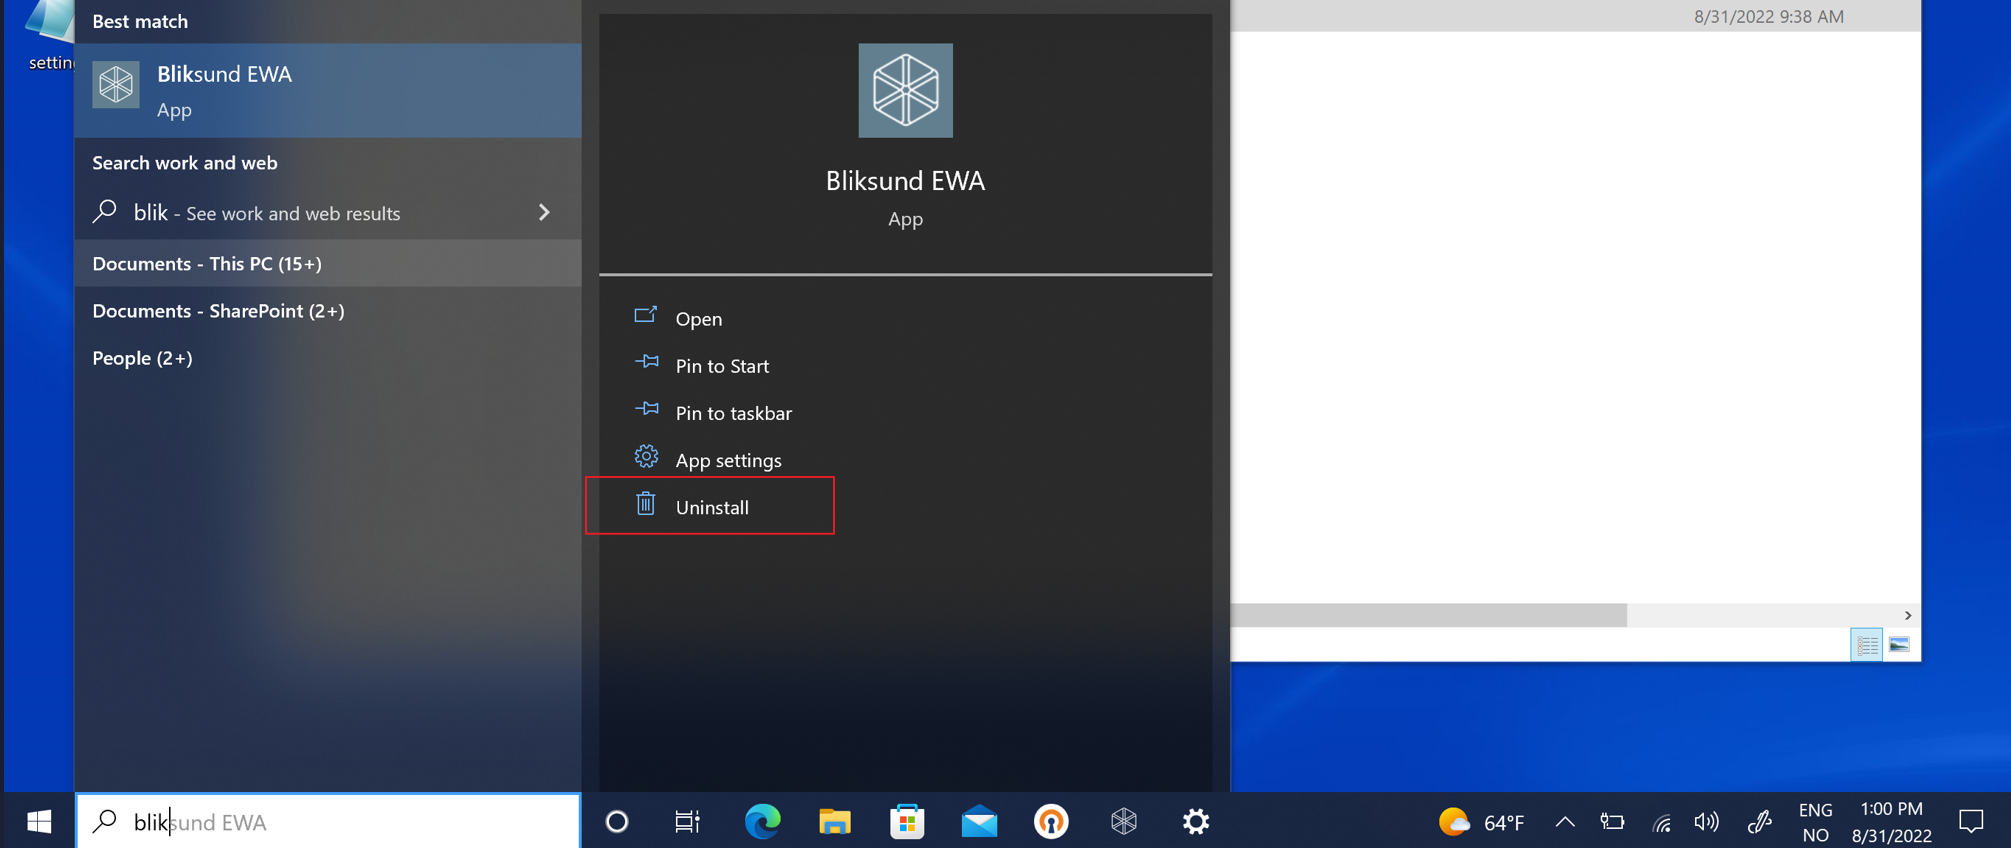
5.Uninstall EWA client
 |
|---|
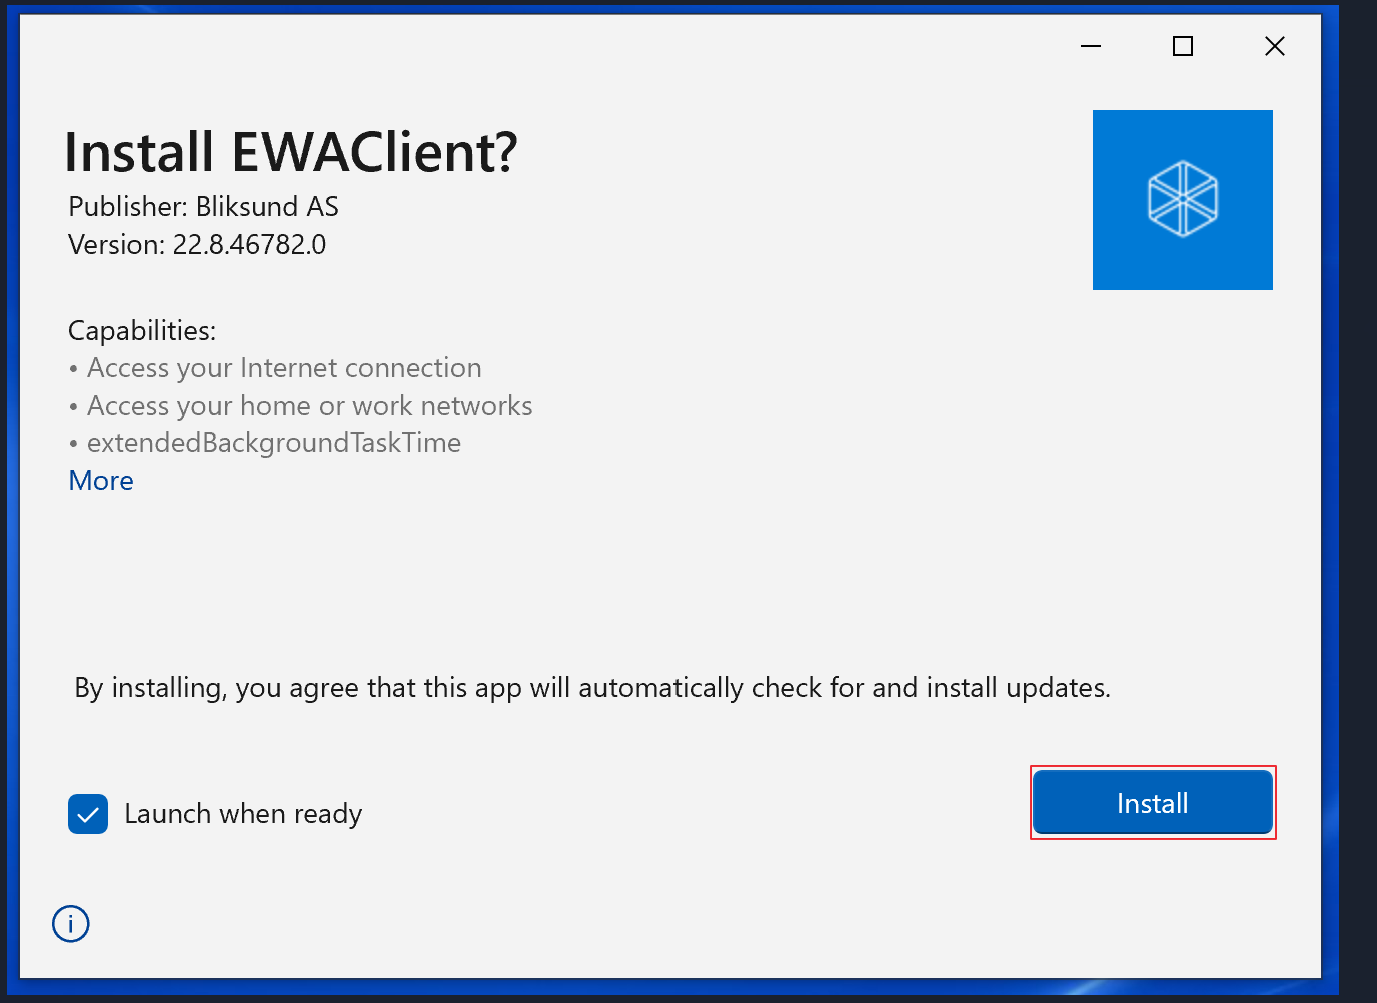
6.Install EWA Client
 |
|---|
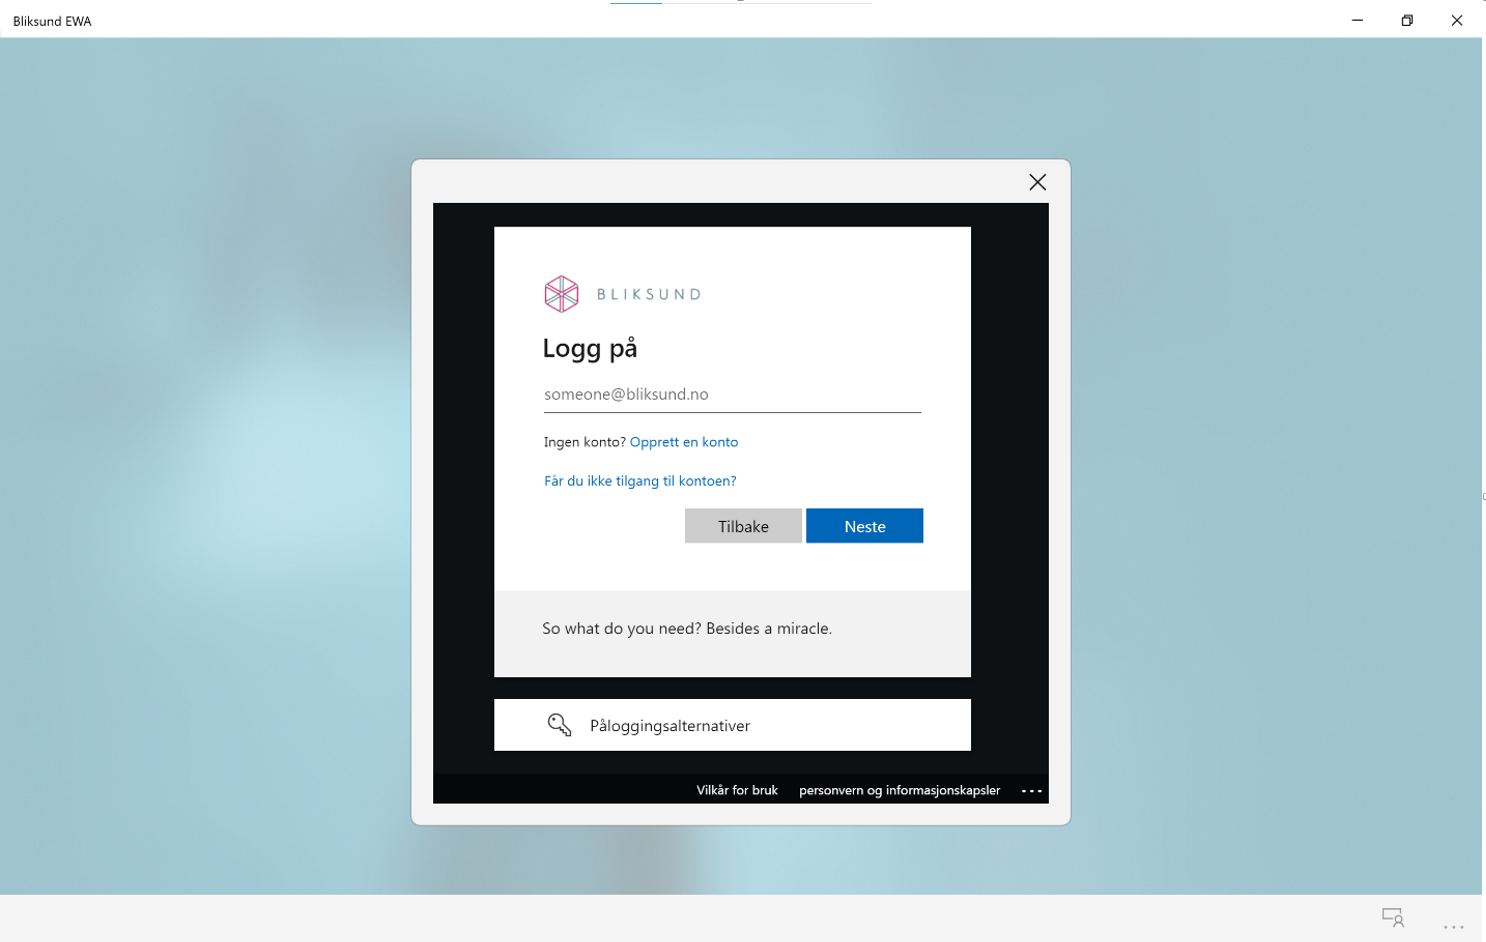
7.Launch the application and login
 |
|---|
WebDAV
WebDAV is not installed in a default installation of IIS but sometimes it is added in the default image or installation used at a customer location. This introduces problems with our system as it takes control of the HTTP verbs PUT, DELETE etc.
To remedy this, you must disable the module on the Site or Application in the Handler Mappings component.
 |
|---|
| Figure 9 - Where to find the option to disable WebDAV |
Not able to access database with a SQL User
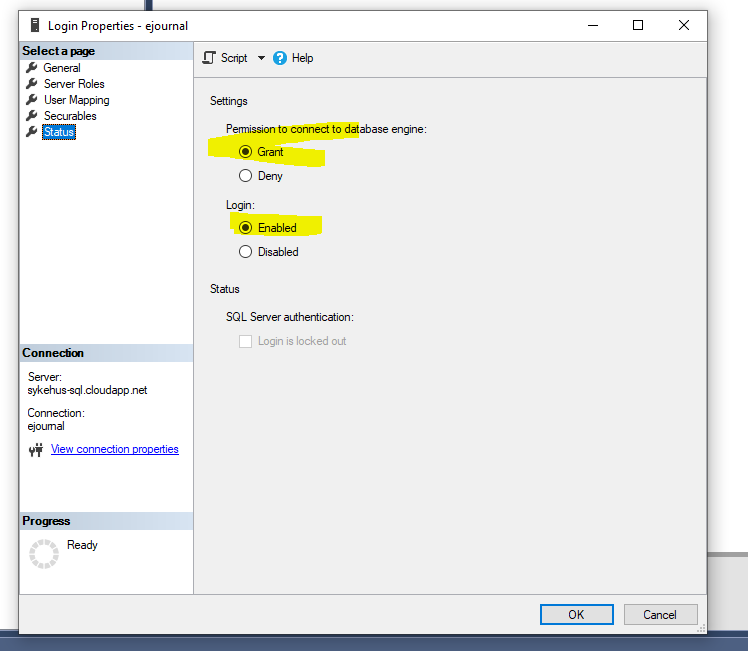
Make sure that the user is allowed to log on.
 |
|---|
Checking that it is set up correctly
- Insight
Try accessing the webpage and log on. If this works, it should be set up
correctly.
It's also possible to go to https://url_to_your_insight/ping to check if Insight responds to requests.
- ClientHub
Go to https://url_to_your_clienthub/ping to check if ClientHub responds to requests and has access to the database.
Unable to access live view (sanntidsskjerm)
Make sure the connection string used by the Insight component contains
"MultipleActiveResultSets=True".
If this part of the connection string is missing or set to "False" the
live views will not display any data, and an error is logged to the
database whenever anyone tries to access a live view.
The exception error text that is logged for this specific problem is
"System.Data.Entity.Core.EntityCommandExecutionException: An error
occurred while executing the command definition. See the inner exception
for details. ---> System.InvalidOperationException: There is already
an open DataReader associated with this Command which must be closed
first."
Application insights connection string exception
If we get a error The 'Application Insights Connection String' argument cannot be null or empty while installing or upgrading the below listed artifacts
- EWA Insight
- Client API
- Integration
- Export
- BliksundEWADataWarehouseExport
- HPLinkIntegration
- UWP Client Application
Please remove the below line in the SetParameters.xml file and restart the server.
<setParameter name="Application Insights Connection String" value="" />
HTTPS certificate binding getting deleted after installing clienthub
The HTTPS certificate binding is getting deleted after installing ClientHub. The problem can be fixed by adding site bindings in the IIS manager. Please follow the below steps to fix the issue.
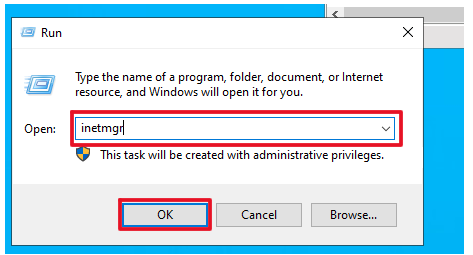
- Start IIS Manager by opening the Run command , then type 'inetmgr' and click 'OK'
 |
|---|
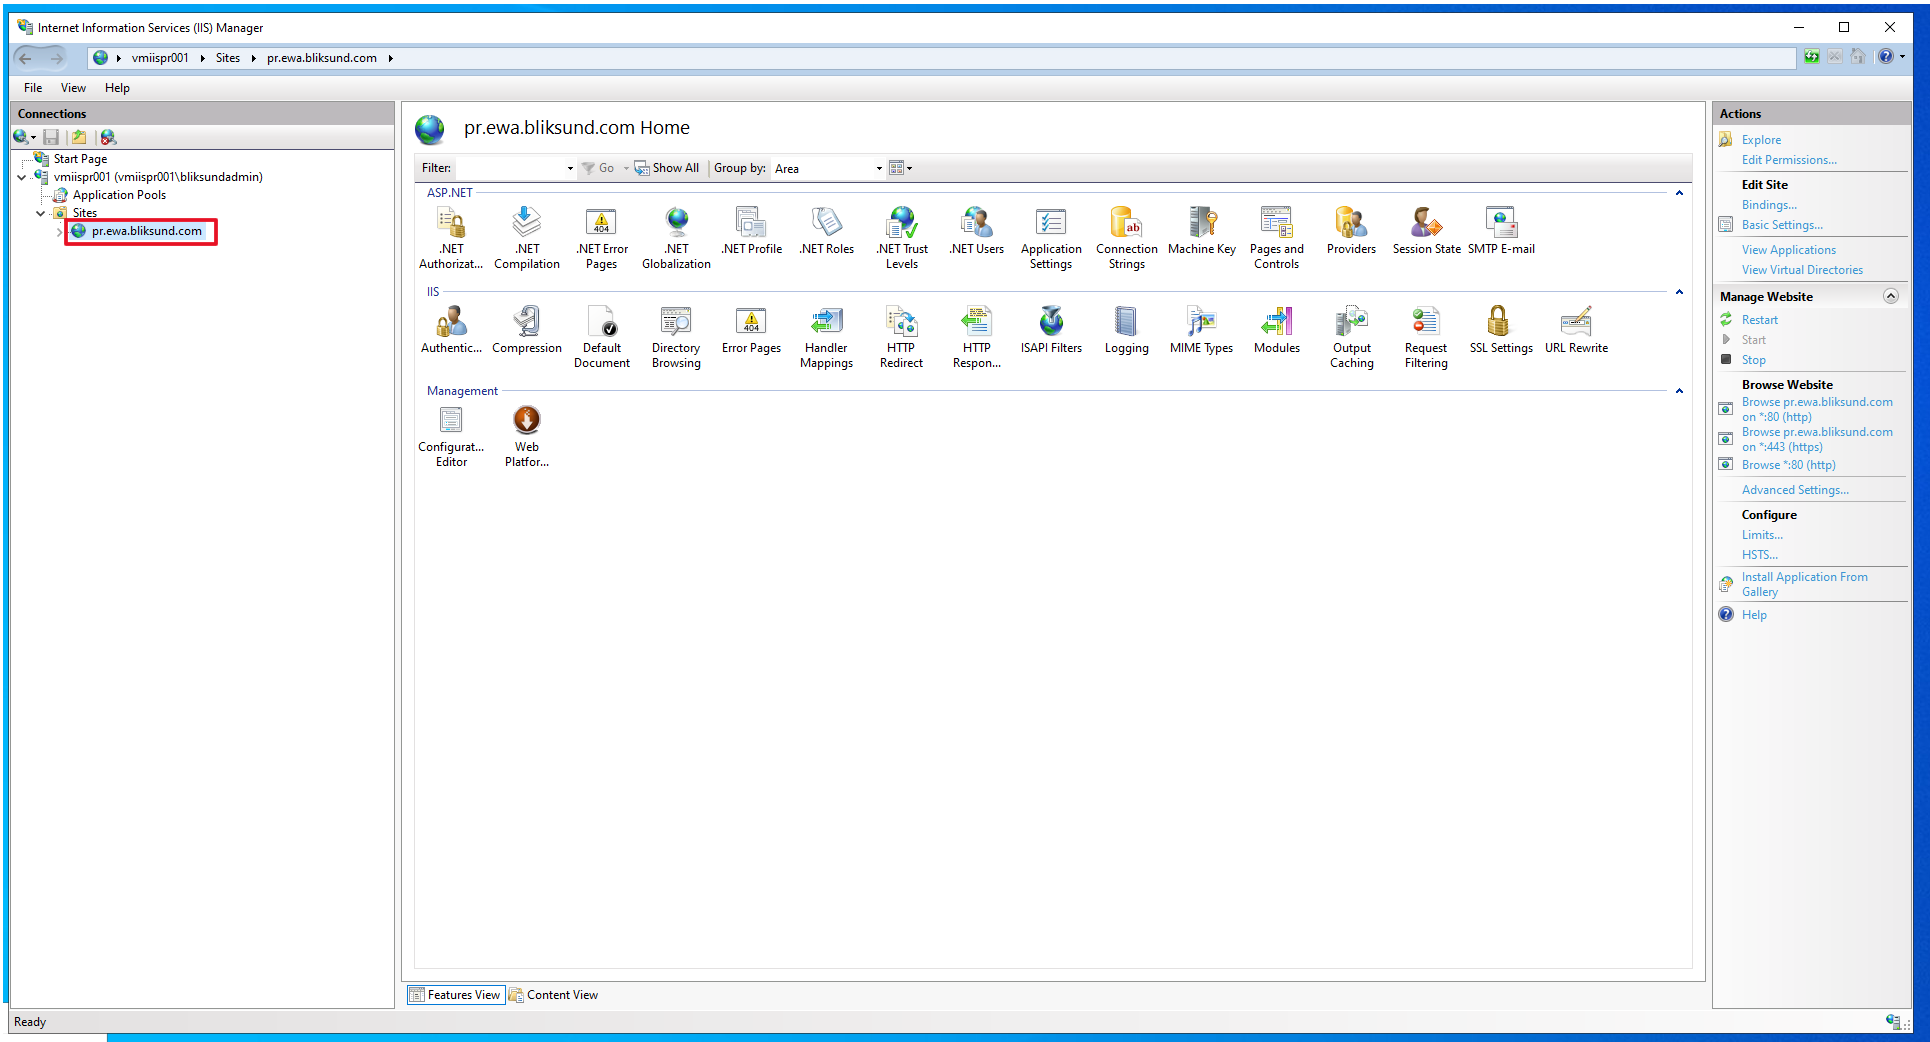
- Select the website by accessing it in the connections pane on the left hand side,navigate to the server and site you wish to bind the certificate to.
 |
|---|
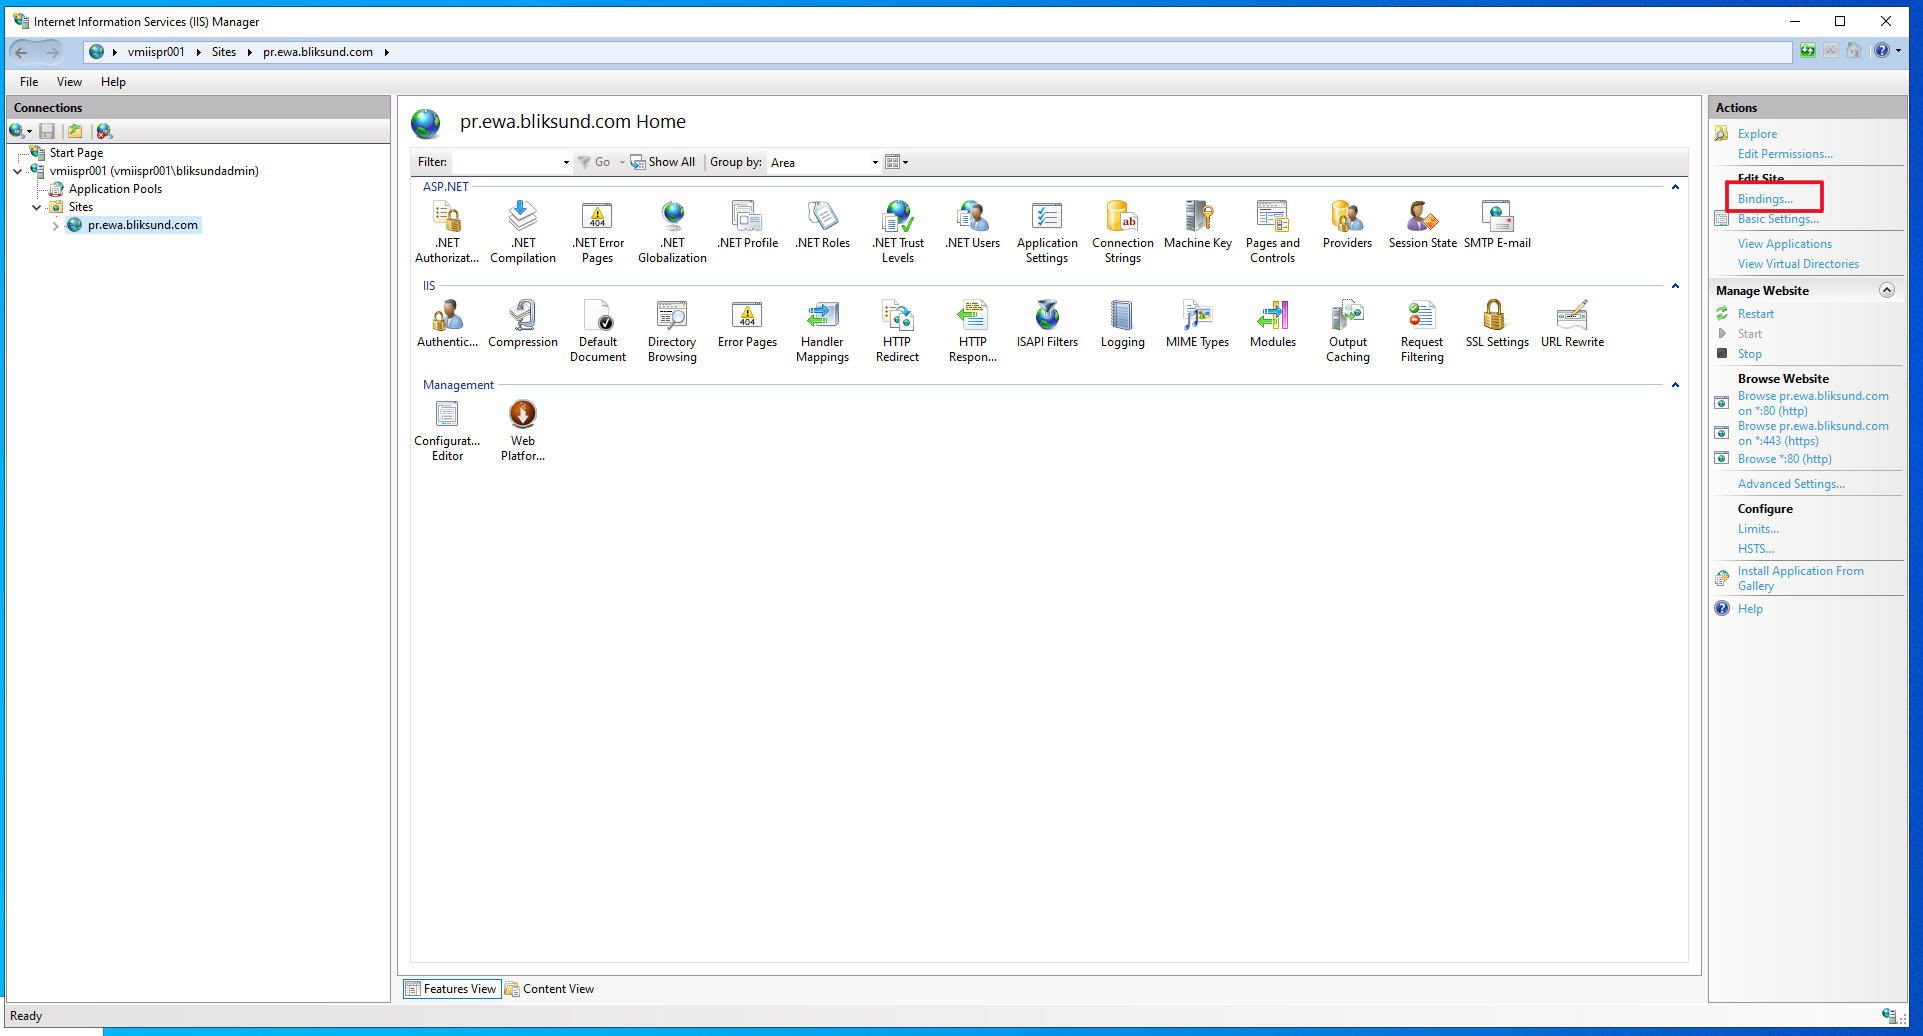
- In the actions pane on the right,click Bindings...
 |
|---|
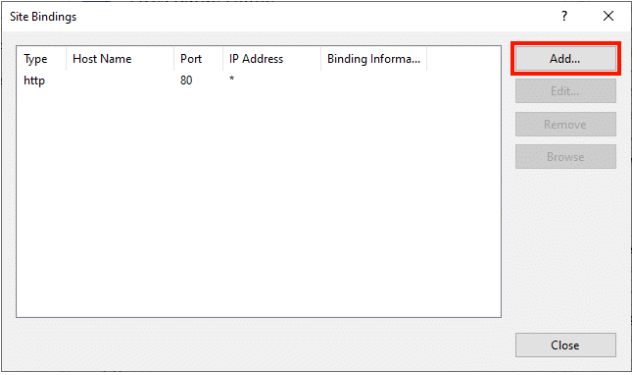
- Click on the 'Add' button.
 |
|---|
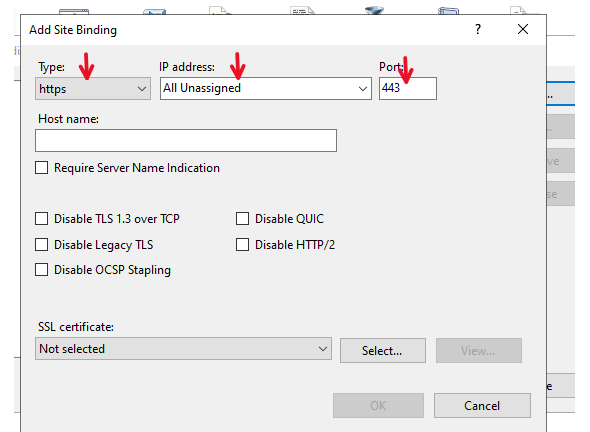
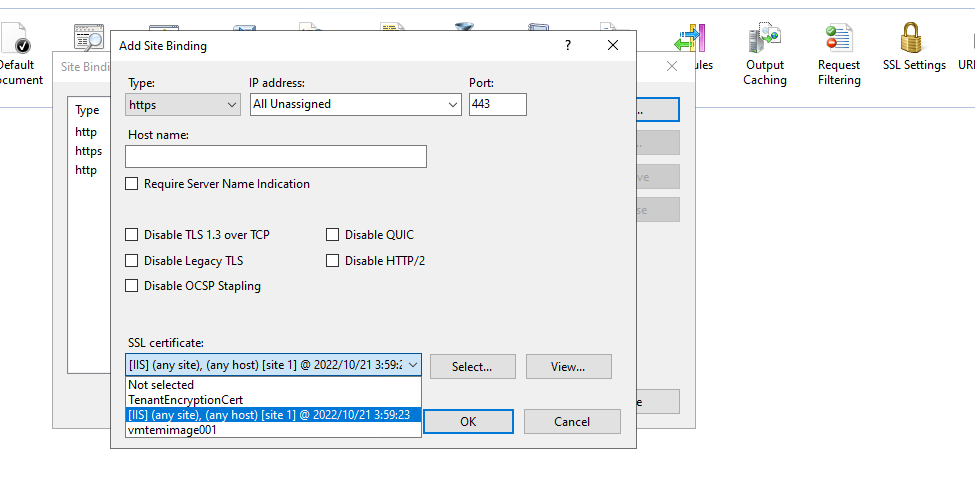
- Select 'https' in the Type, for IP address select 'All Unassigned' or the site's IP address, for port enter '443' in the site binding window.
 |
|---|
- Select the desired certificate from the SSL Certificate drop down menu.
 |
|---|
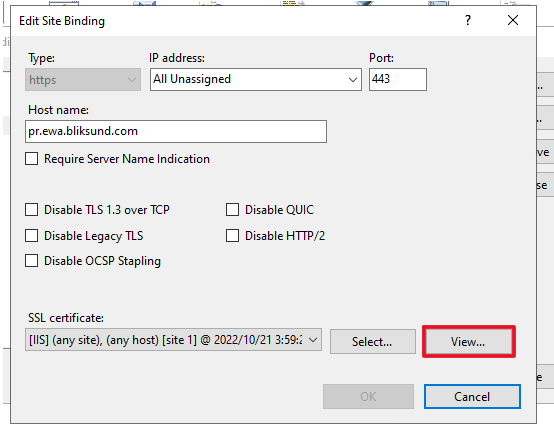
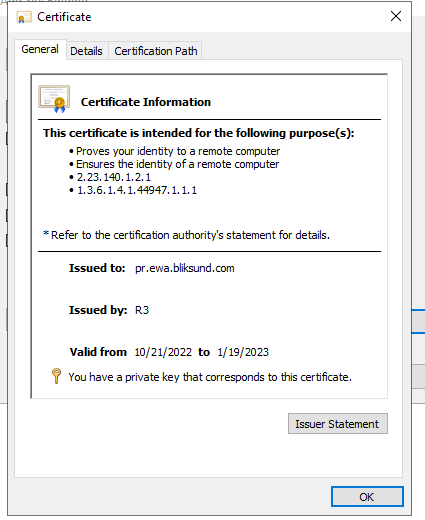
- View the certificate.
 |
|---|
 |
|---|
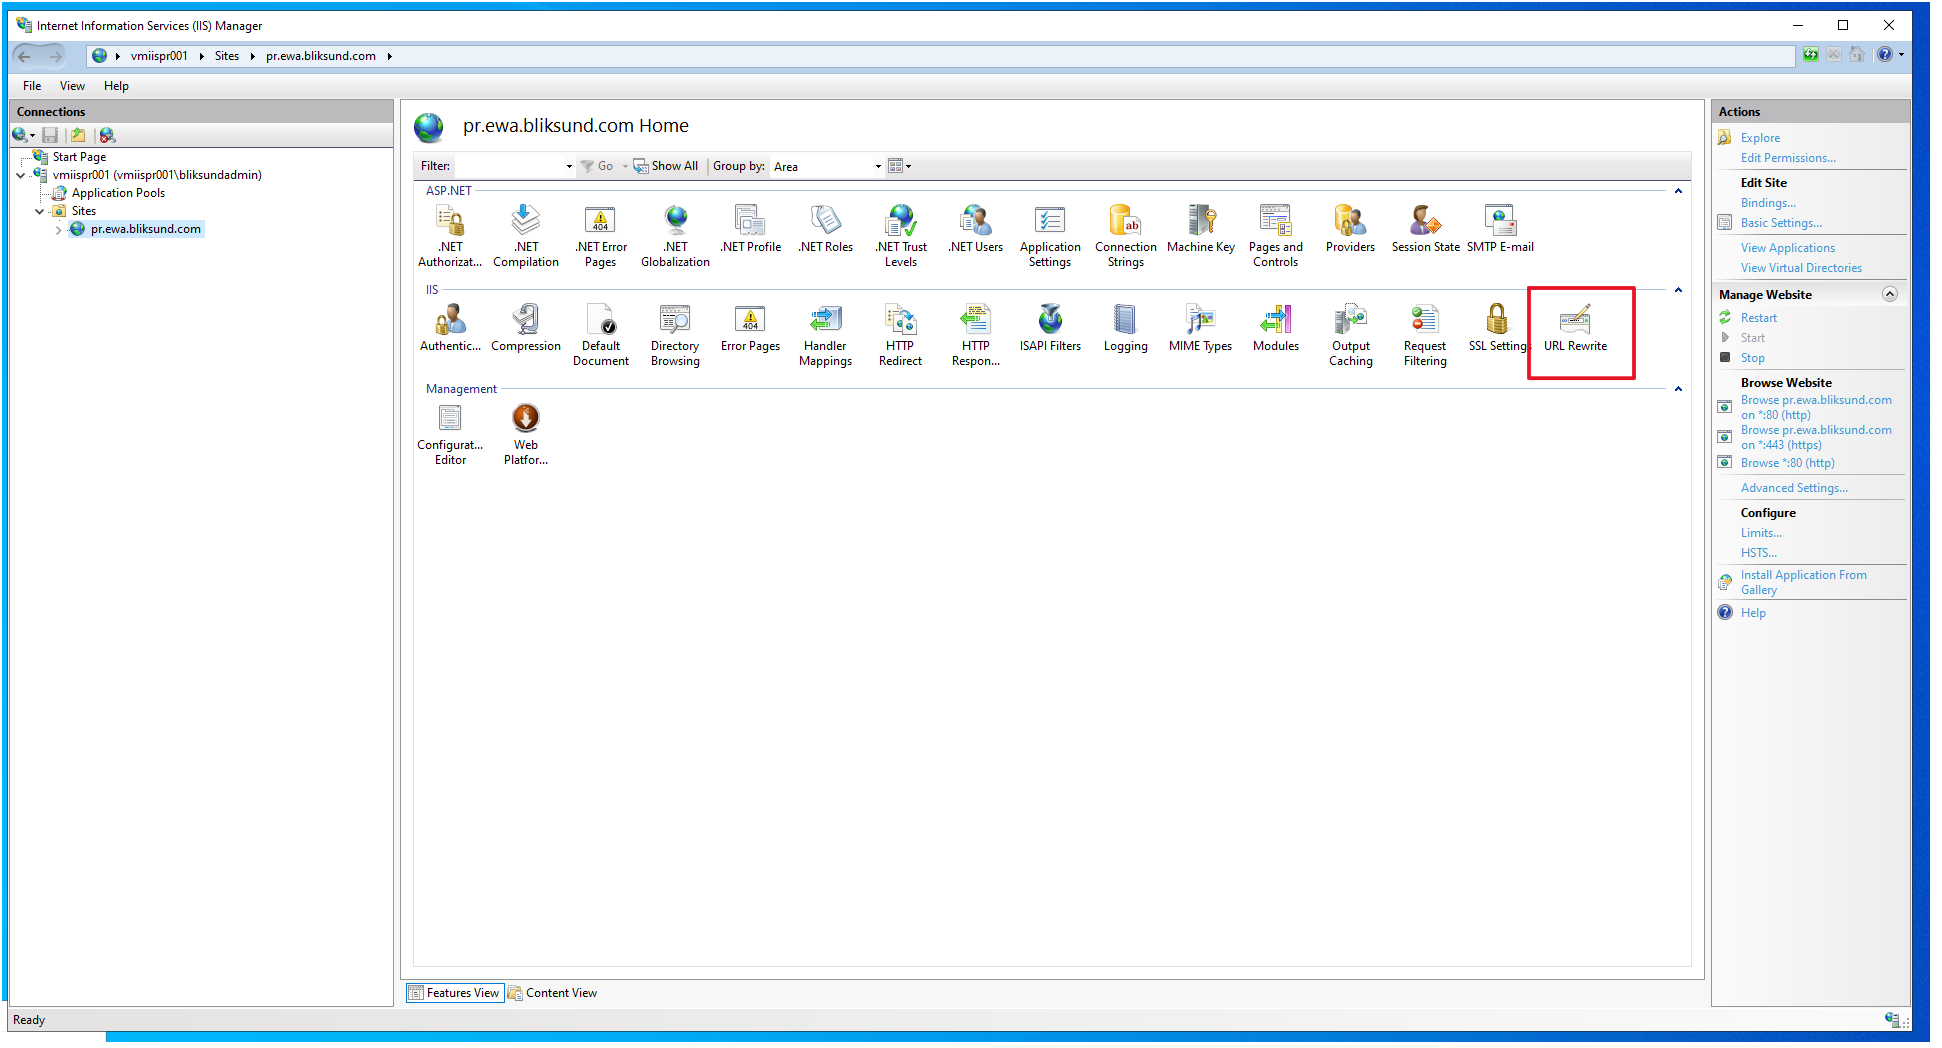
- Click on 'URL Rewrite' for redirecting incoming traffic to https.
 |
|---|
Barcode scanner on https://www.felleskatalogen.no/medisin
When using older webview browser versions it appears to be an issue with the barcode scanner on felleskatalogen.no/medisin that causes the client app to freeze upon opening. This problem requires a restart of the app to fix. When using newer versions like Webview2 it works as intended.
 |
|---|