Forms Configuration
Prerequisite
We will use the new Form Module to store questions and responses for both form configuration and form responses (performed forms).
Before you can use the new forms feature in EWA, ensure that the Form Module API is installed and running.
Additionally, other modules need to be configured correctly to ensure the proper functioning of the new forms feature.
Here are the modules that require configuration:
-
Form Module: Refer the Form Module API Installation for instructions.
-
ClientHub: To match the values in the Form Module API configuration, add
FormModuleAPIPathandFormModuleApiKeytoBliksund.EWA.ClientHub.SetParameters.xmlfile. For guidance, please follow the ClientHub Installation. -
Insight: In the Web. config, add values for
FormModuleEndpointandFormModuleApiKeykeys to match with the same values in the Form Module API configuration. Please refer to the Form Module installation guide. -
ExportService: If you have manually installed the export service on your server, add values for
FormModuleApiAddressandFormModuleApiKeytoappsettings.xmlfile. This file is already extracted to the installation folder atC:\Program Files\BliksundEWAExport. Ensure that these values match with those in the Form Module API configuration. -
WebView2: Forms module has a dependency on WebView2. All Windows 11, the WebView2 Runtime is included as part of the operating system. Windows 10, however, doesn’t have WebView2 Runtime pre-installed in all the versions. If your Windows 10 machine doesn’t have WebView2 Runtime pre-installed in it, Download the suitable WebView2 Runtime for your machine from the below link provided.
https://developer.microsoft.com/en-us/microsoft-edge/webview2/#download-section
It is recommended to disable the old 'Checklists' feature before enabling the new 'Forms' feature.
Access Right Configuration
The new version of the forms uses the same access rights as the old checklist version.
To access the new checklist feature the access right should be written to the database via JSON file with the help of a migration.
| Access Right | Requires federated login configuration? | Description |
|---|---|---|
| ChecklistAdministration | No | Can access the old checklist and the new form configuration page to manage forms. Can delete completed form responses from records in Insight. |
It is also required for the user to have an 'Admin' access right and 'Dataset'access right along with the 'ChecklistAdministration' access right to create or manage forms on the form configuration page. (To assign a form to a resource or set a location and dataset triggers)
| Access Right | Requires federated login configuration? | Description |
|---|---|---|
| Admin | No | Can administrate health trusts, stations, resources and locations in Insight. |
| Dataset | No | Can administrate datasets in Insight. |
For release version 23 to print completed forms from the journal details page, the user needs any one of the listed journal print access permissions based on their access level.
| Access Right | Requires federated login configuration? | Description |
|---|---|---|
| AllJournalPrint | No | Can print completed checklist of journals in all organizations and departments in Insight. |
| OrganizationJournalPrint | Yes | Can print completed checklist of journals that belong to that Organization in Insight. |
| DepartmentJournalPrint | Yes | Can print completed checklist version of journals that belong to that Department in Insight. |
New checklist feature flag
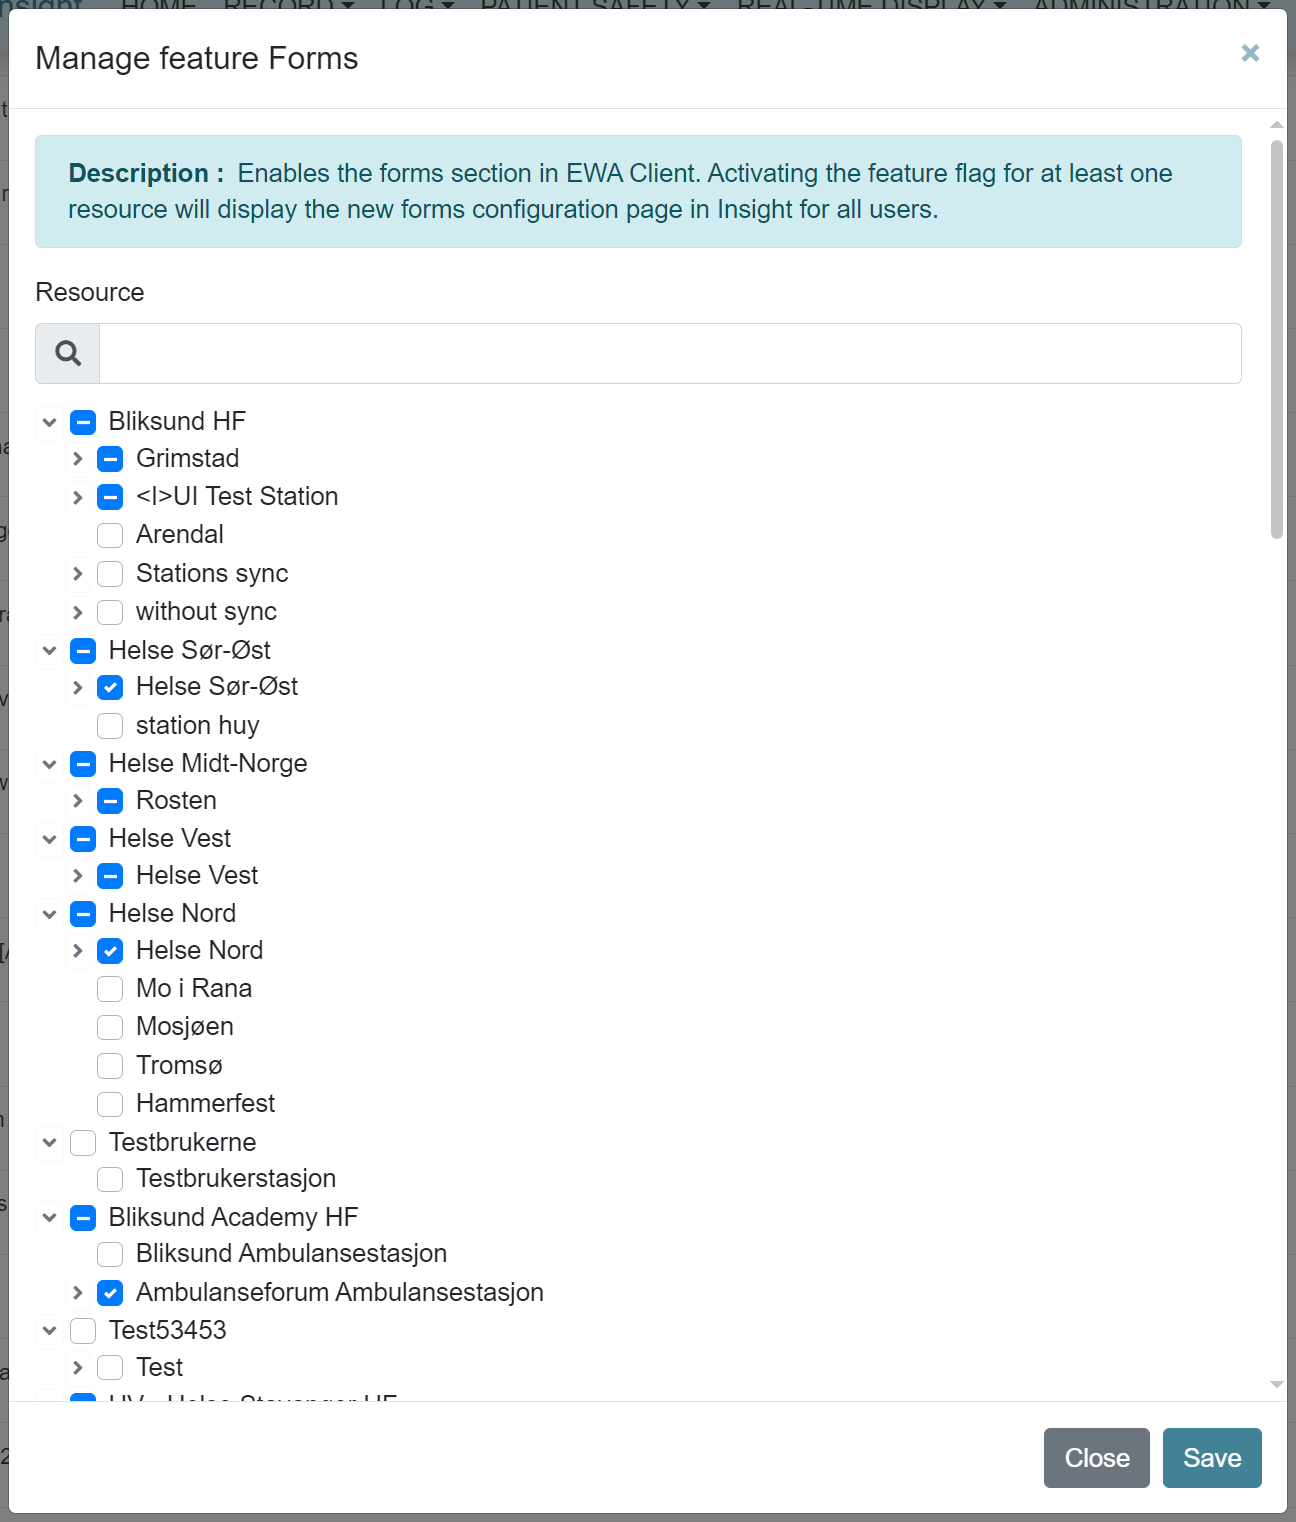
To view the new form configuration page in Insight the feature flag for forms needed to be enabled for at least one resource in Insight. To view the new forms feature enabled for the client, enable the feature for all the resources required.
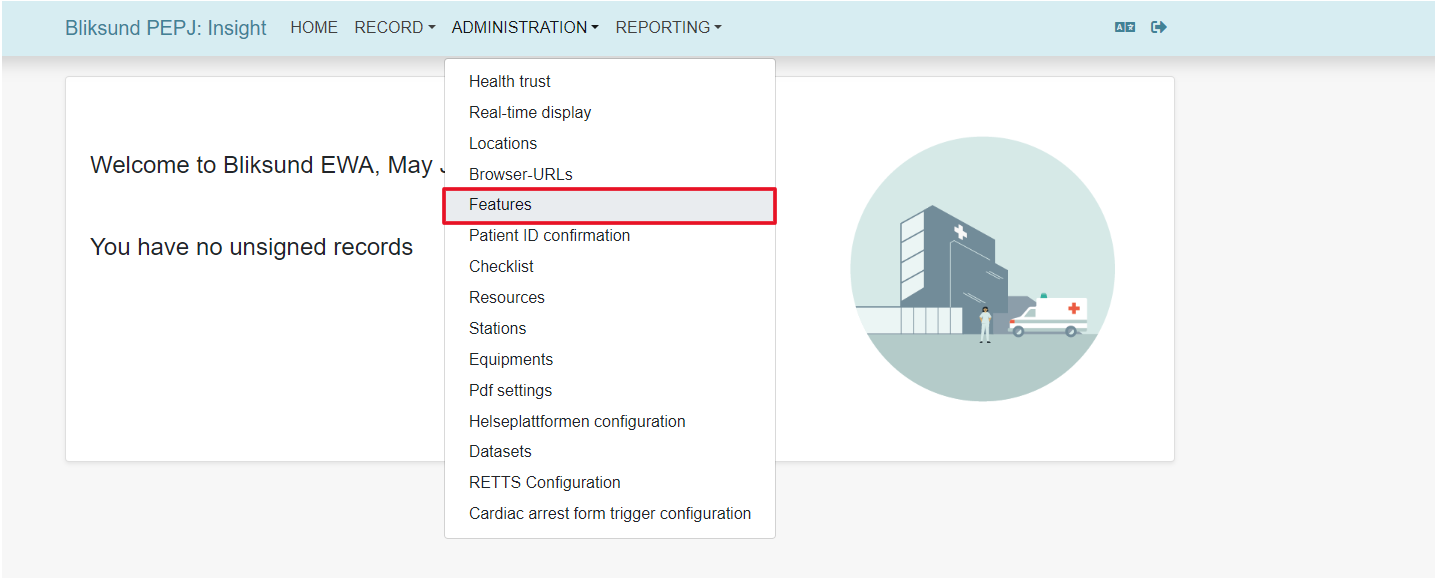
To do this, navigate to the features page by selecting Administration > Features in the main menu and enable the feature flag 'Forms' for all the resources required.
Create form
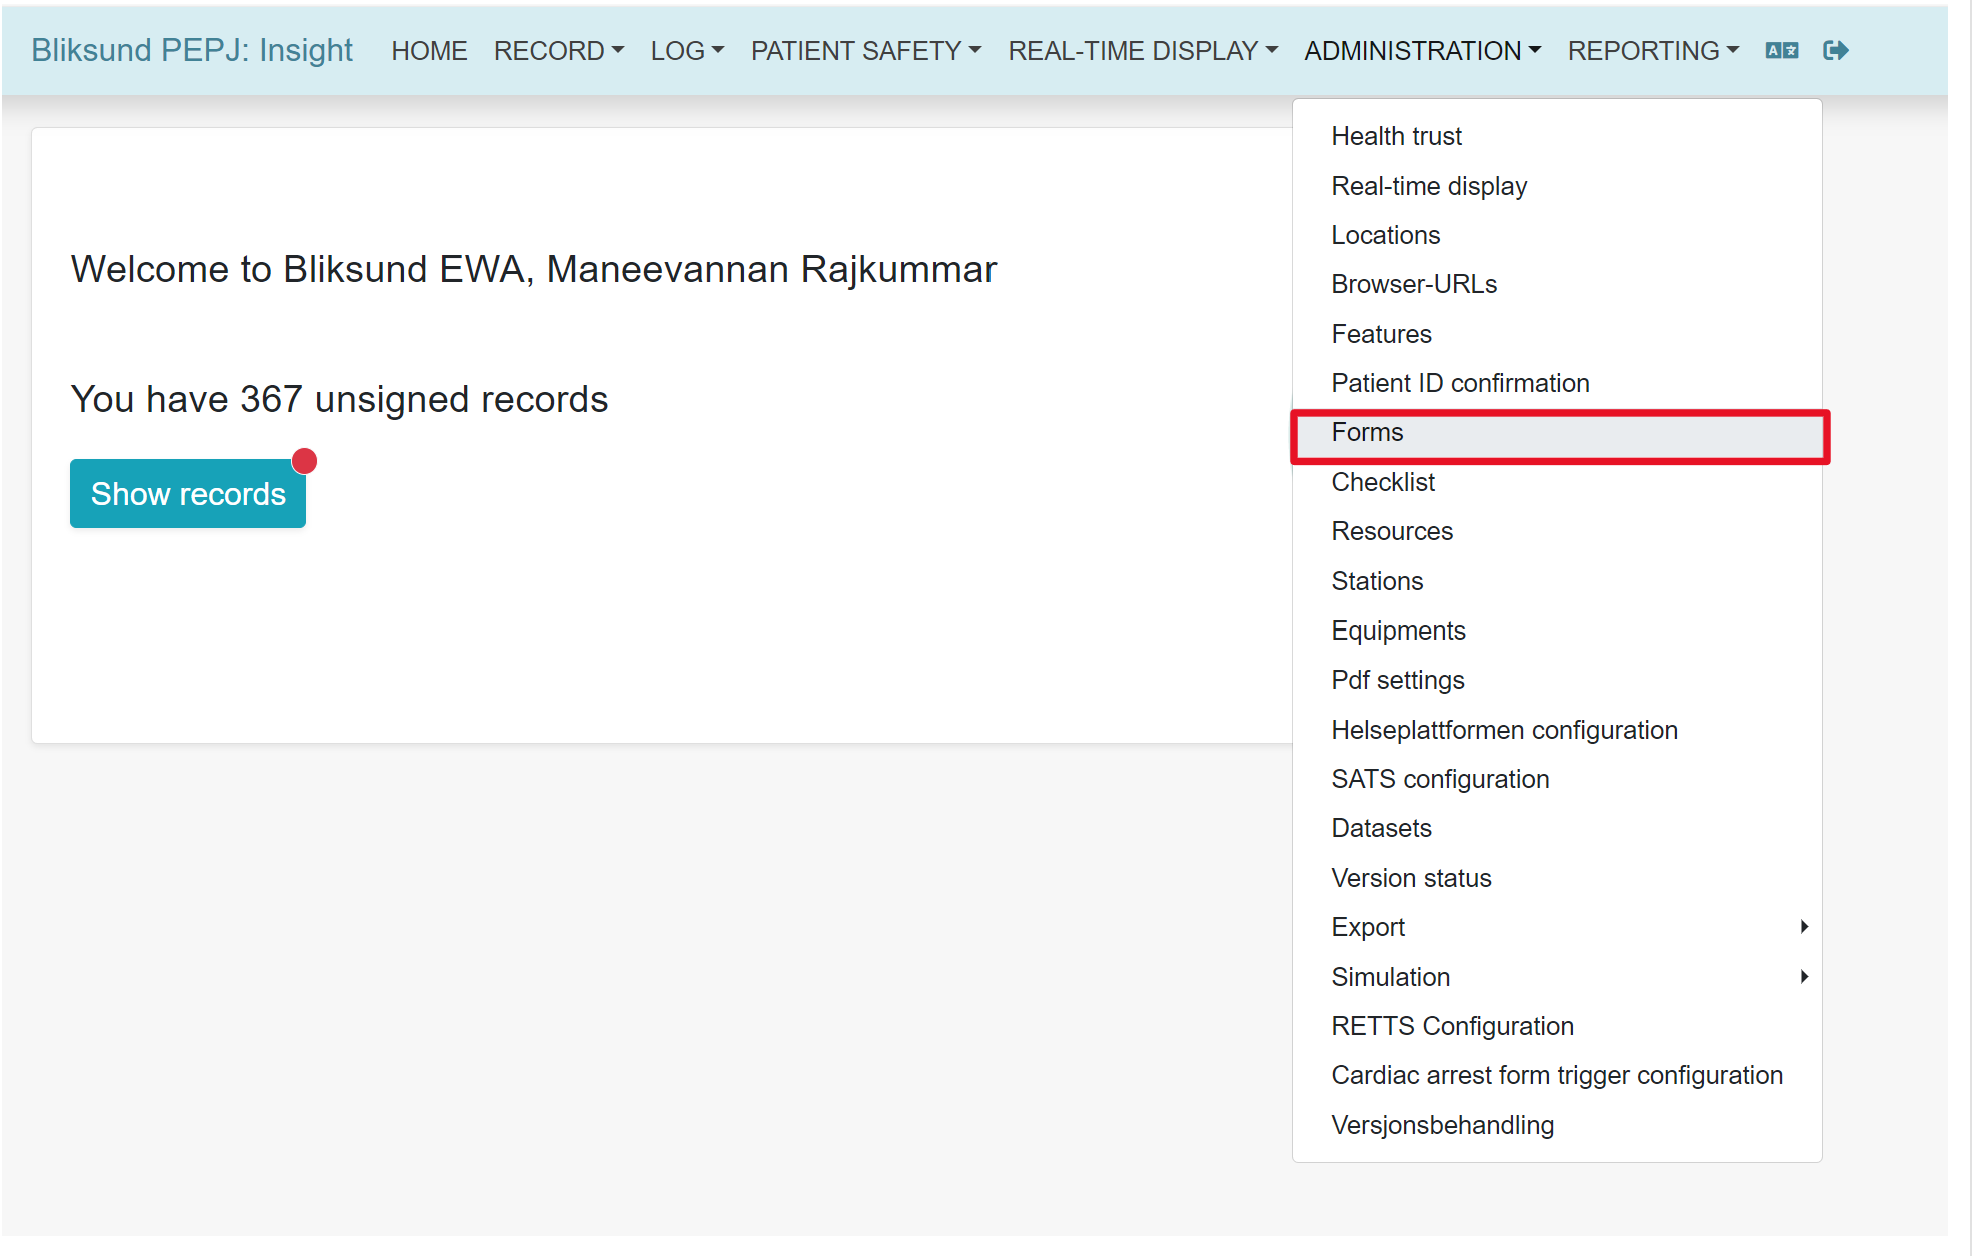
To create a new form, navigate to the new form configuration page by selecting Administration > Forms in the main menu.
The new forms page opens and it can be filtered by state or name.
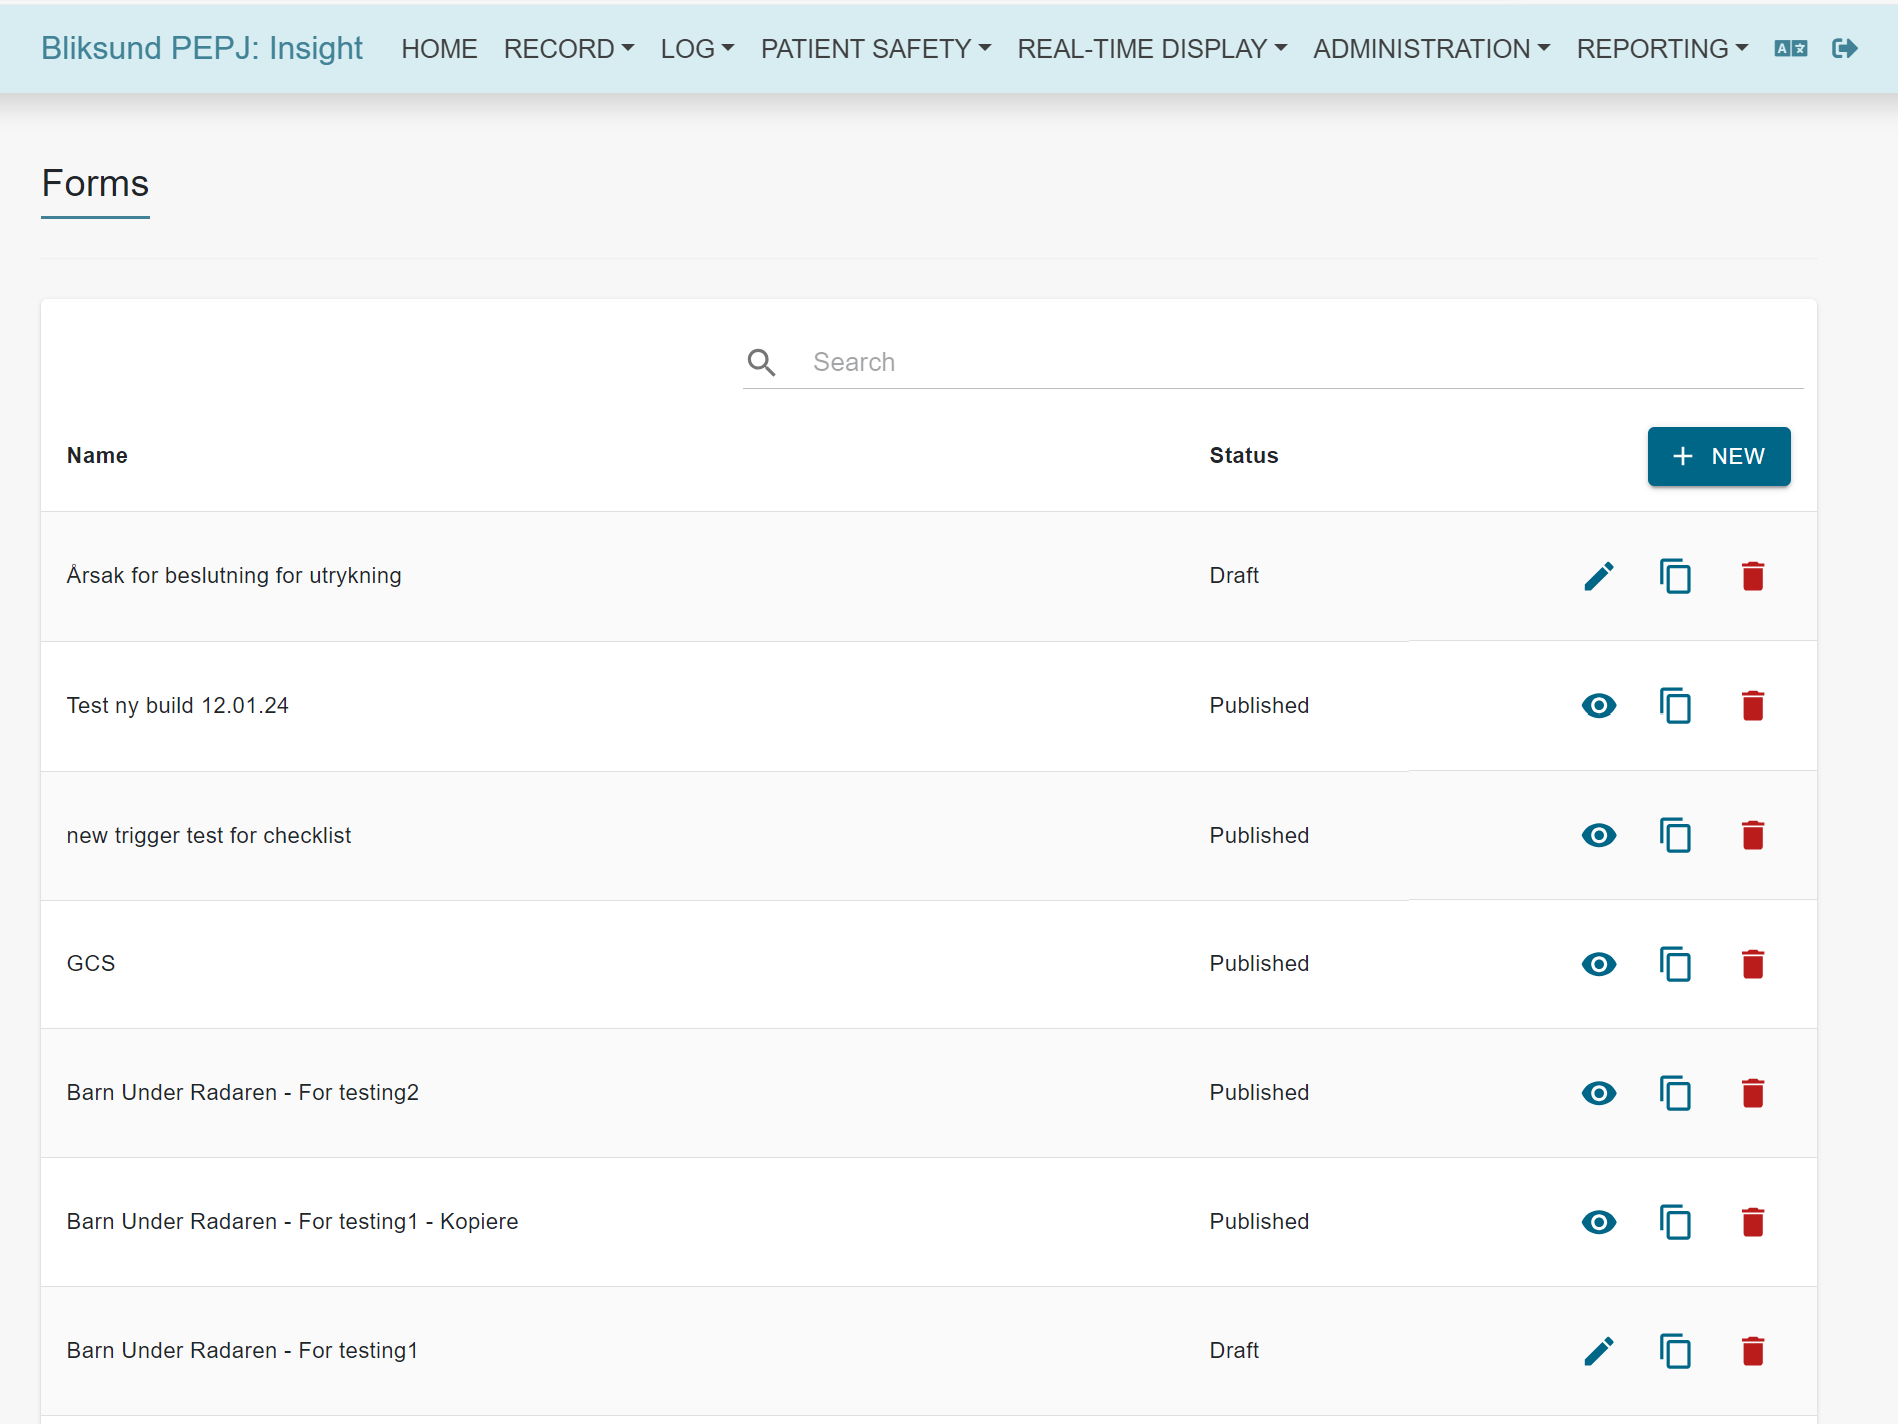
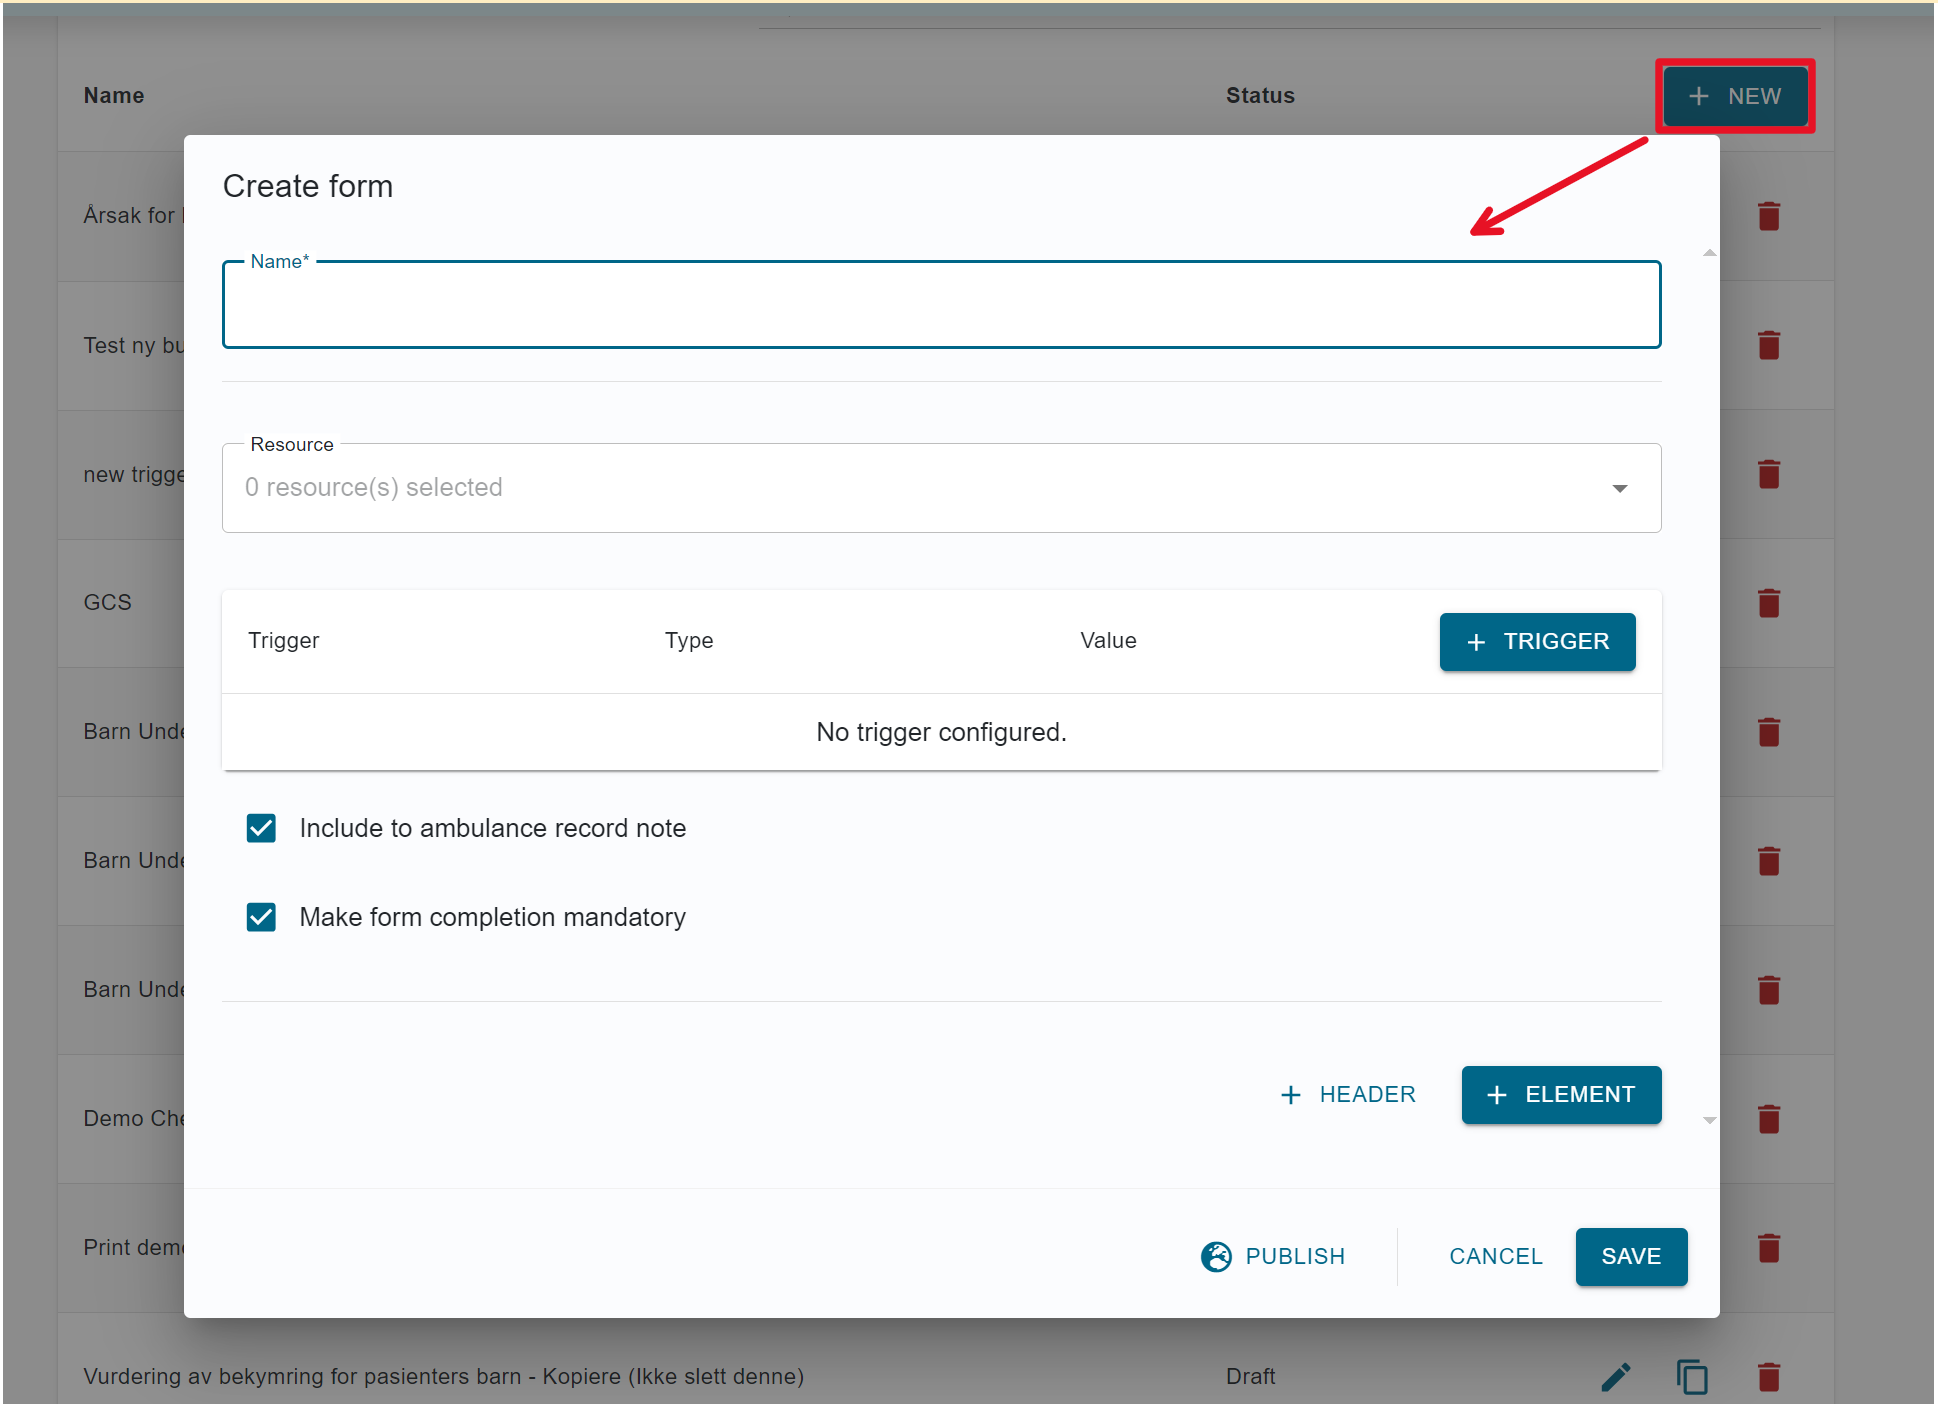
Click on the New button, and provide a name for it.
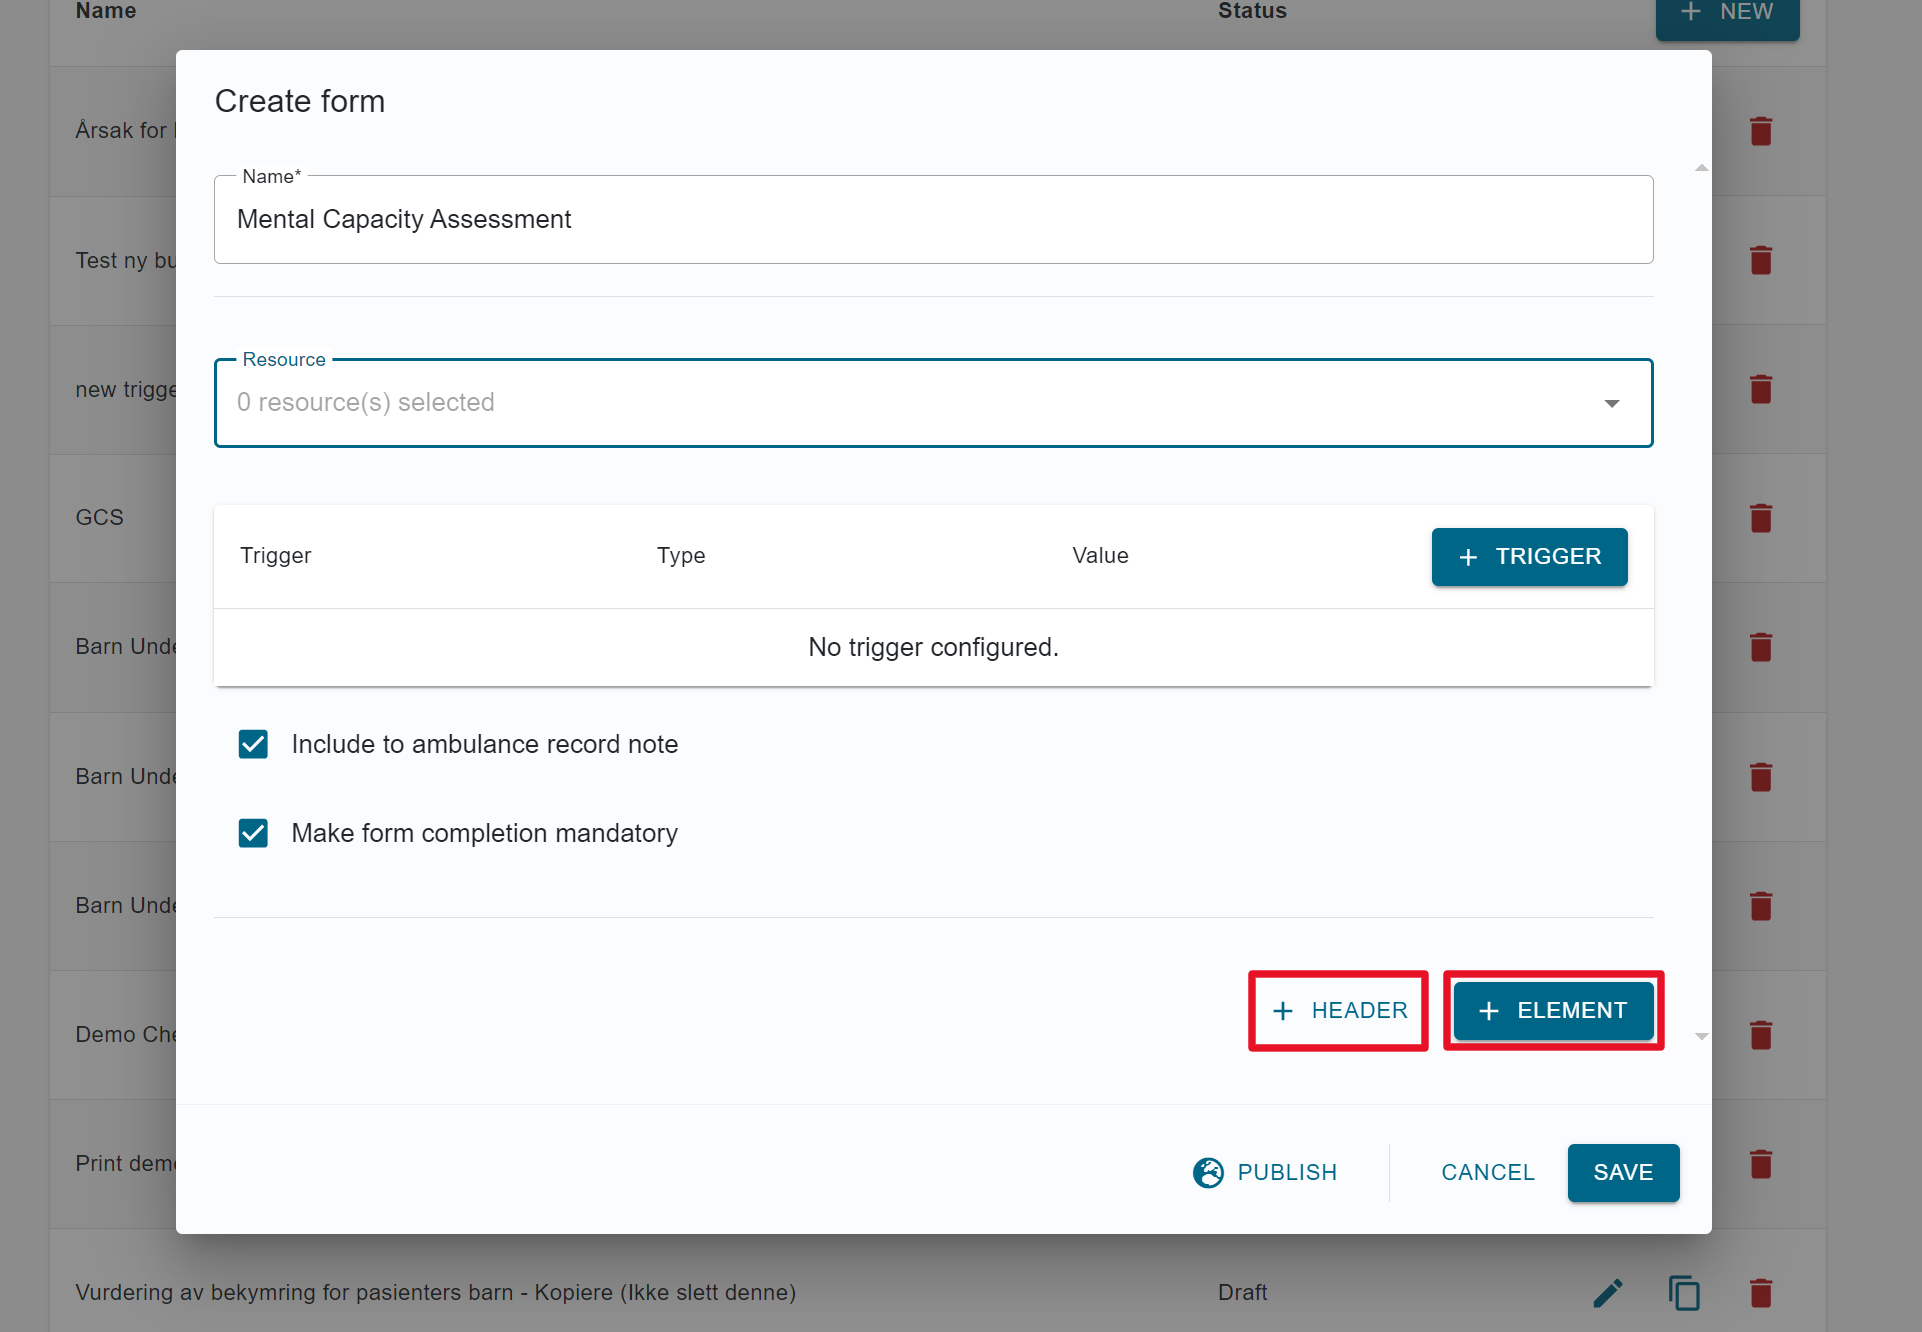
Click on the Header or Element button to add an element to the form.
Then a new element will be added.
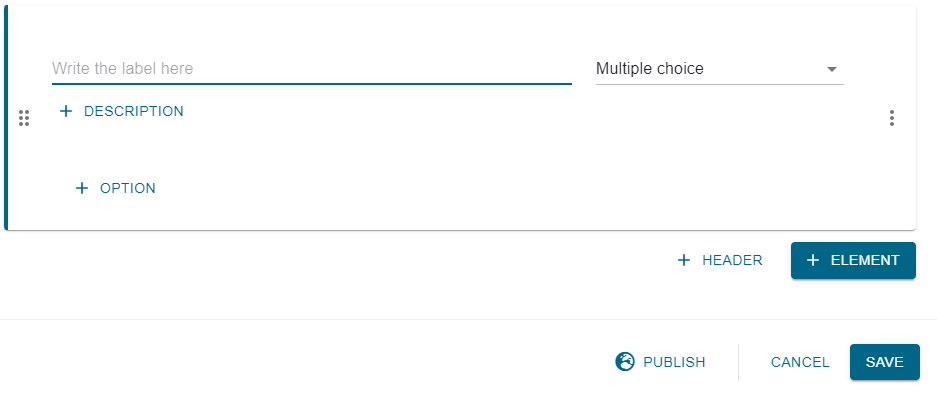
You can change the element type by opening the dropdown.
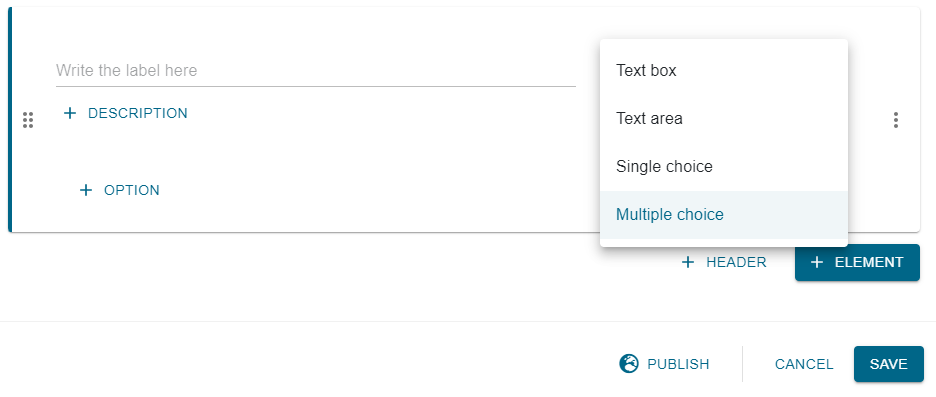
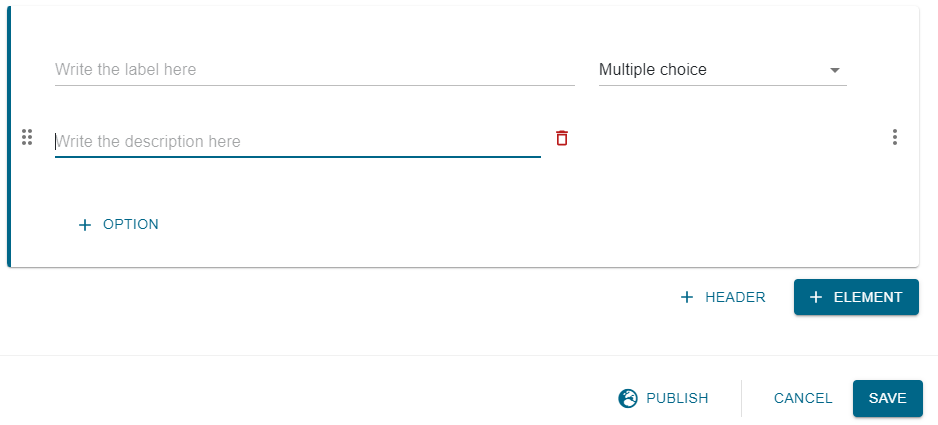
To add a description for an element, click on the Description button and enter a description.
To duplicate an element, click on the 'Duplicate' button from the element context menu. The new element will have the same content as the original.
![]()

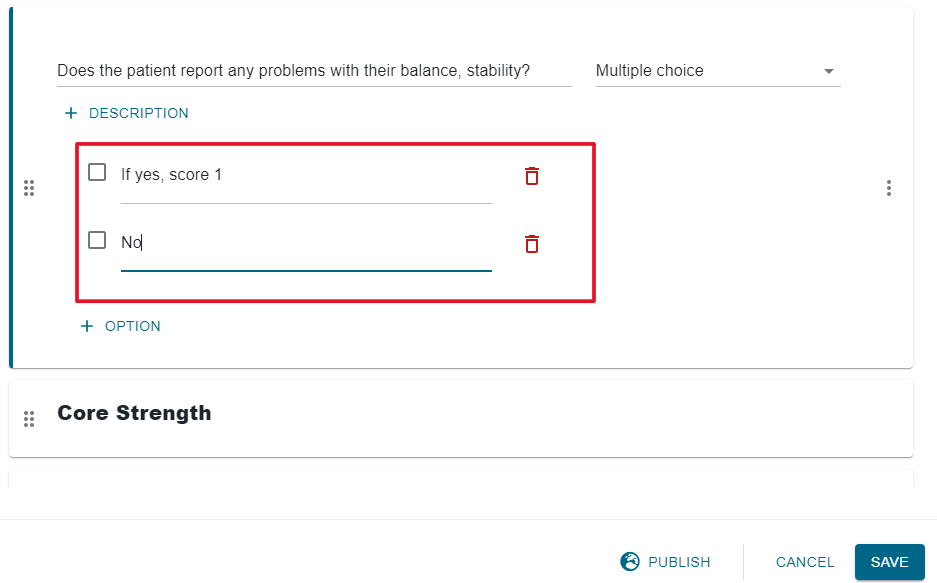
The options can be added if the element type is 'multiple choice' or 'single choice'.
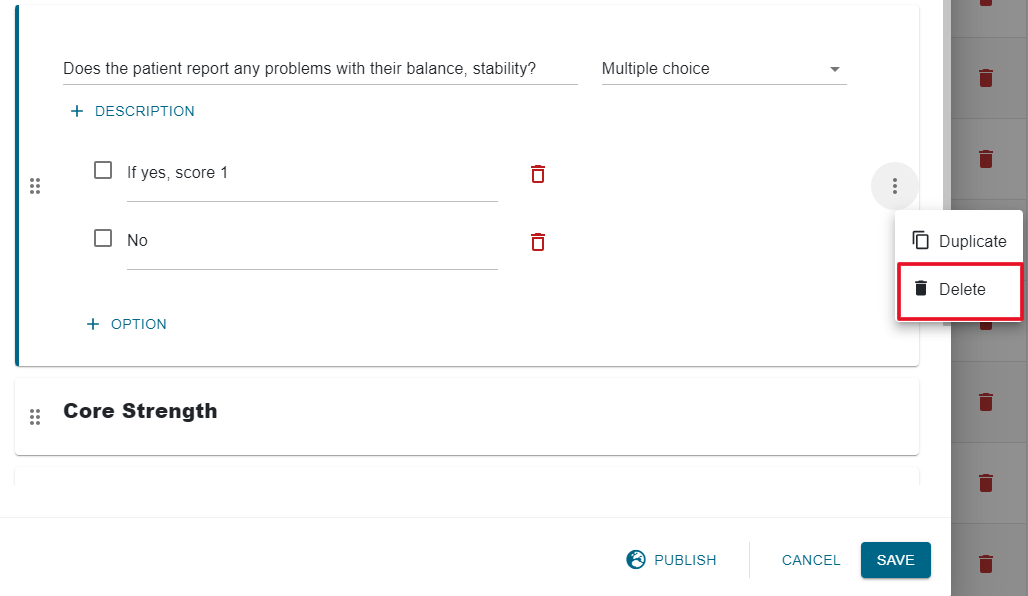
To delete the element, click on the Delete button from the element context menu.
Click on the Save or Publish button to save or publish your form. You can save an incomplete form as a draft by clicking on the Save button if you want to finish it later.
The published/draft forms are listed on the forms page.
The form must be published for it to be used by the client.
Resource configuration
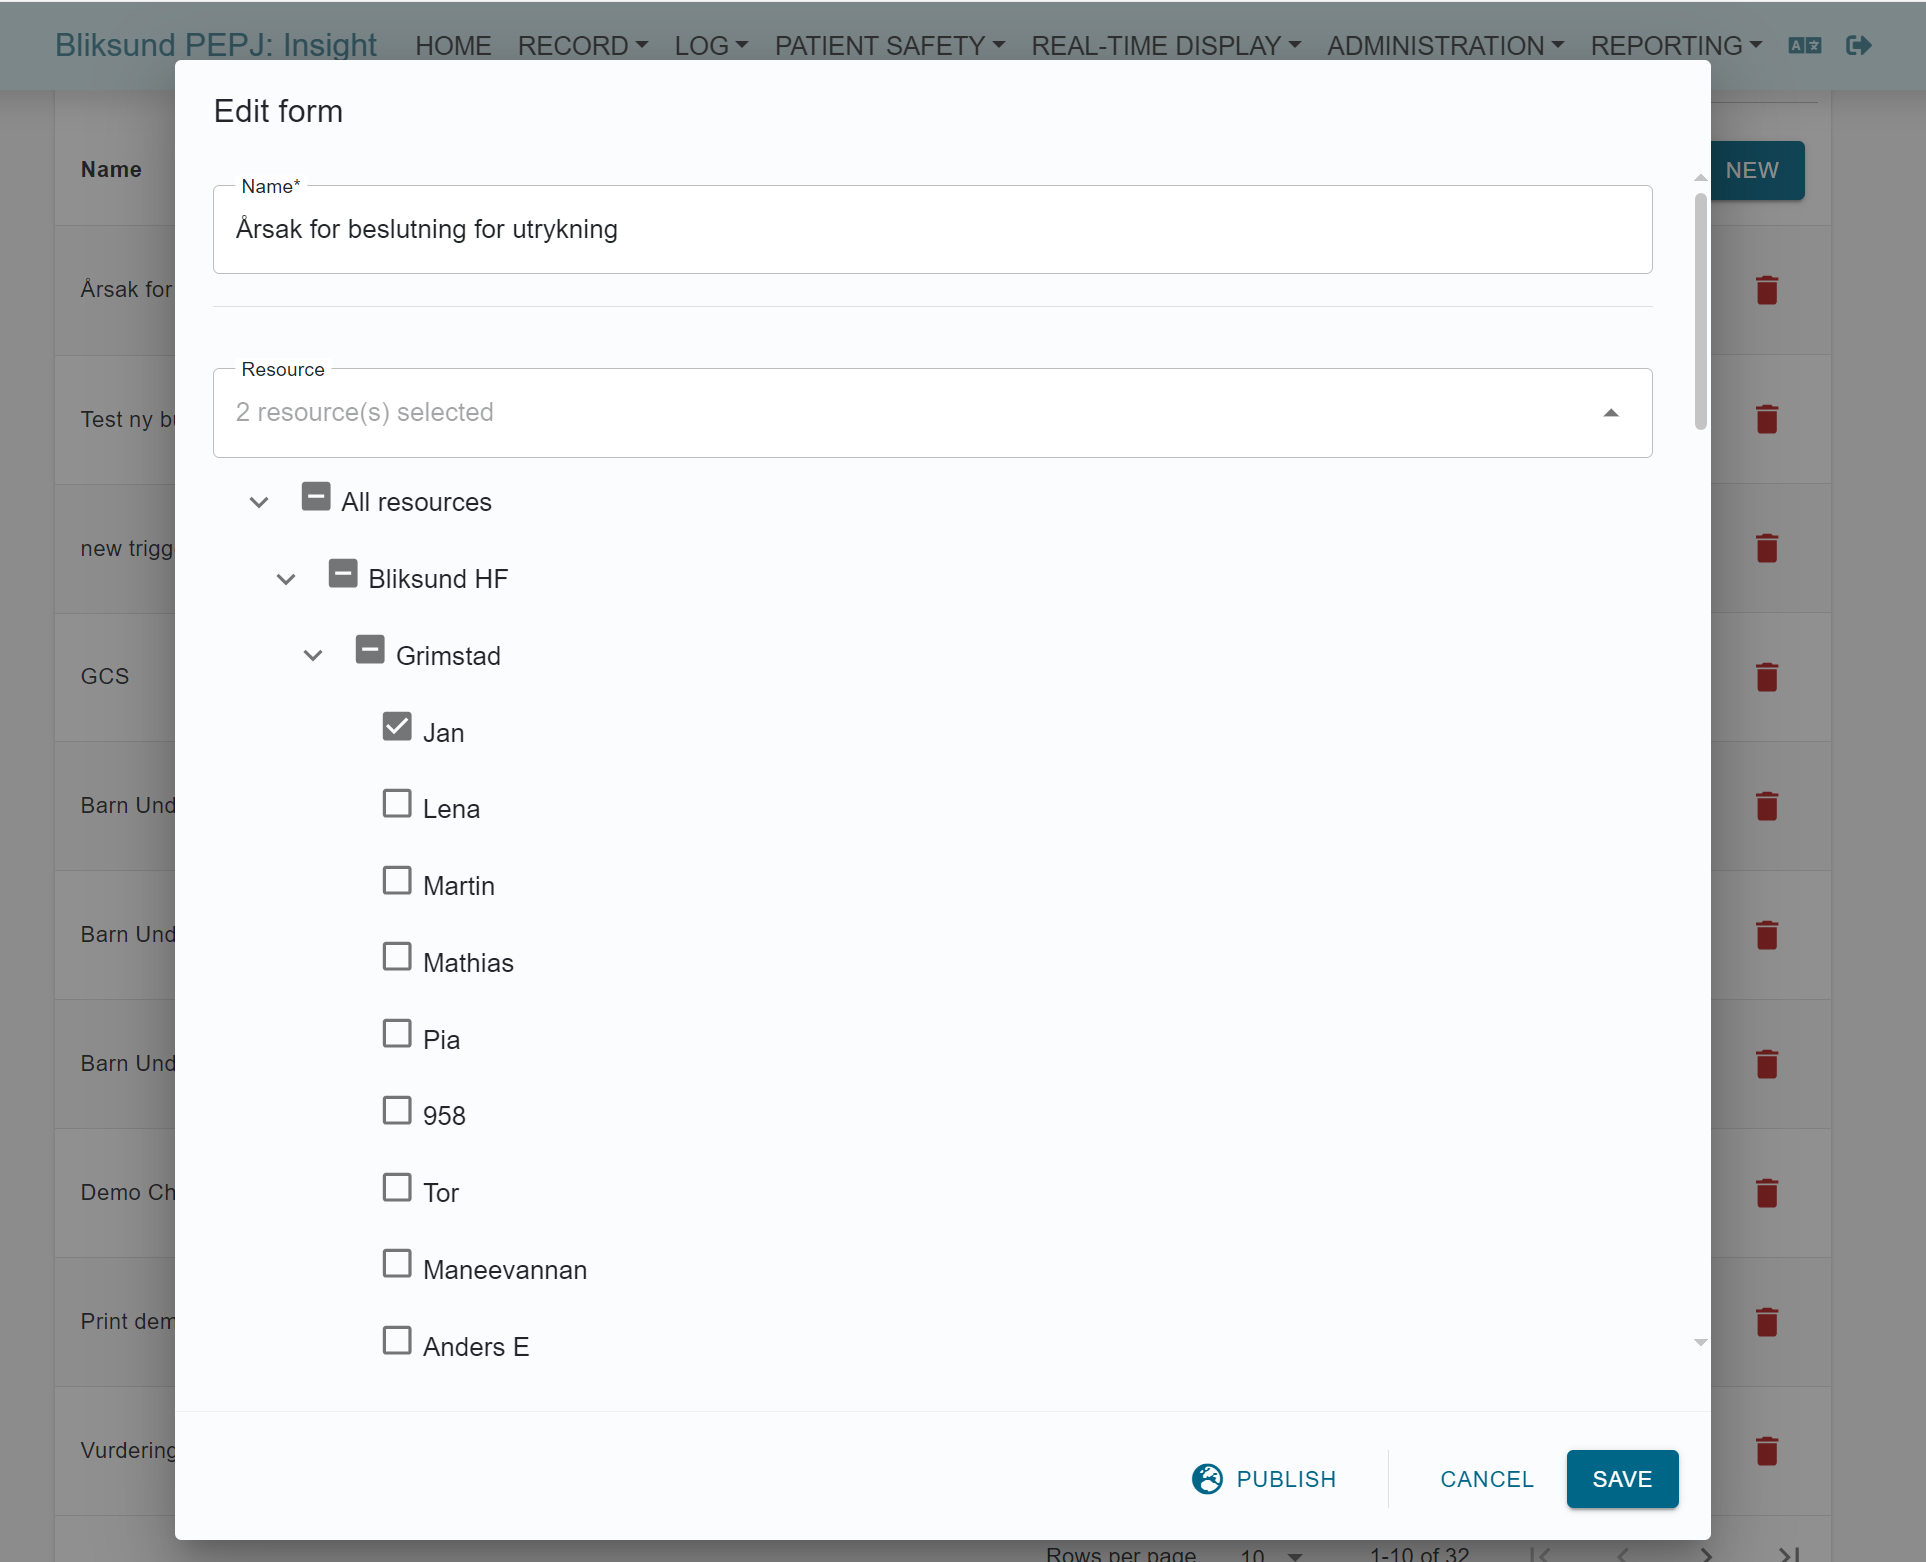
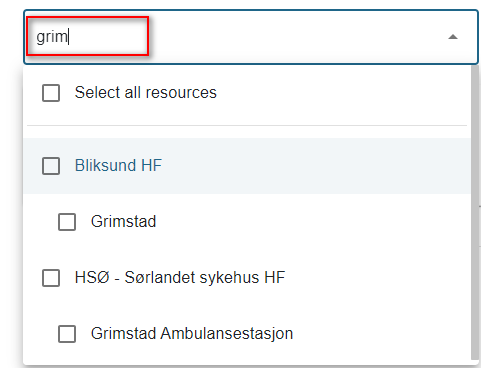
When opening a create/edit/view form page, you can select resources under the 'Name' field which supports filtering and selecting all resources. All selected resources will be counted and shown in the placeholder. To have the form tile to be displayed in EWA Client the form should be enabled for the resource.
Triggers configuration
The trigger for location, dataset and mission type can be created under the resource field. They are shown as a table that supports inline editing.
To create a trigger, click on the Trigger button.
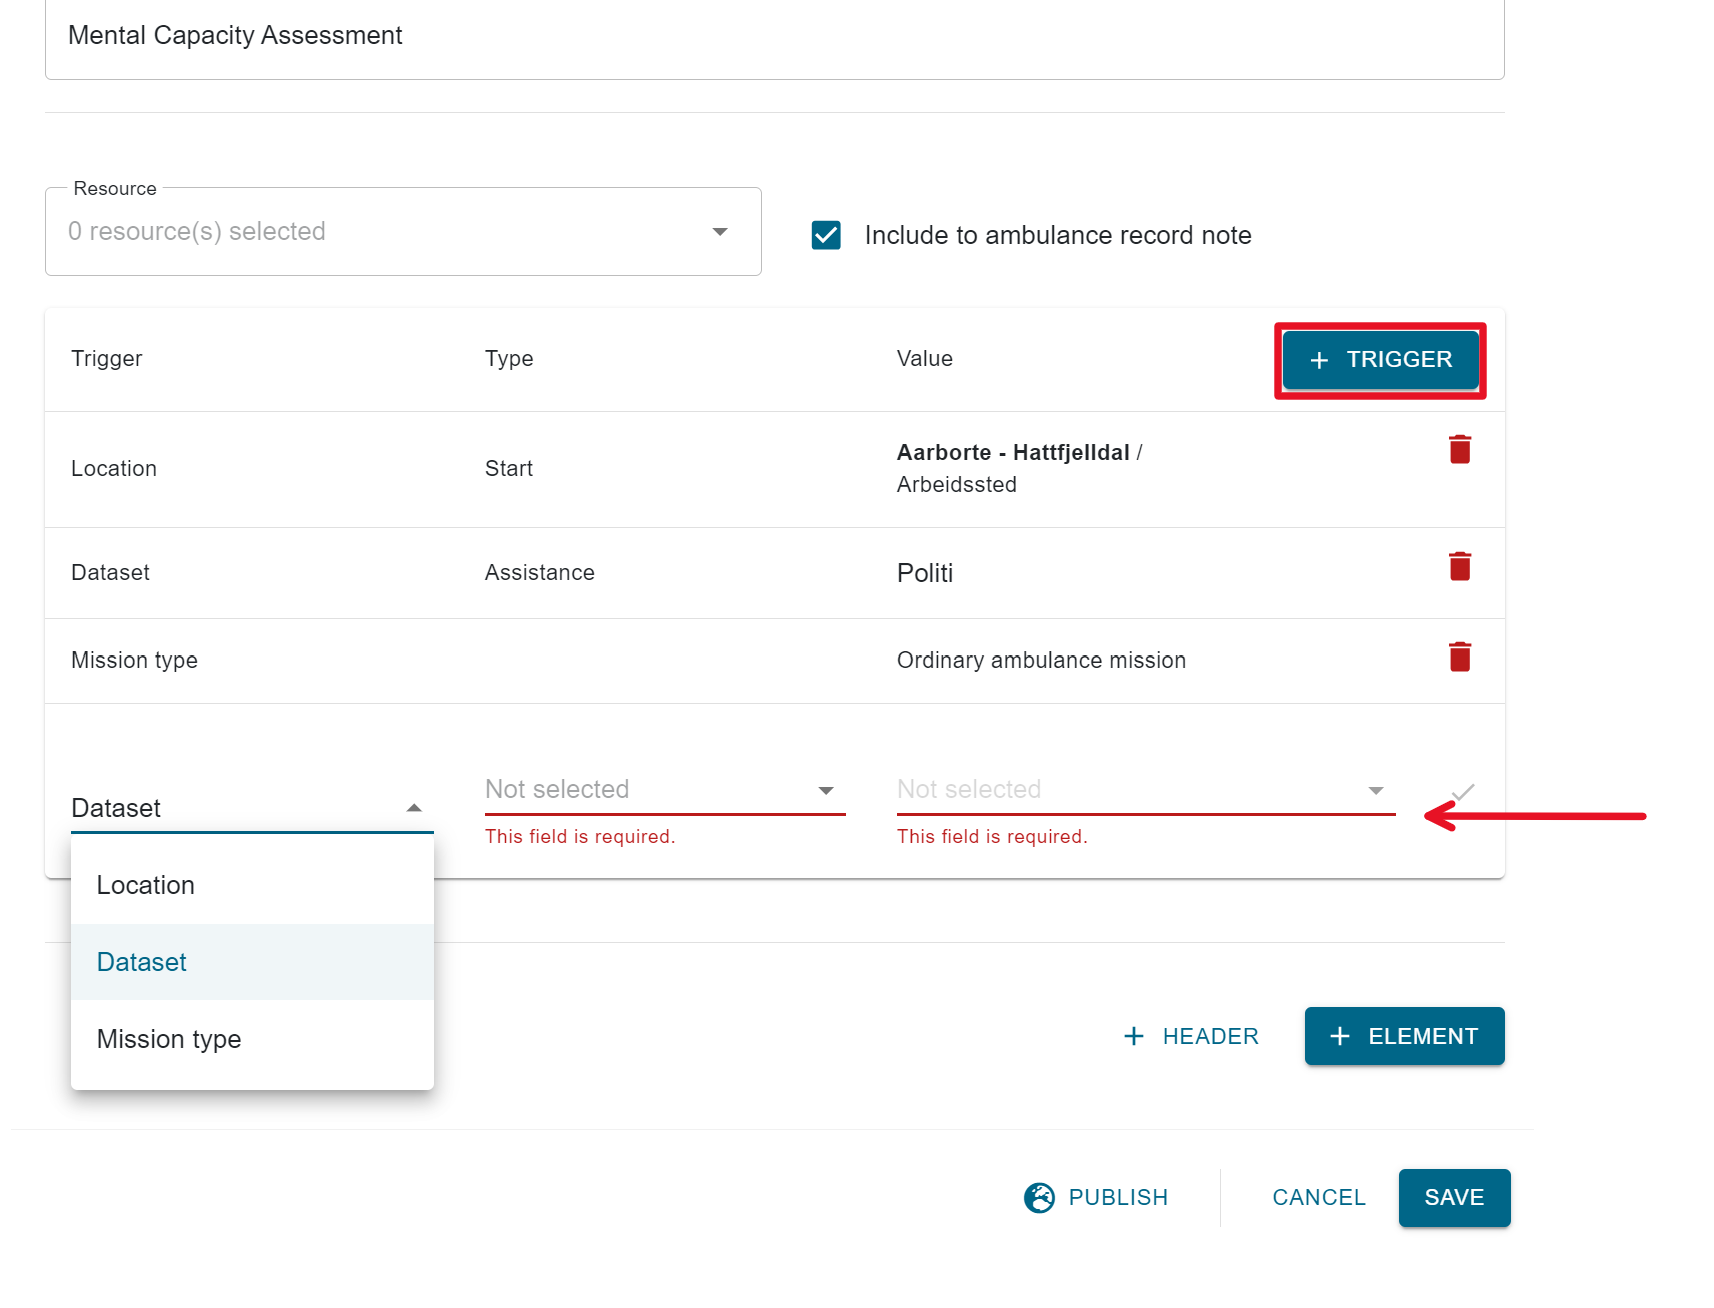
Enter all required fields and click on the tick icon button on the right side of each row to save your trigger. The list of datasets shown in the 'Value' dropdown supports filtering.
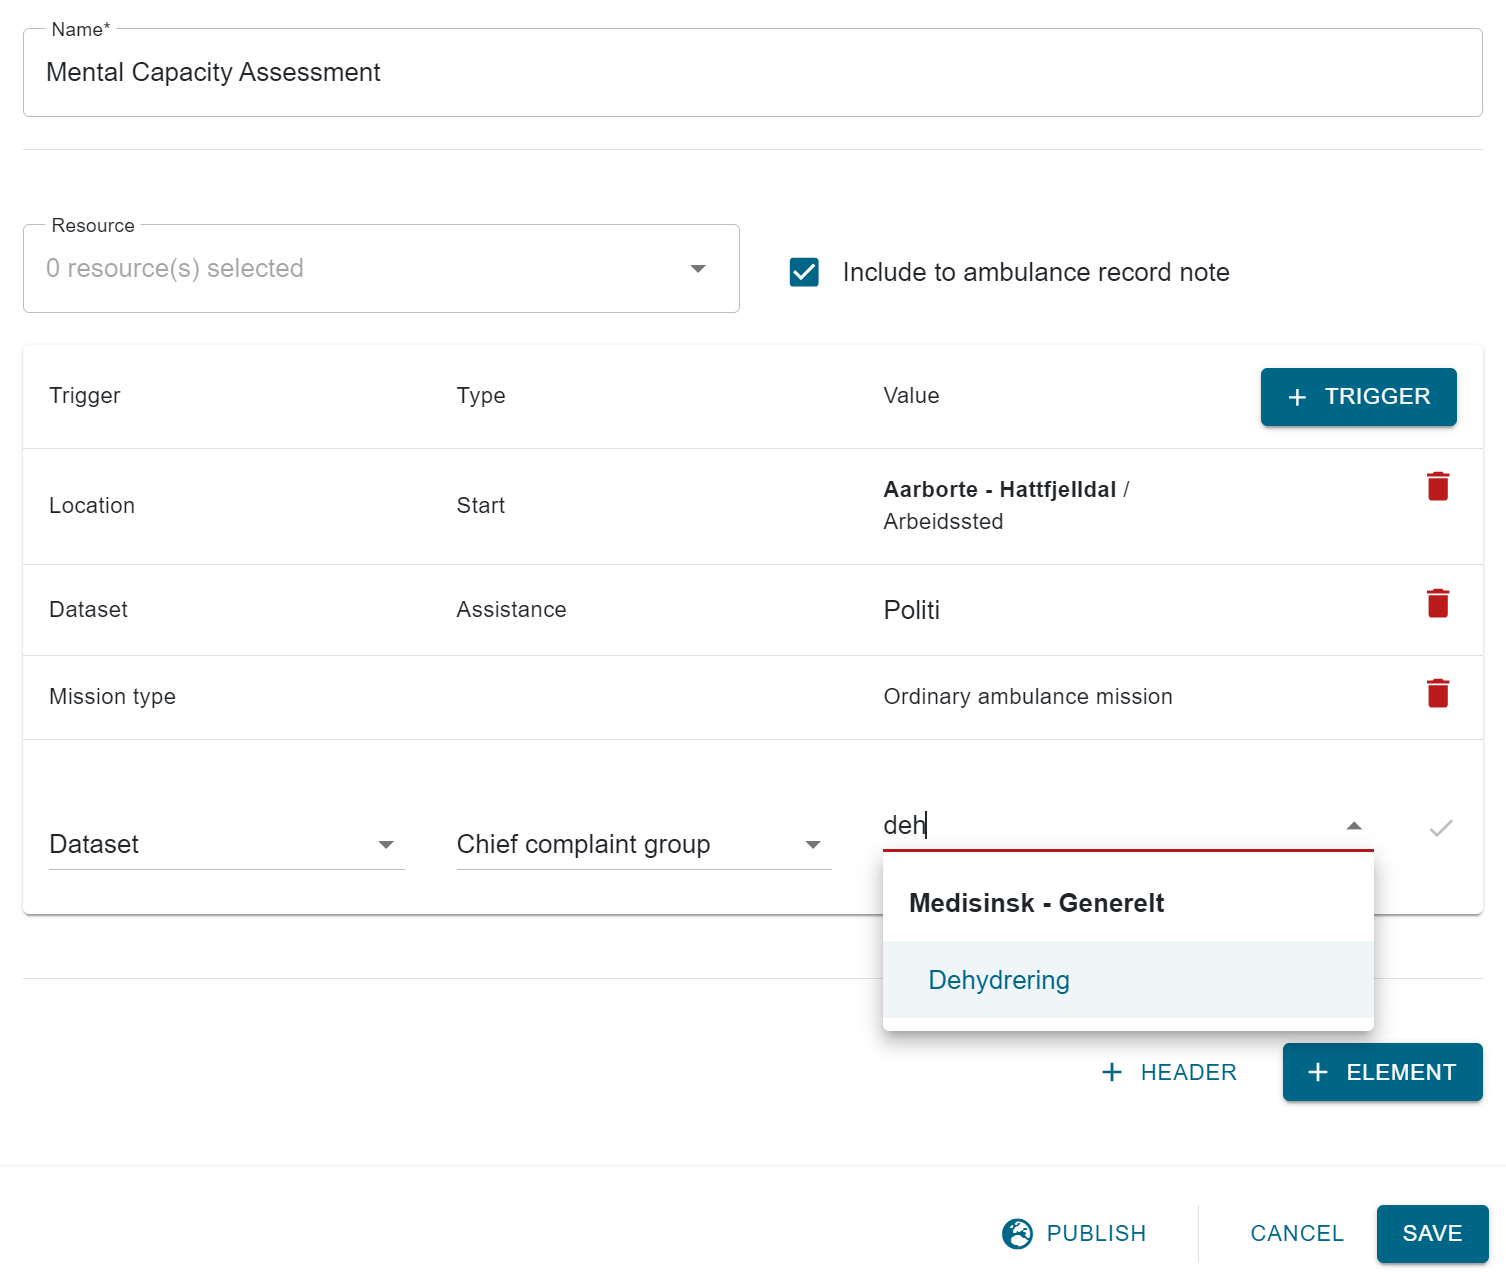
The trigger can be easily deleted by clicking on the delete icon button on its right side.

Score configuration
*Introduced in release 27*
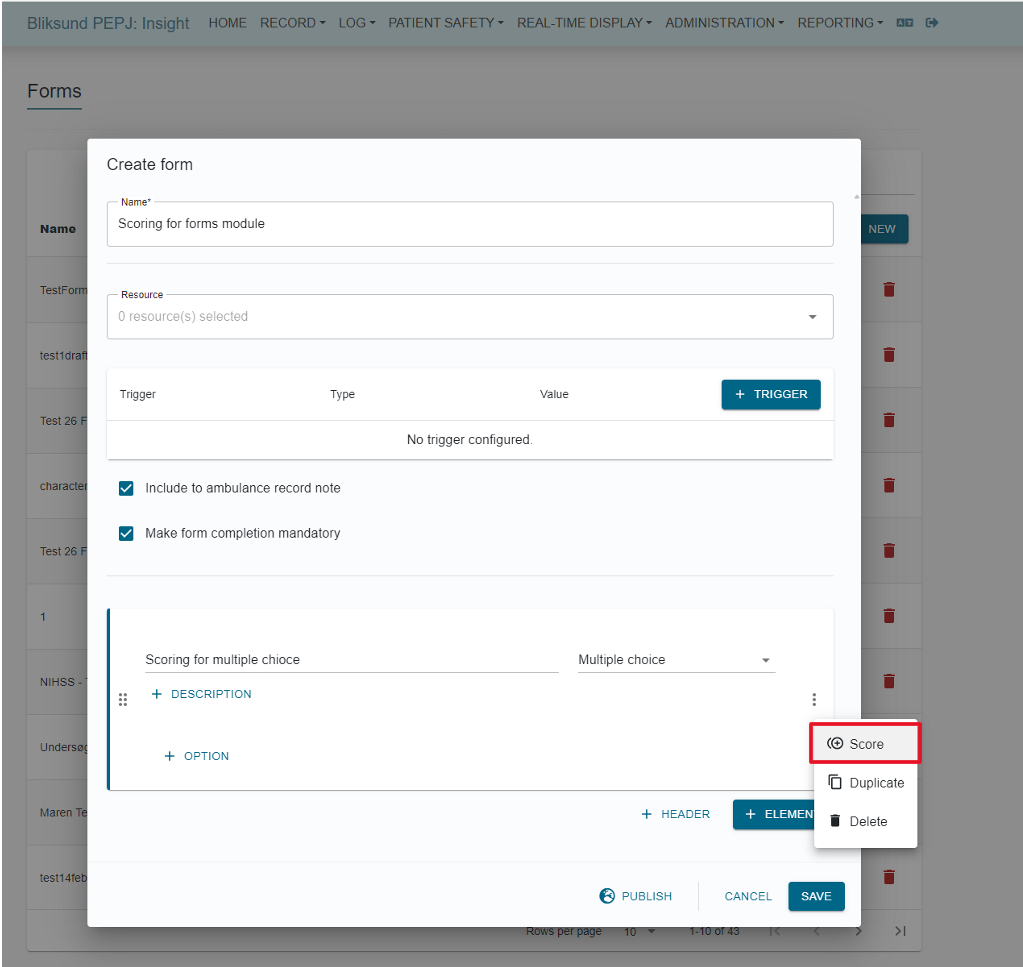
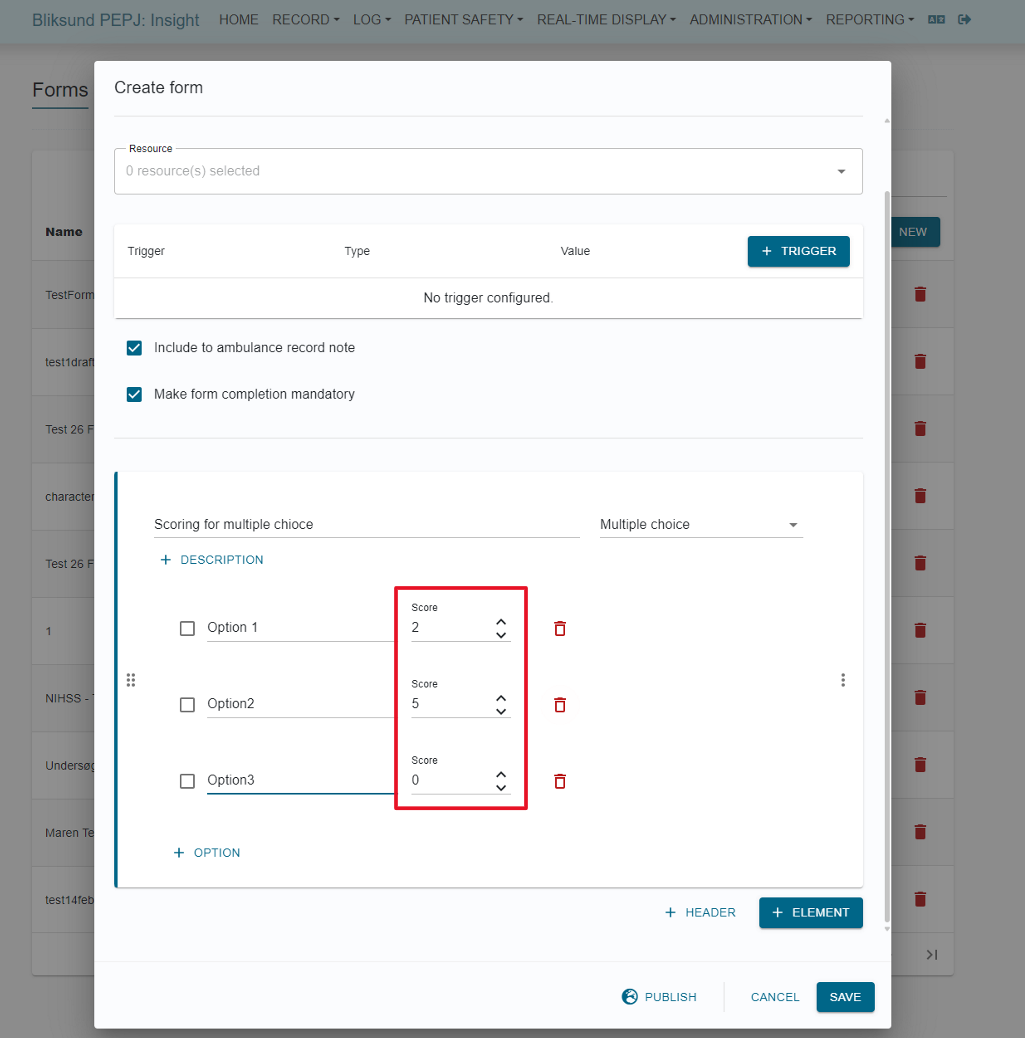
While adding single or multiple-choice elements to a form, the score for each choice can be configured and the form response calculates the total score based on the selected items after completing the form in EWA Client.
To configure the score for single or multiple-choice elements, click on the Score option in the menu.
To add options with scores, click on the option and enter the score to configure for each option.
Save and publish the form before filing in the form response in EWA Client.
Added Support for Multiple Sections
*Introduced in release 29*
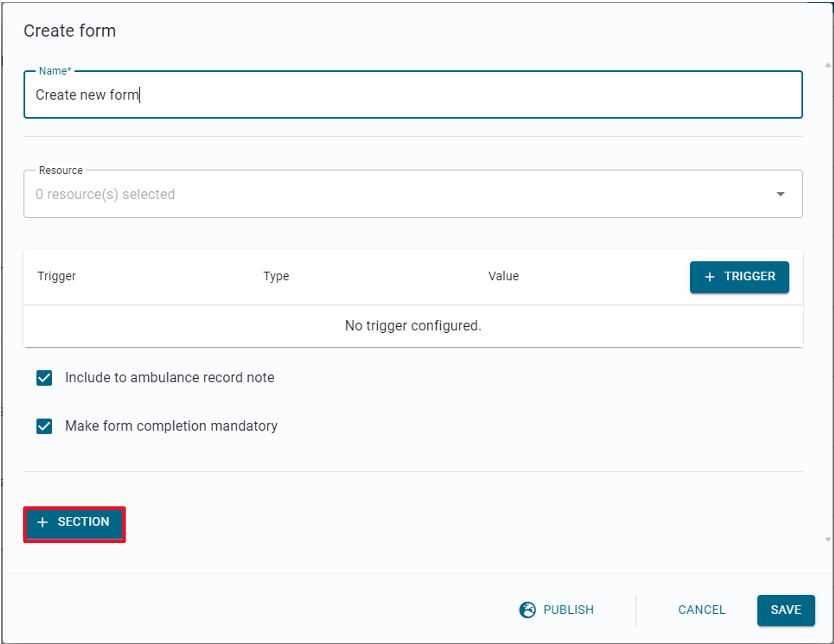
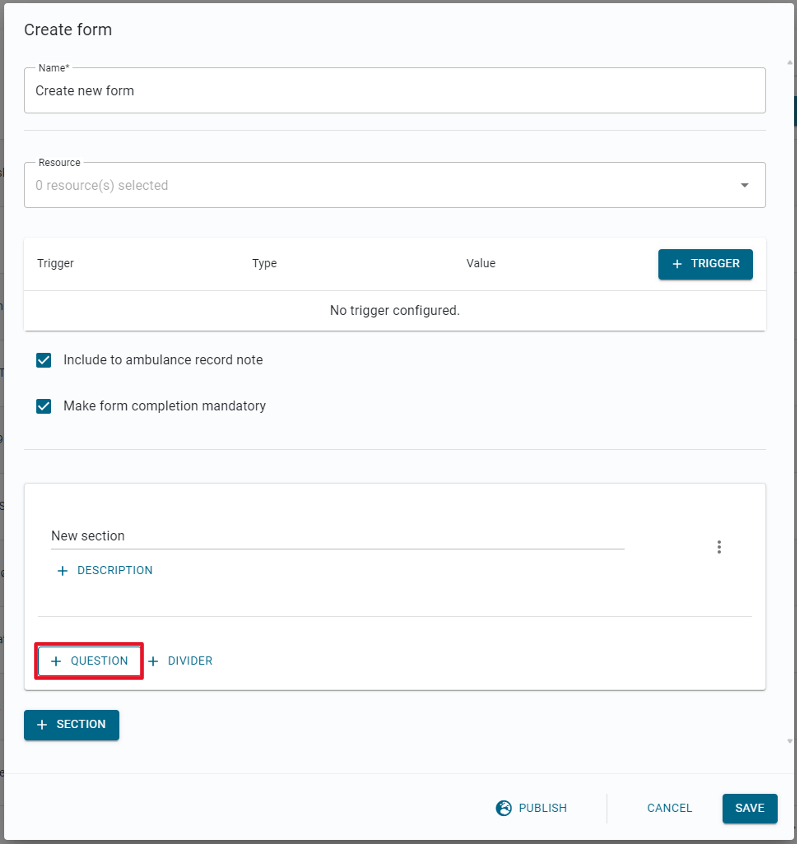
We've implemented the functionality to seamlessly integrate multiple sections within the form configuration process. To include a new section in a form configuration, simply create a new form and utilize the Add Section button. Specify the section's name and proceed to add questions or new elements under it by clicking the Question button.
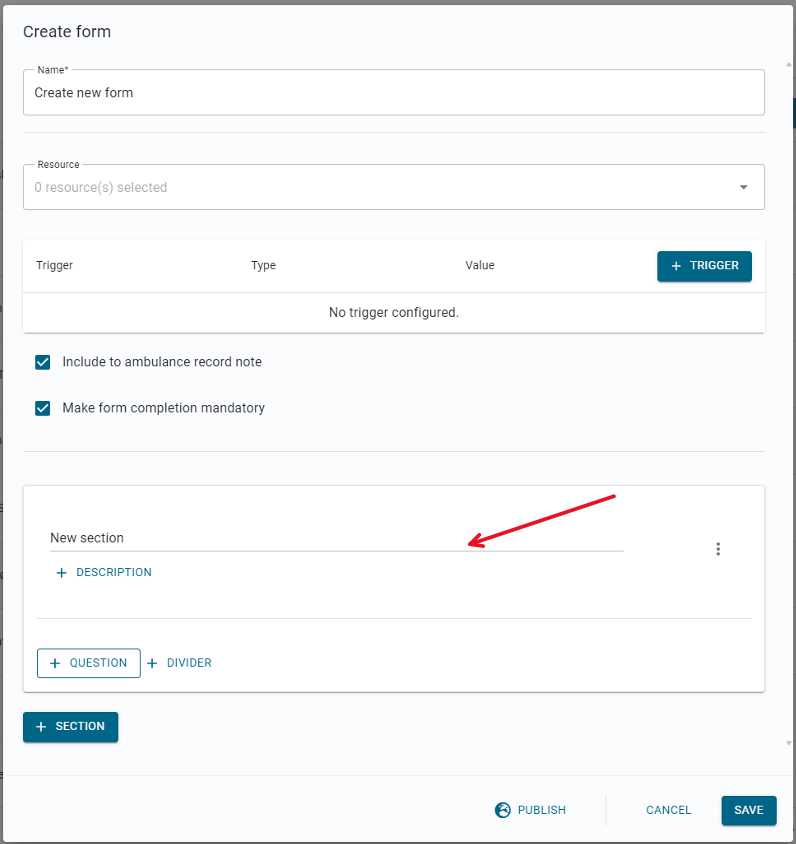
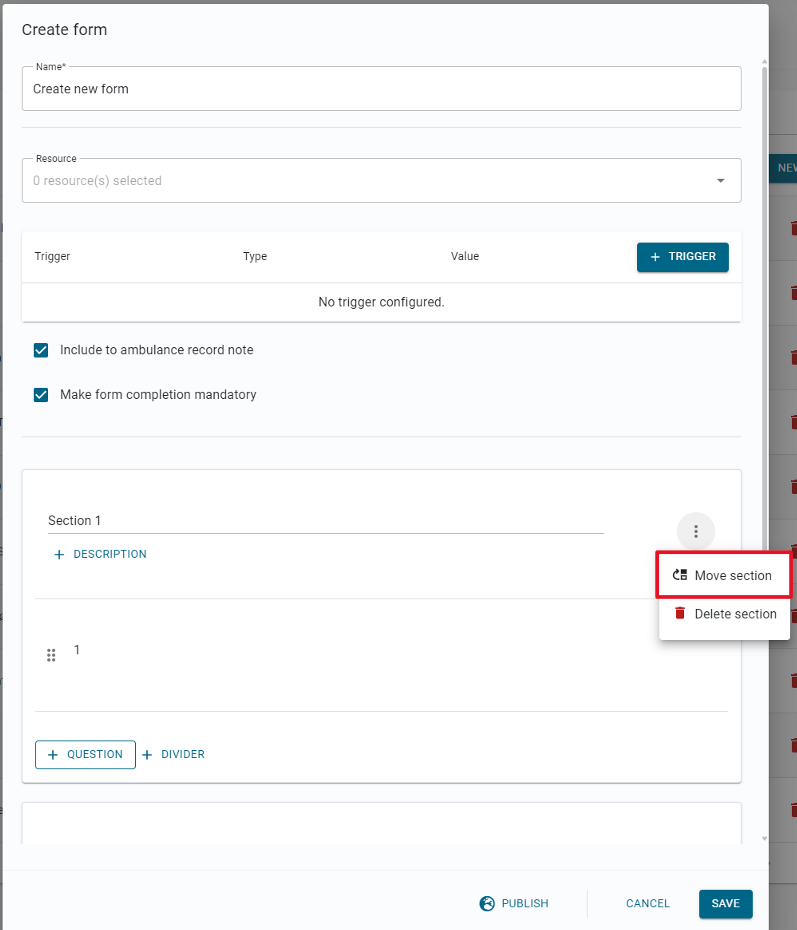
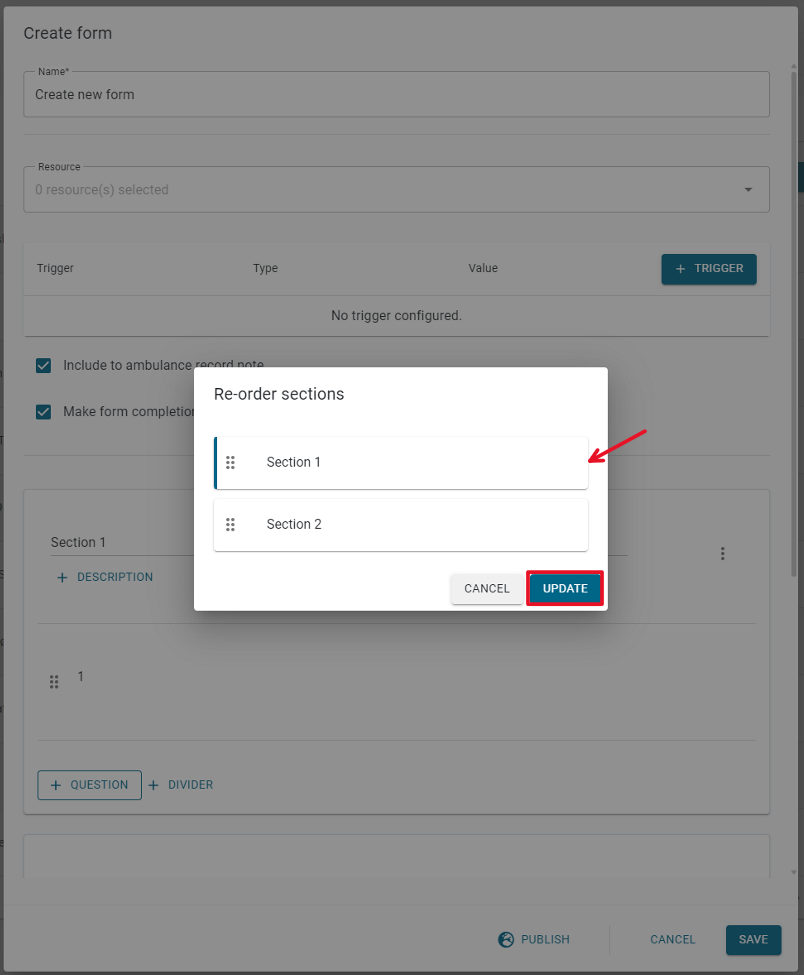
Sections within the form configuration can be rearranged using the Move option when dealing with multiple sections. Select the Move Section option, adjust the order of the sections as needed, and then click the Update button to save the changes. (Please note that the form configuration must be saved or published to retain the adjustments).
Dynamic Branching Conditions
*Introduced in release 29*
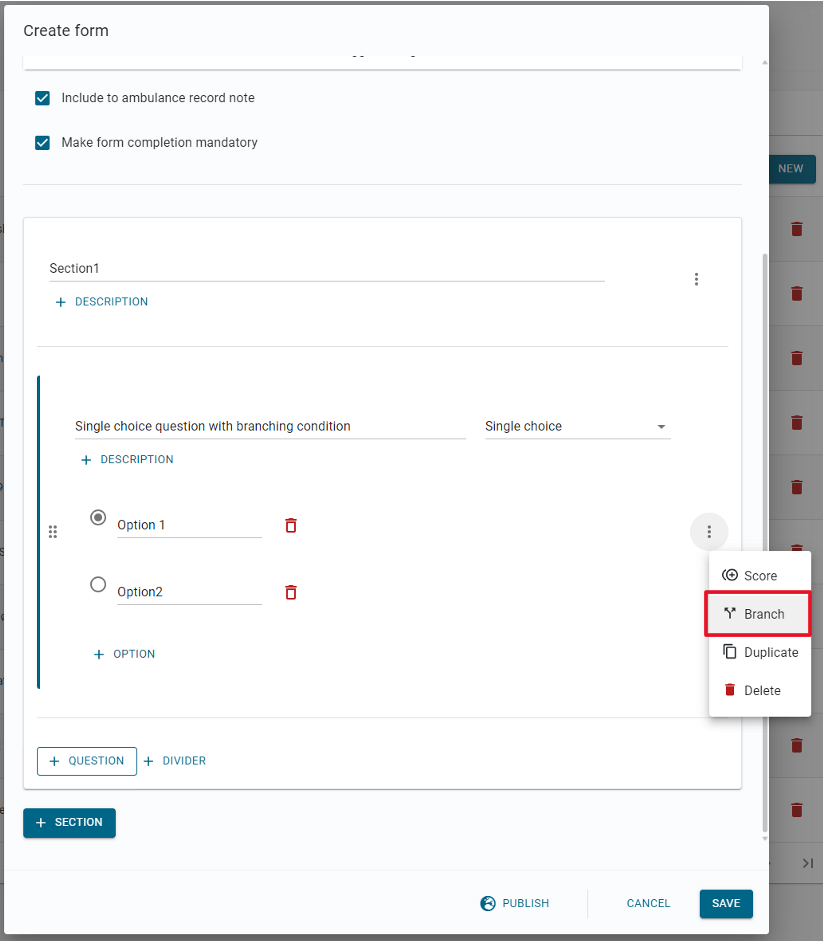
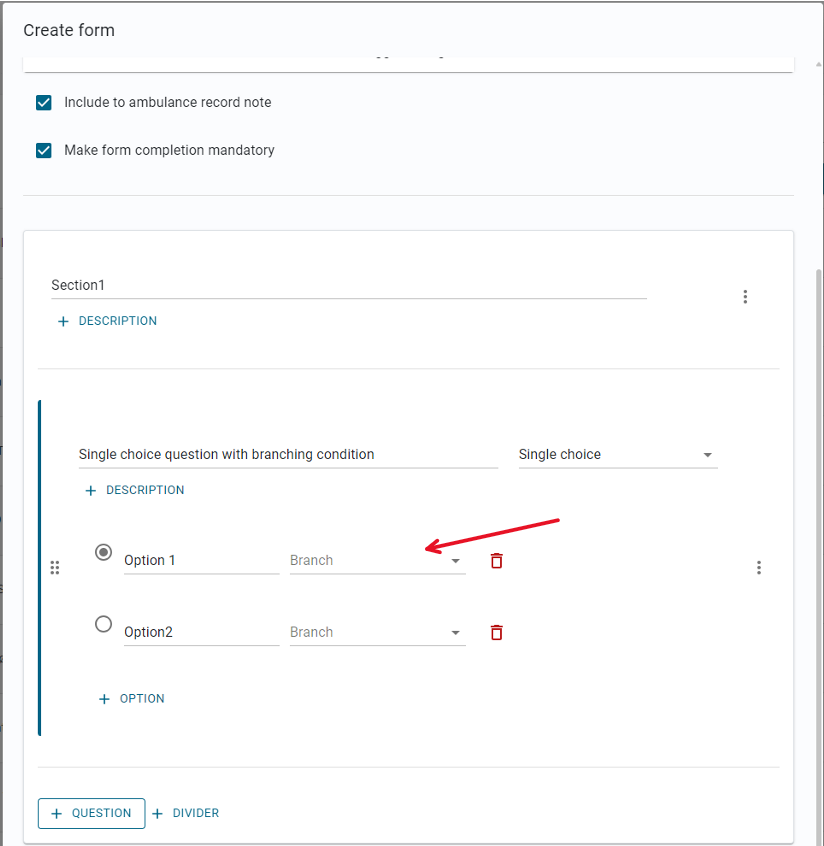
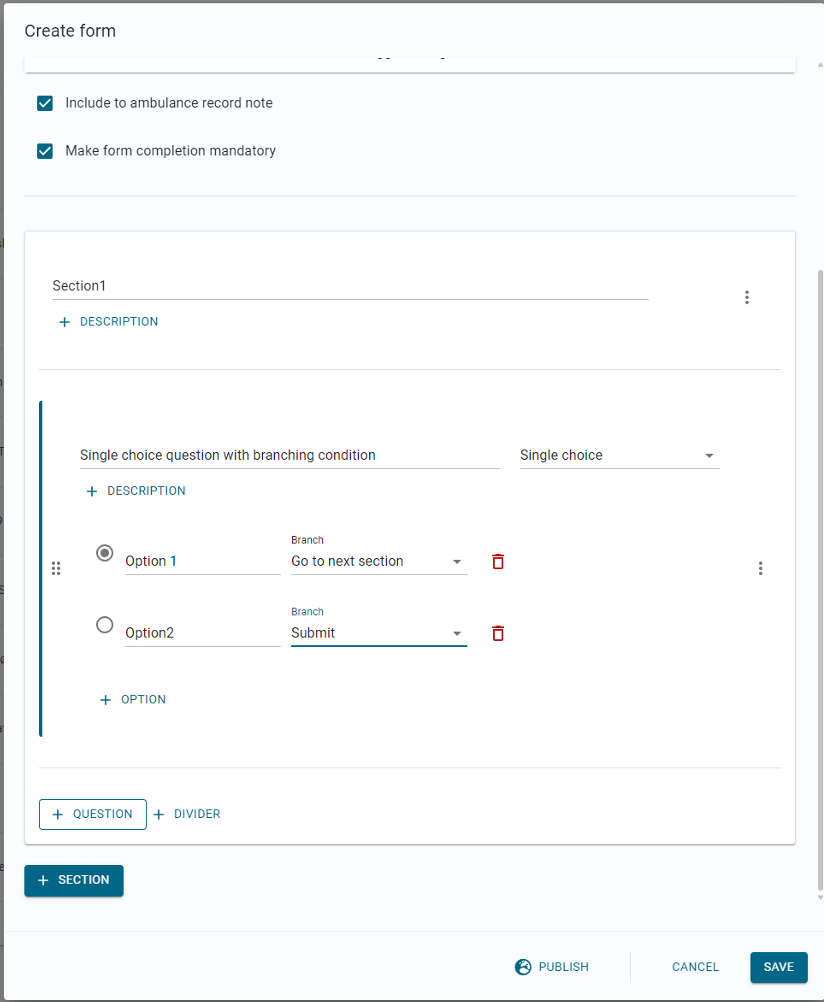
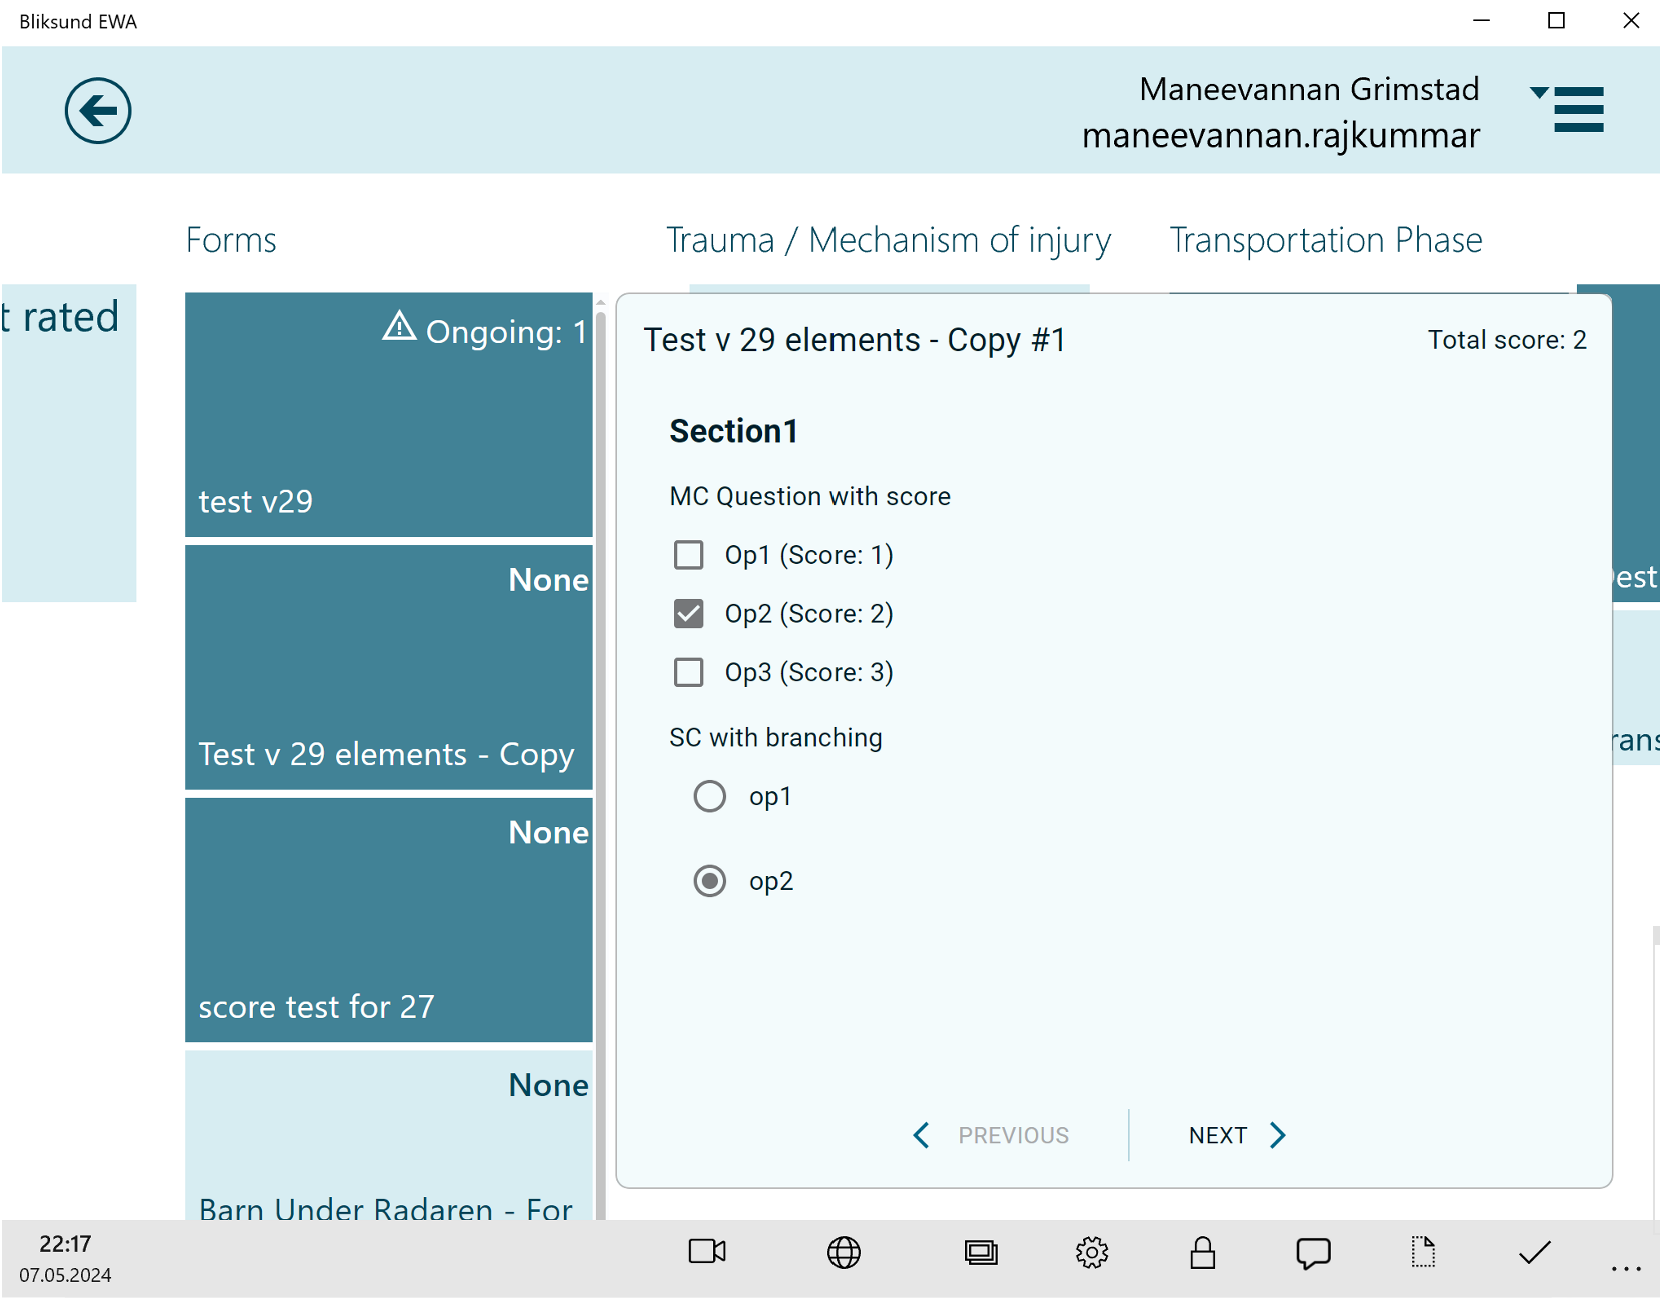
The inclusion of branching conditions designed for single-choice element types empowers users to craft dynamic form experiences. Respondents are steered towards distinct sections depending on their selections.
To incorporate a branching condition for a single-choice question, begin by creating a form containing a single-choice question. Then, enable the branching condition feature and define the condition for the selected option.
Expanded Element Types
*Introduced in release 29*
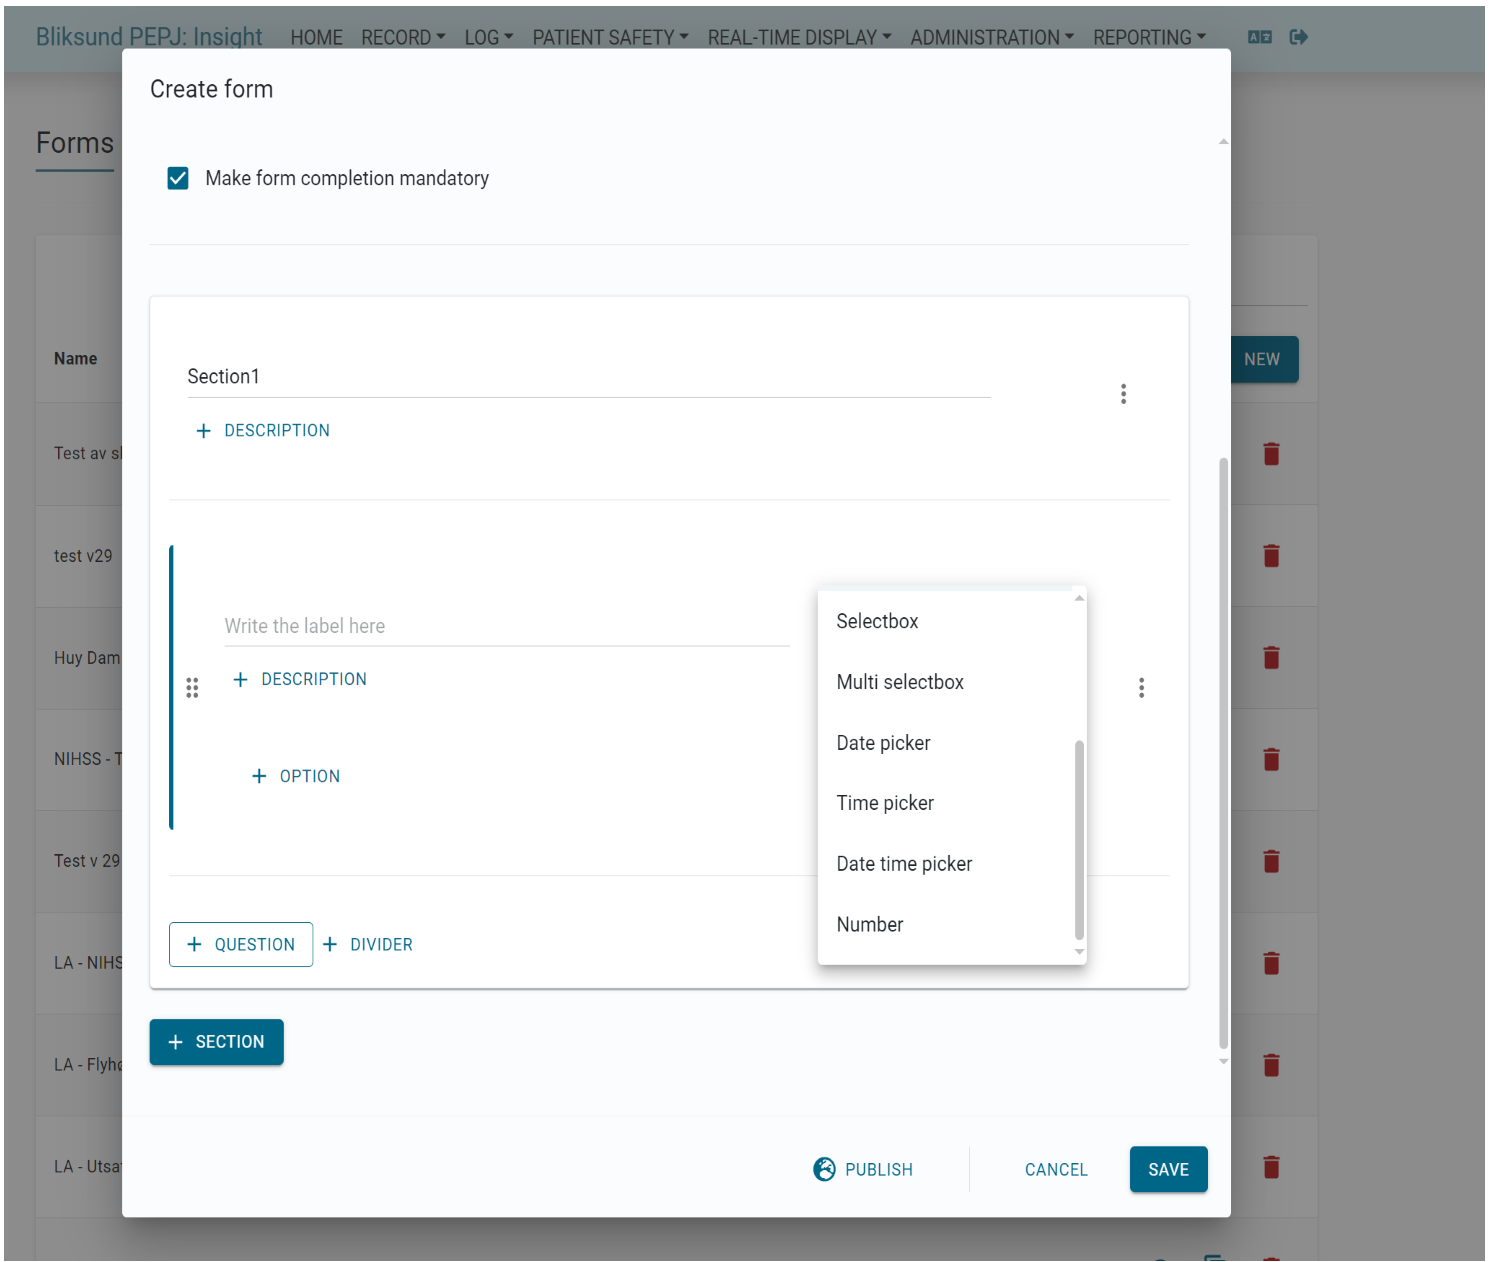
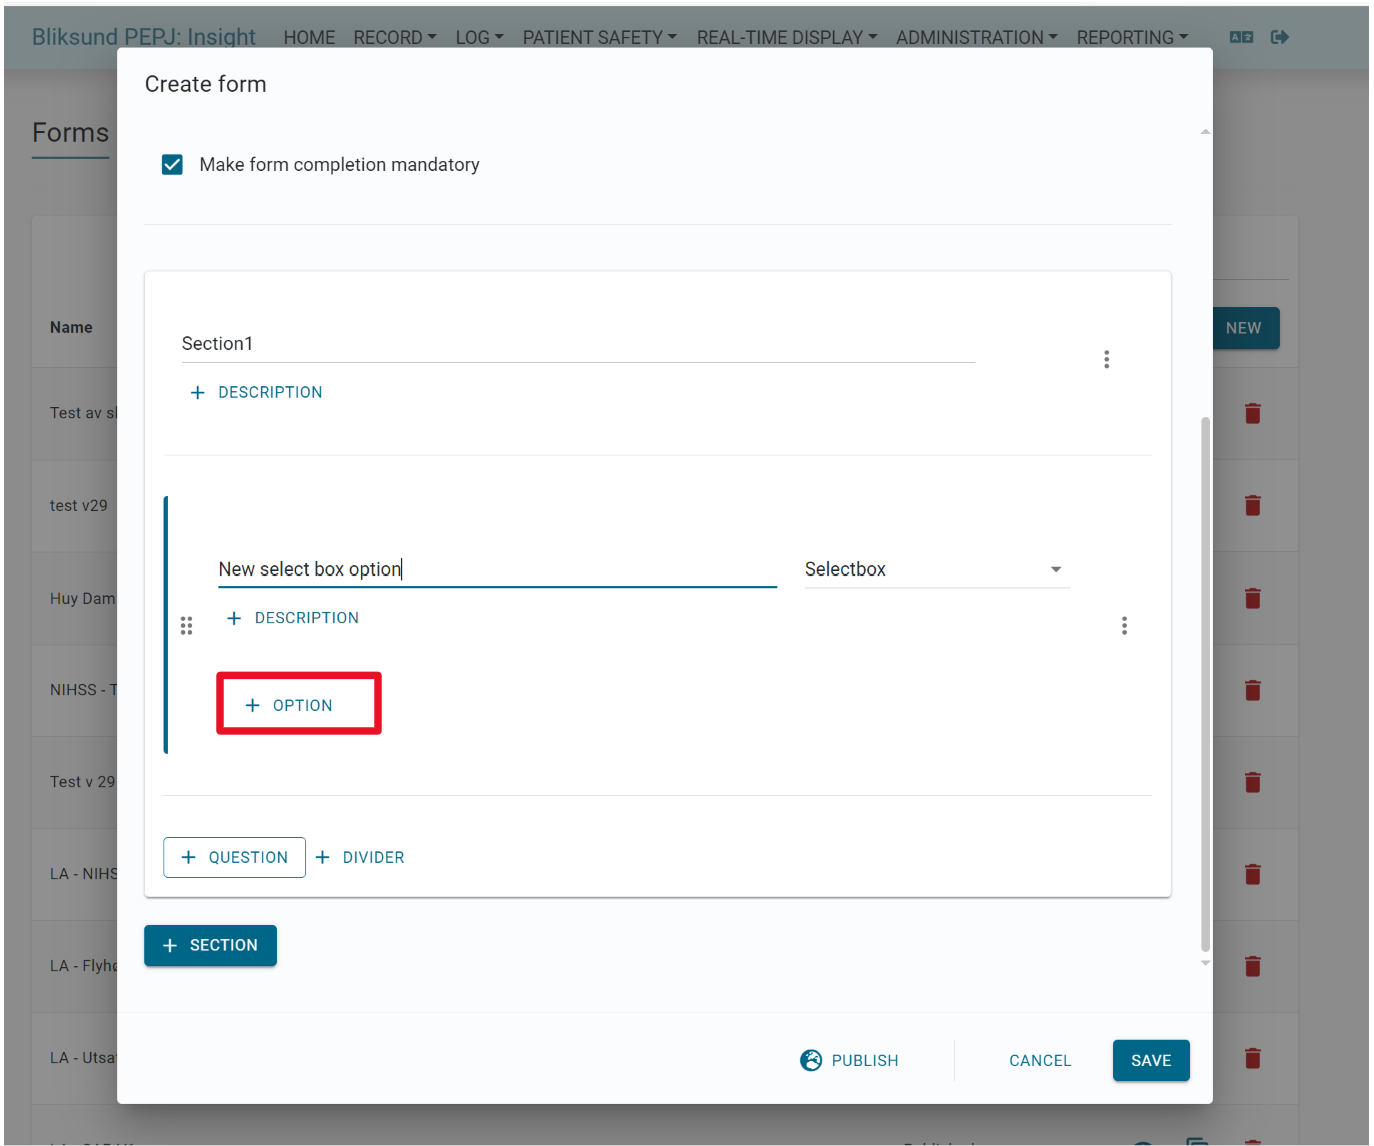
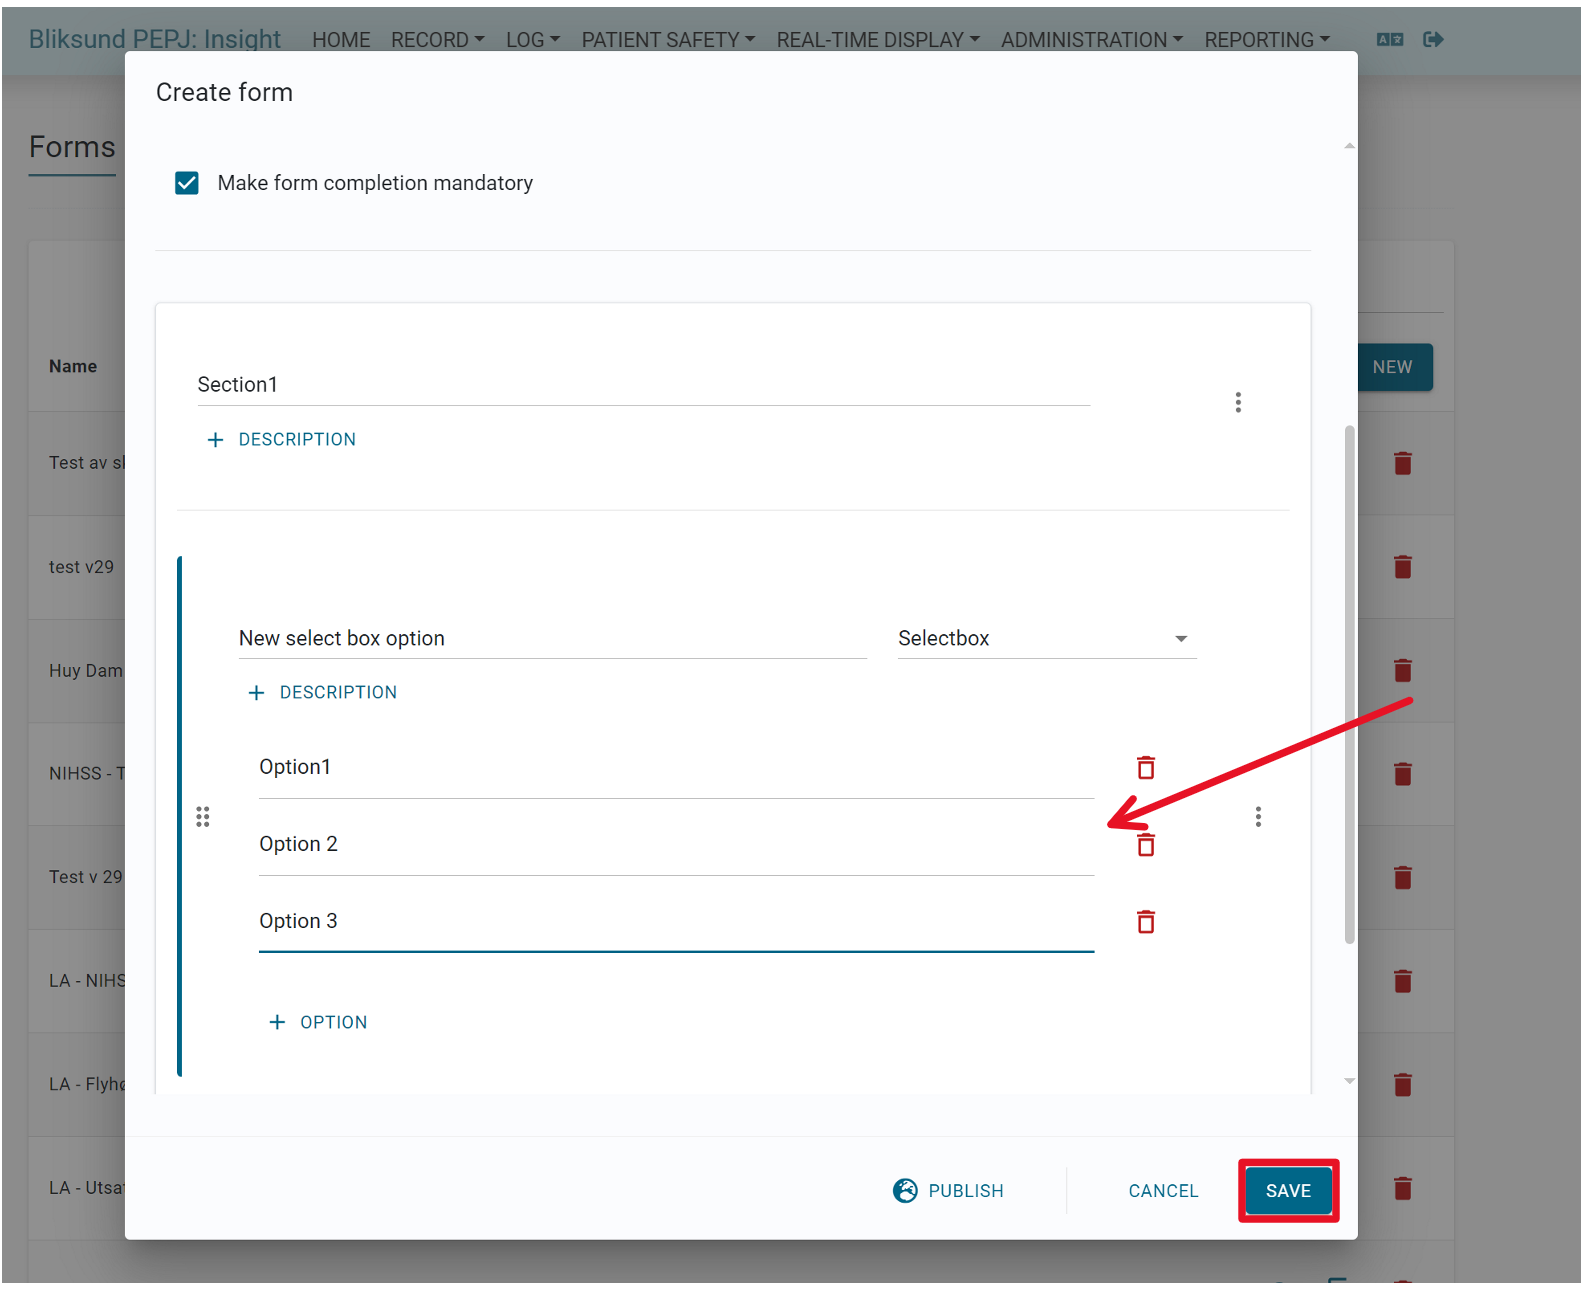
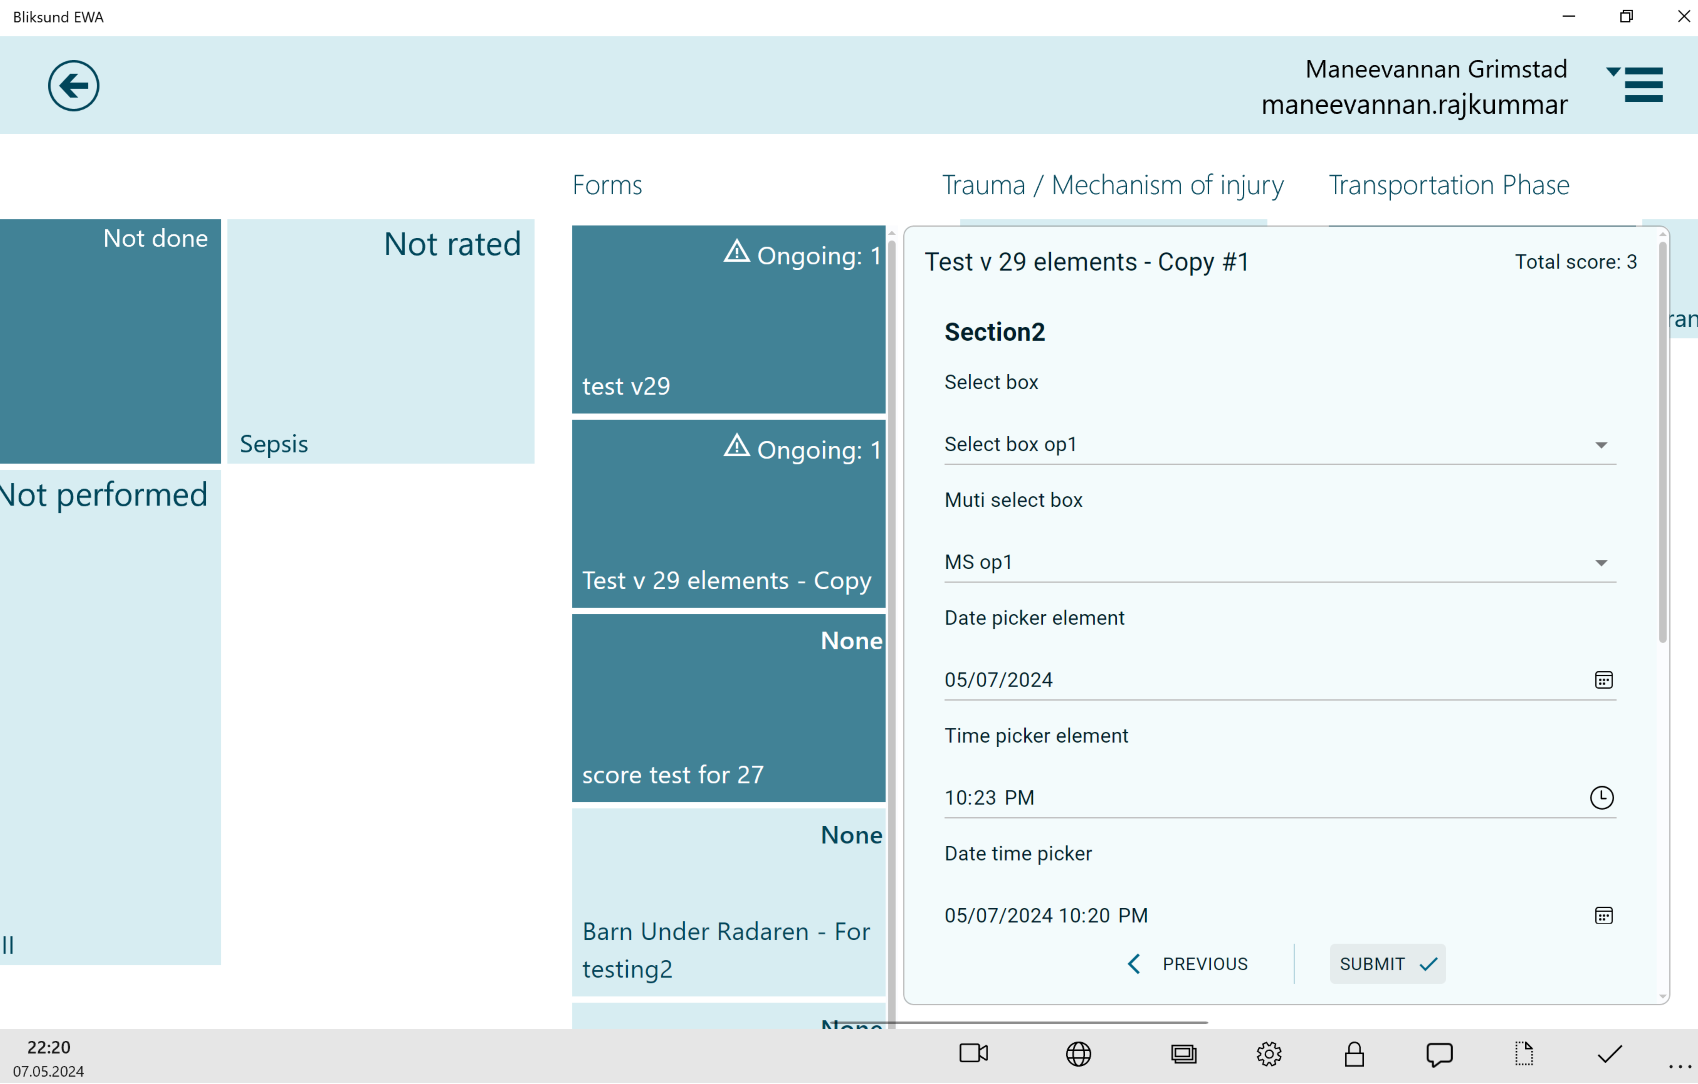
We've enhanced form configurability by adding support for new element types. Users can now integrate select boxes, multi-select boxes, date pickers, time pickers, date-time pickers, and number fields.
To configure forms with the new elements, follow these steps: create a form, add a section, and select the desired new element type from the dropdown menu. Customize the element by adding multiple options as needed. Save the form configuration to apply the changes.
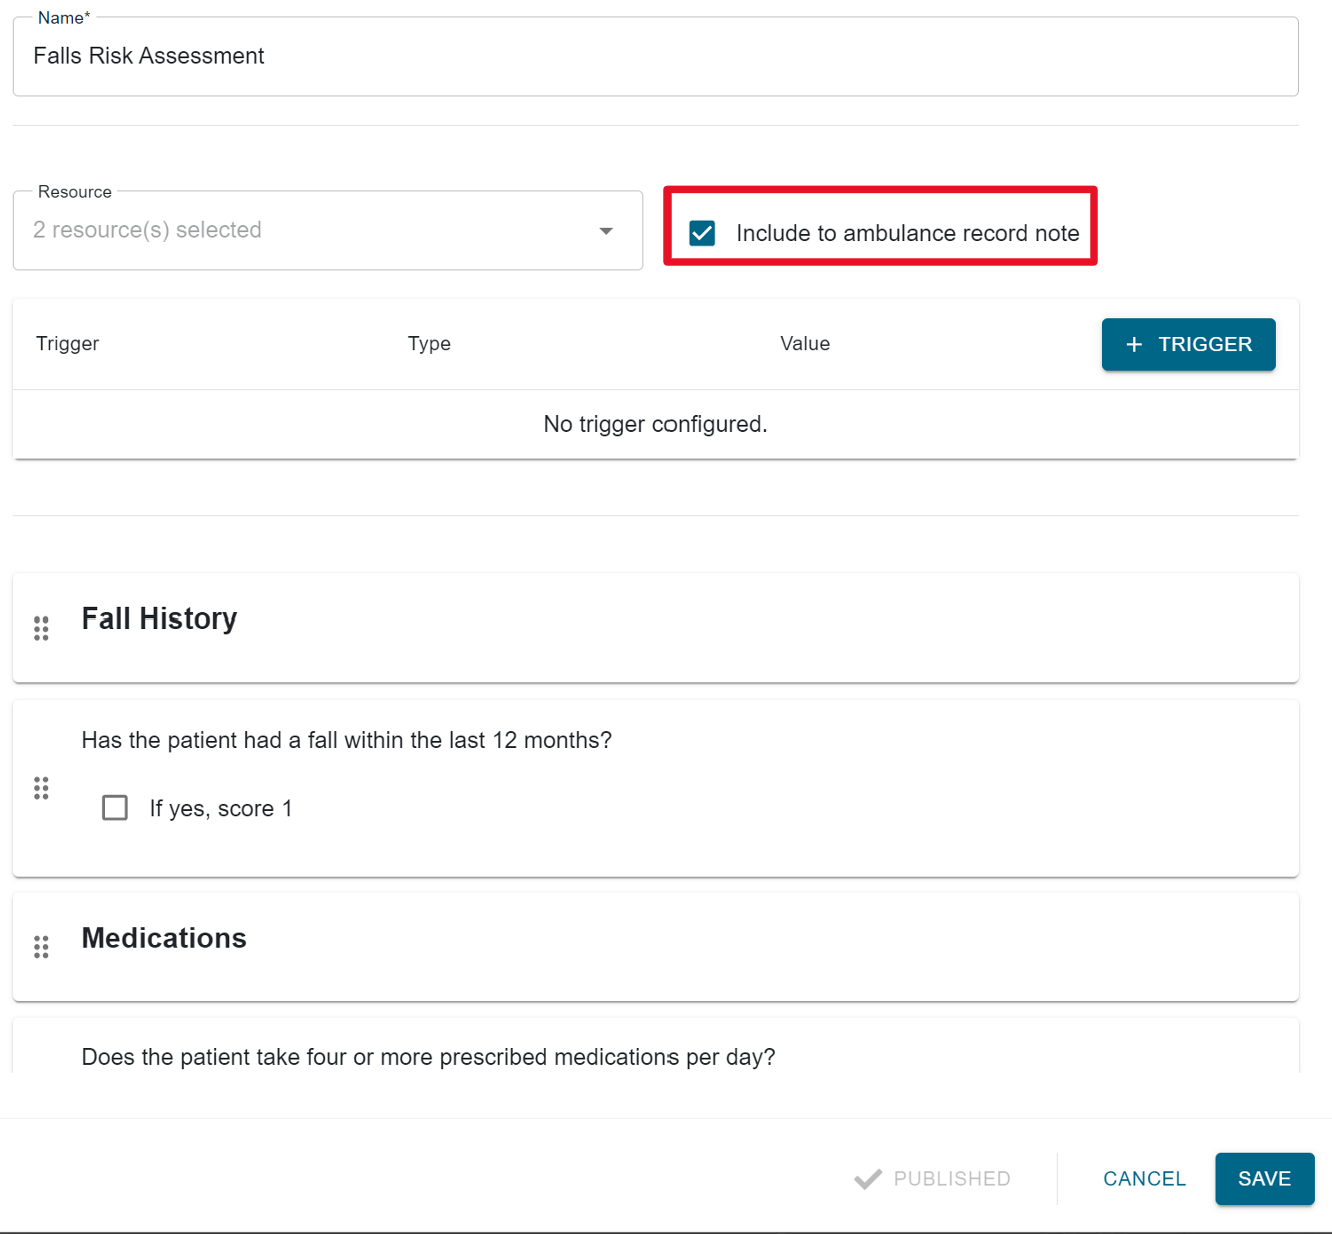
Enable including form data to ambulance record note
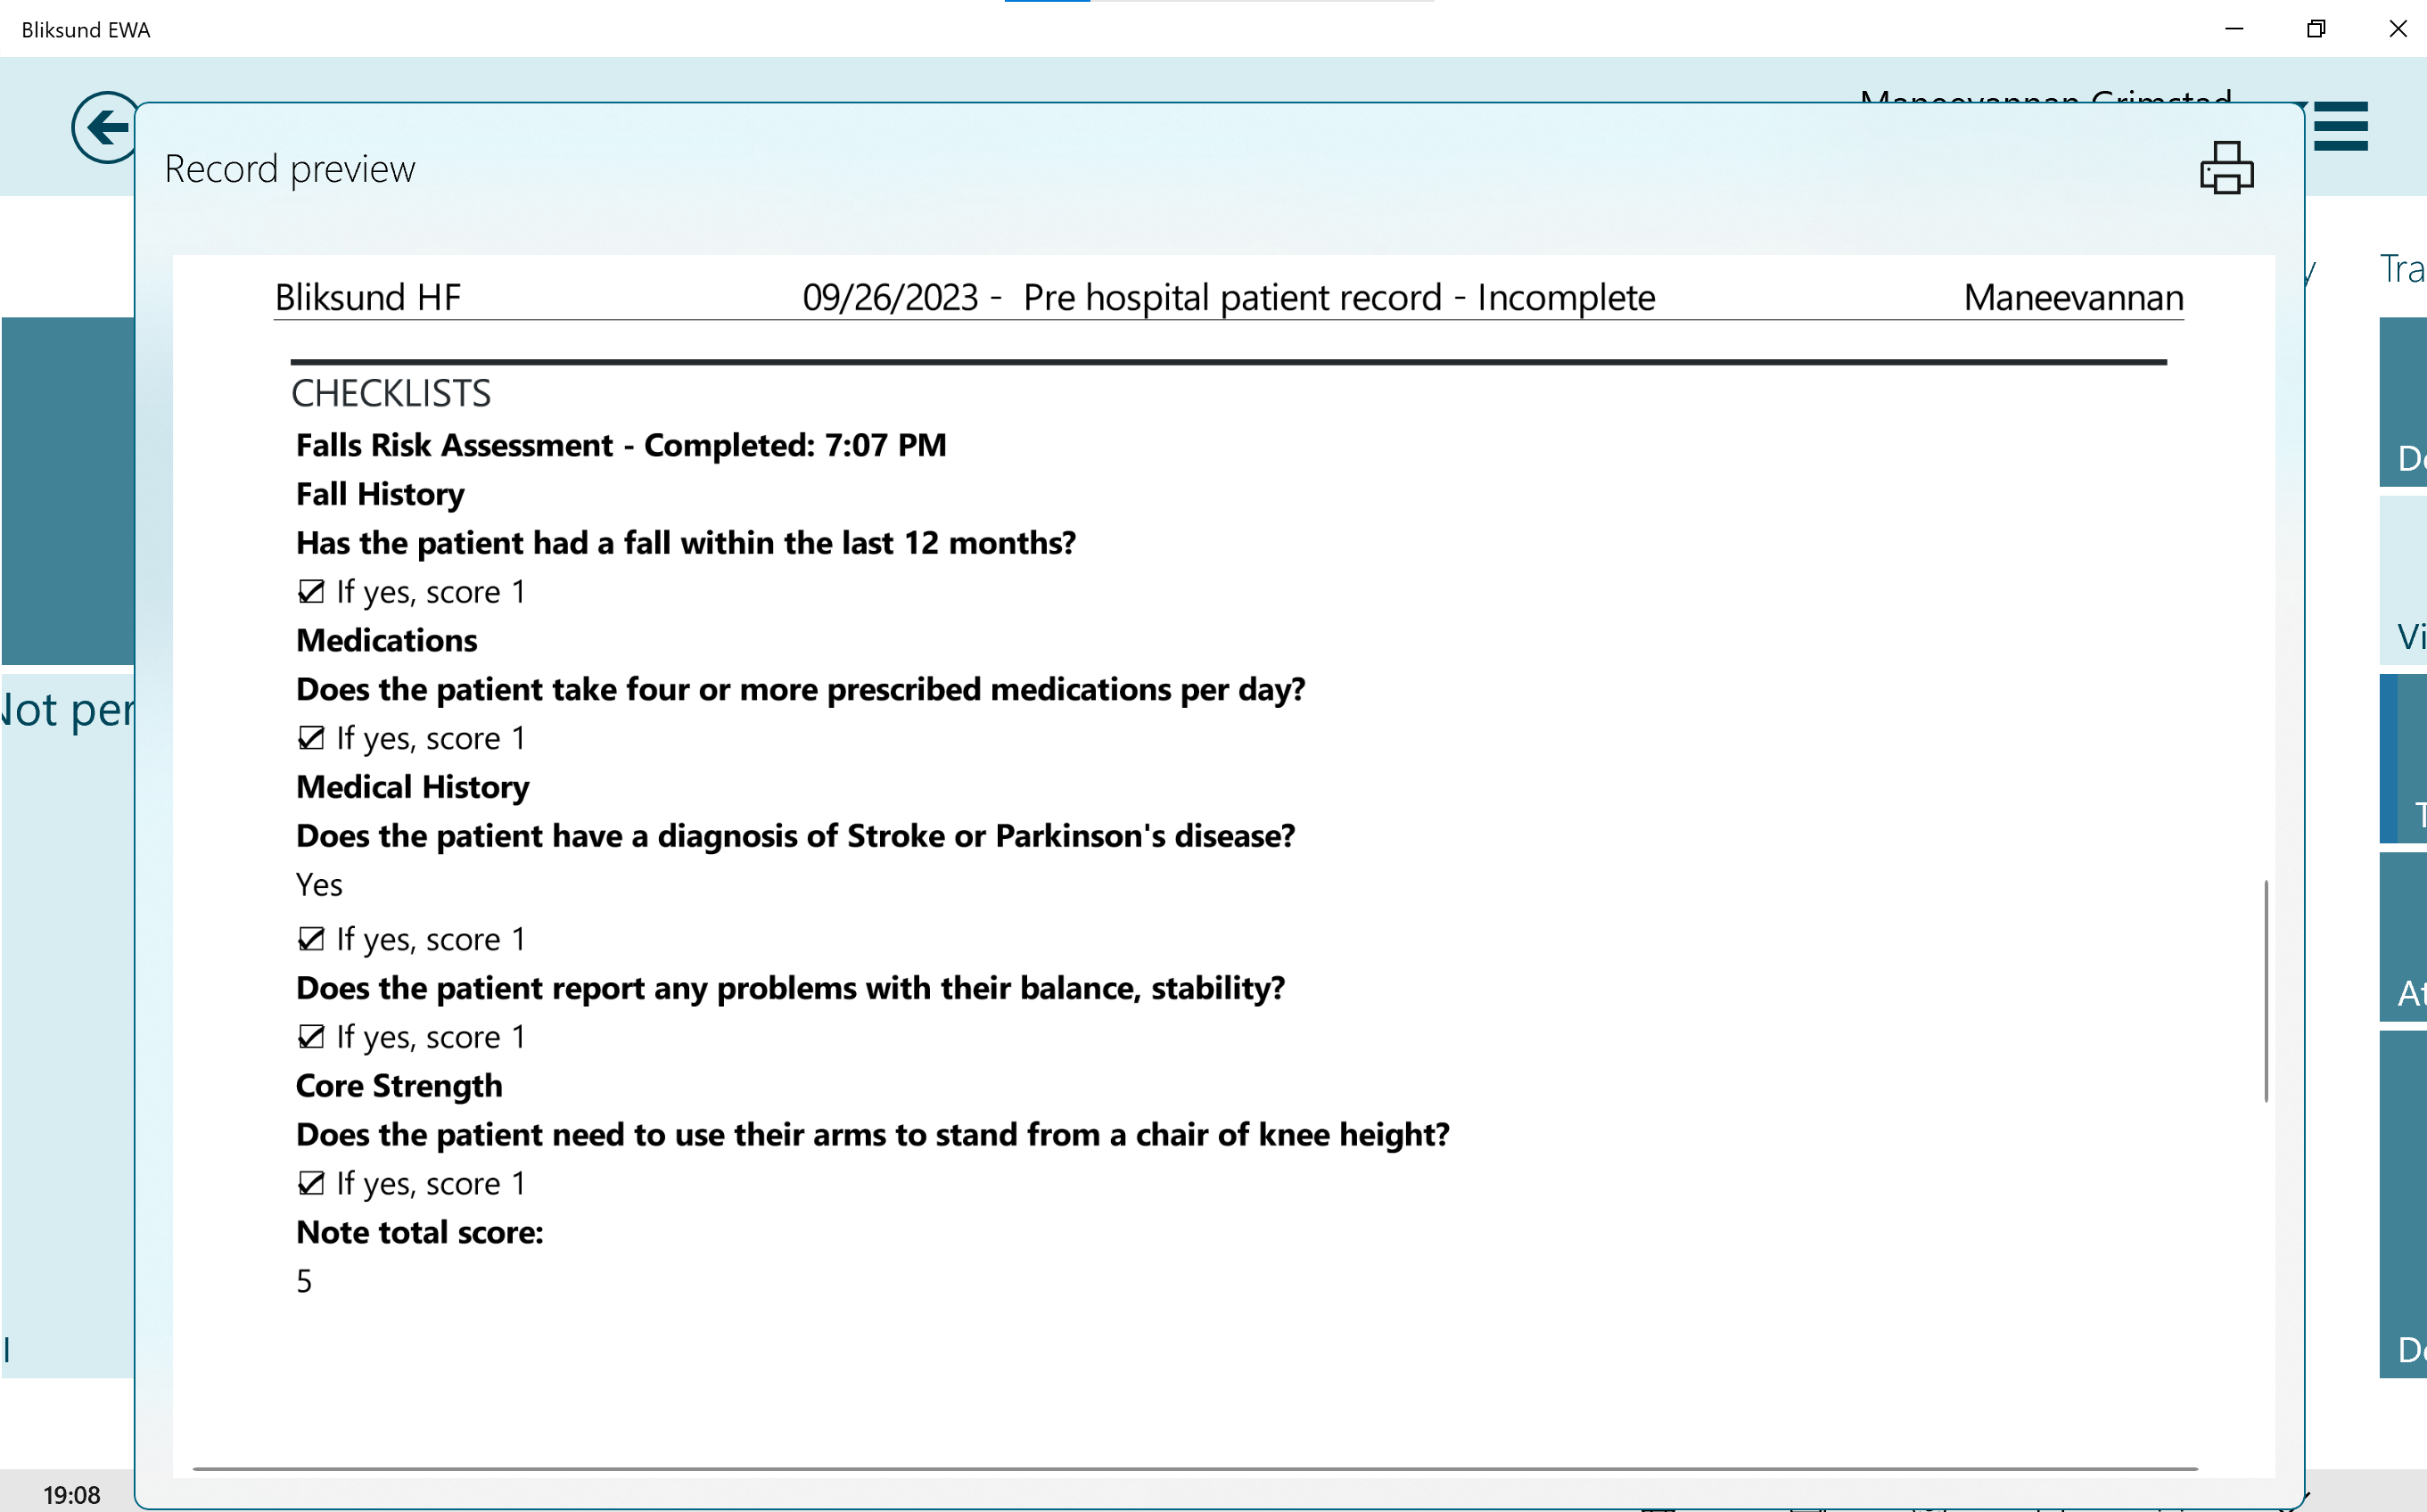
By default including form data in ambulance record notes is enabled in all forms created. All completed form responses filled in the mission in the EWA client will be included in the print preview generated in the client, journal print in Insight and PDF data exported to DIPS/DocuLive. To print the completed forms from the journal details page 'Include to ambulance record note' should be enabled for the form(Printing completed forms feature is released to the customers in release 23).
From release 24 users can print the completed form if they have print journal access, disabling 'Include to ambulance record note' will not hide the print option in the form page.
Modify form
Only the drafted forms can be modified in all fields of the name, resources, triggers and elements. Click on the Edit button next to your drafted form and modify it.
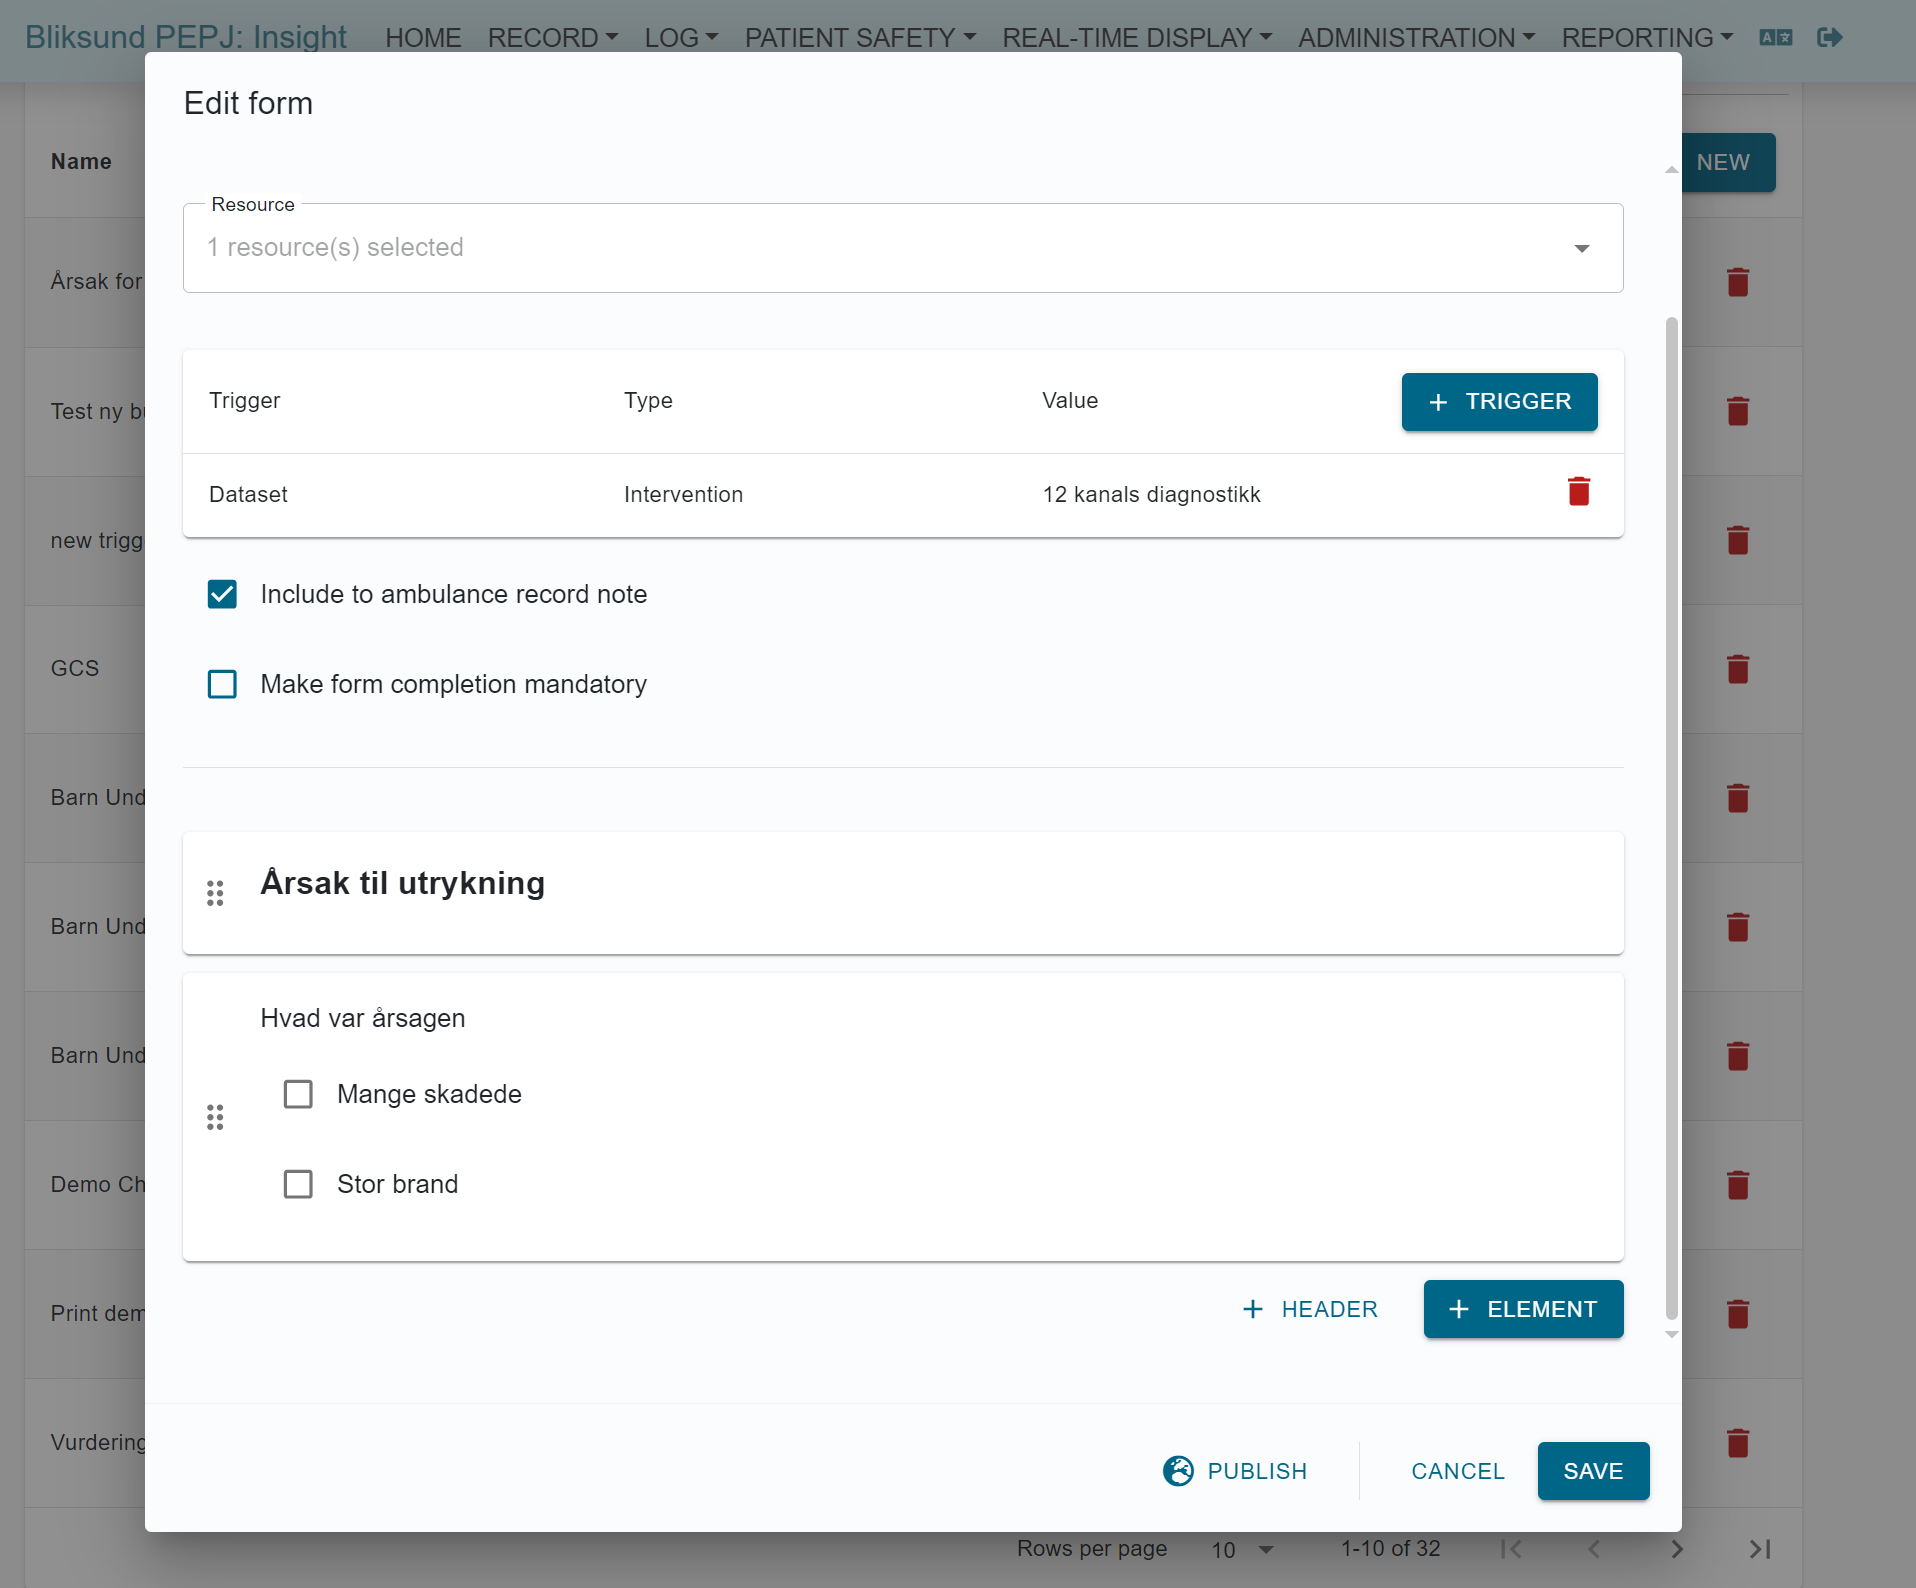
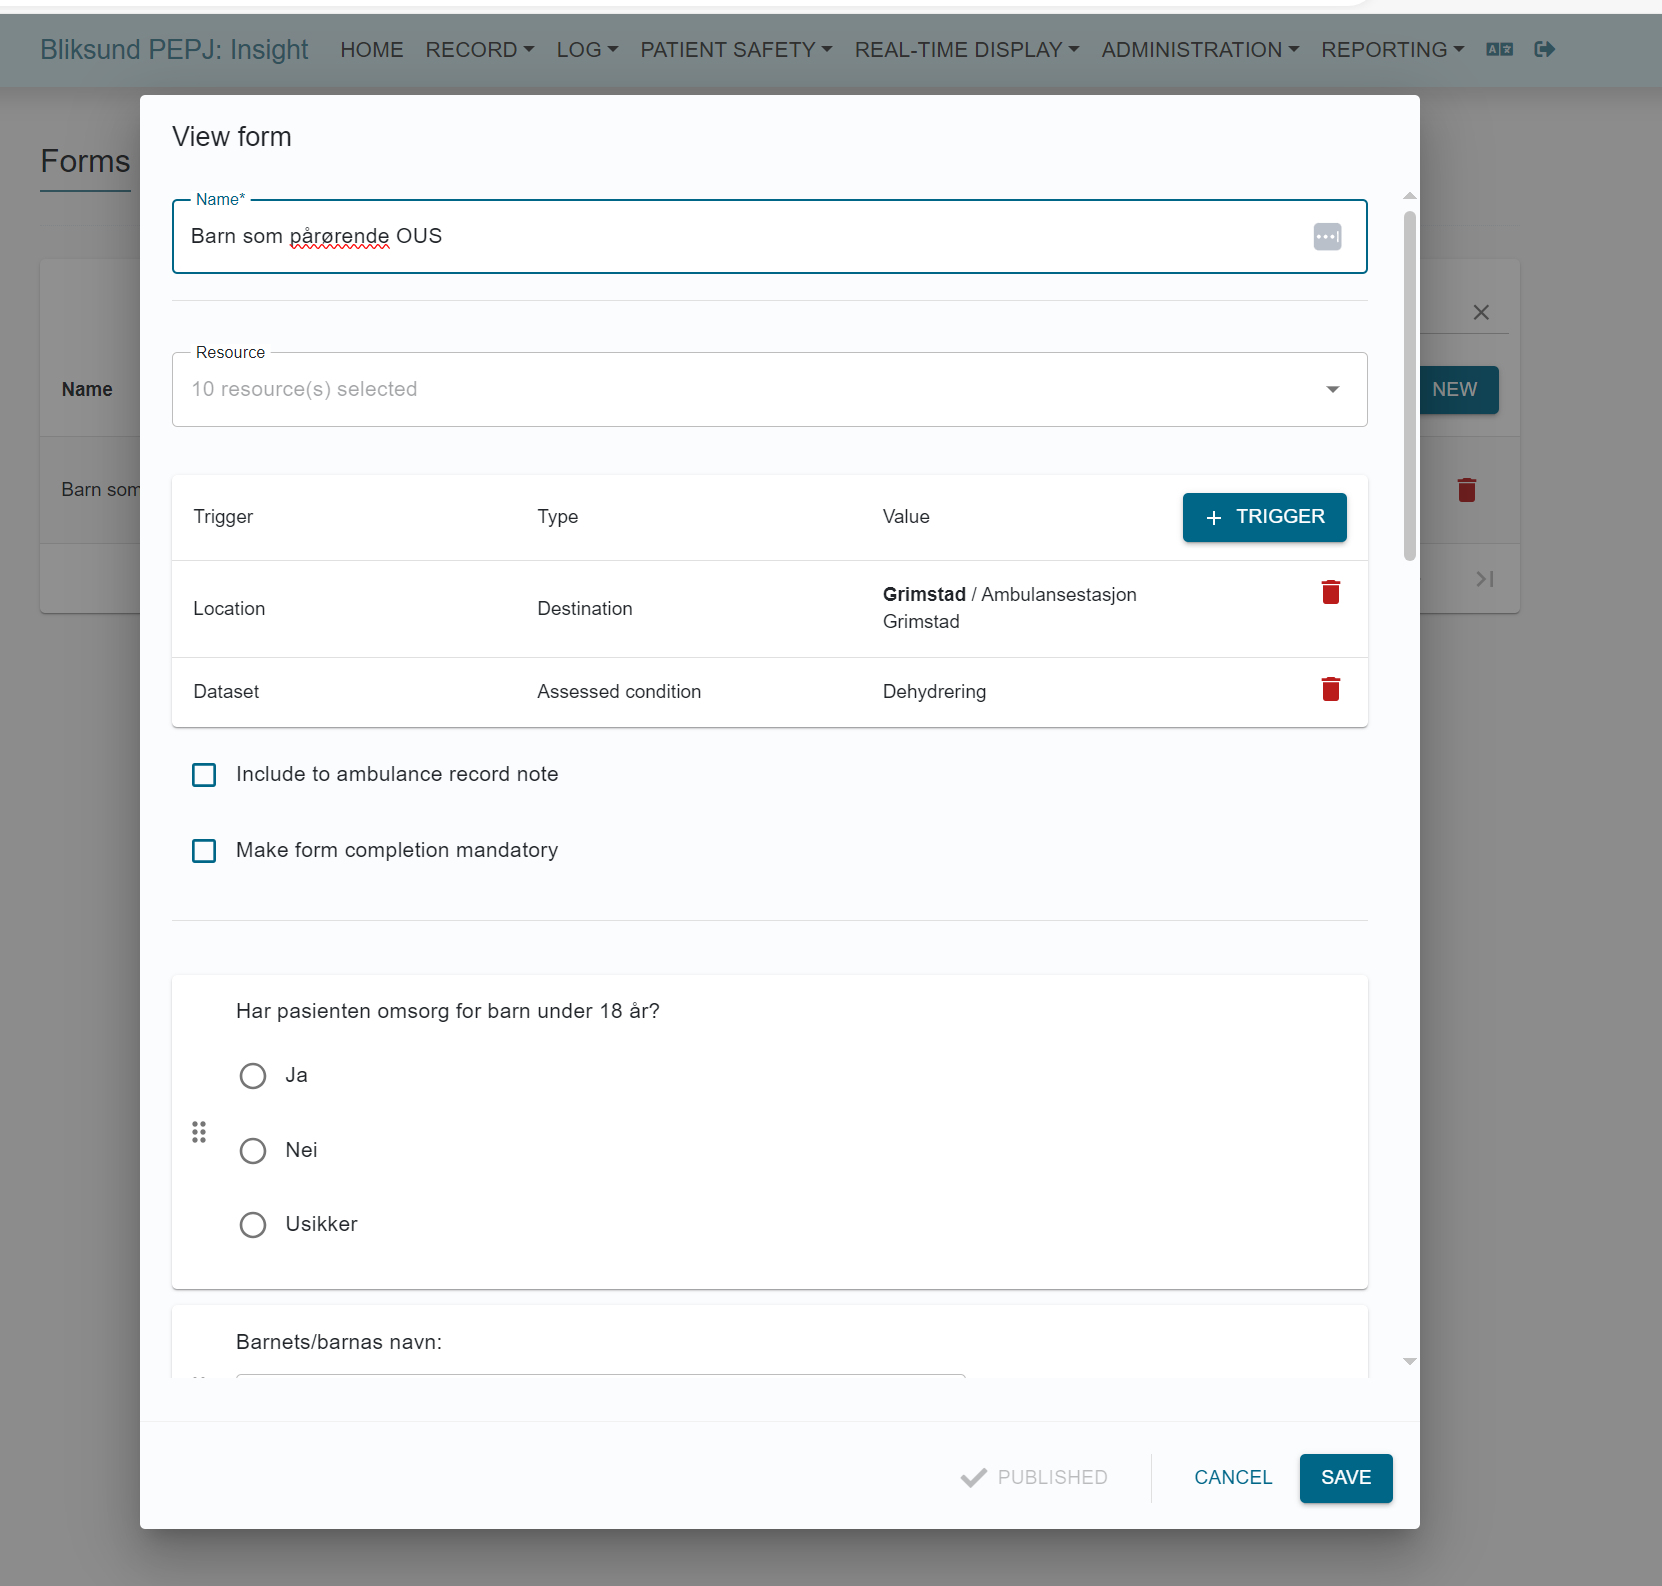
View form
Click on the 'View' button next to the published form to view it. In the view form dialog, elements can not be edited, only names, resources, triggers and enabling/disabling of including form response to ambulance record notes are editable.
Duplicate form
To duplicate an existing form, click on its Duplicate button next to the form that needs to be duplicated. The duplicated dialog will be opened with the whole name (with suffix) and elements populated.
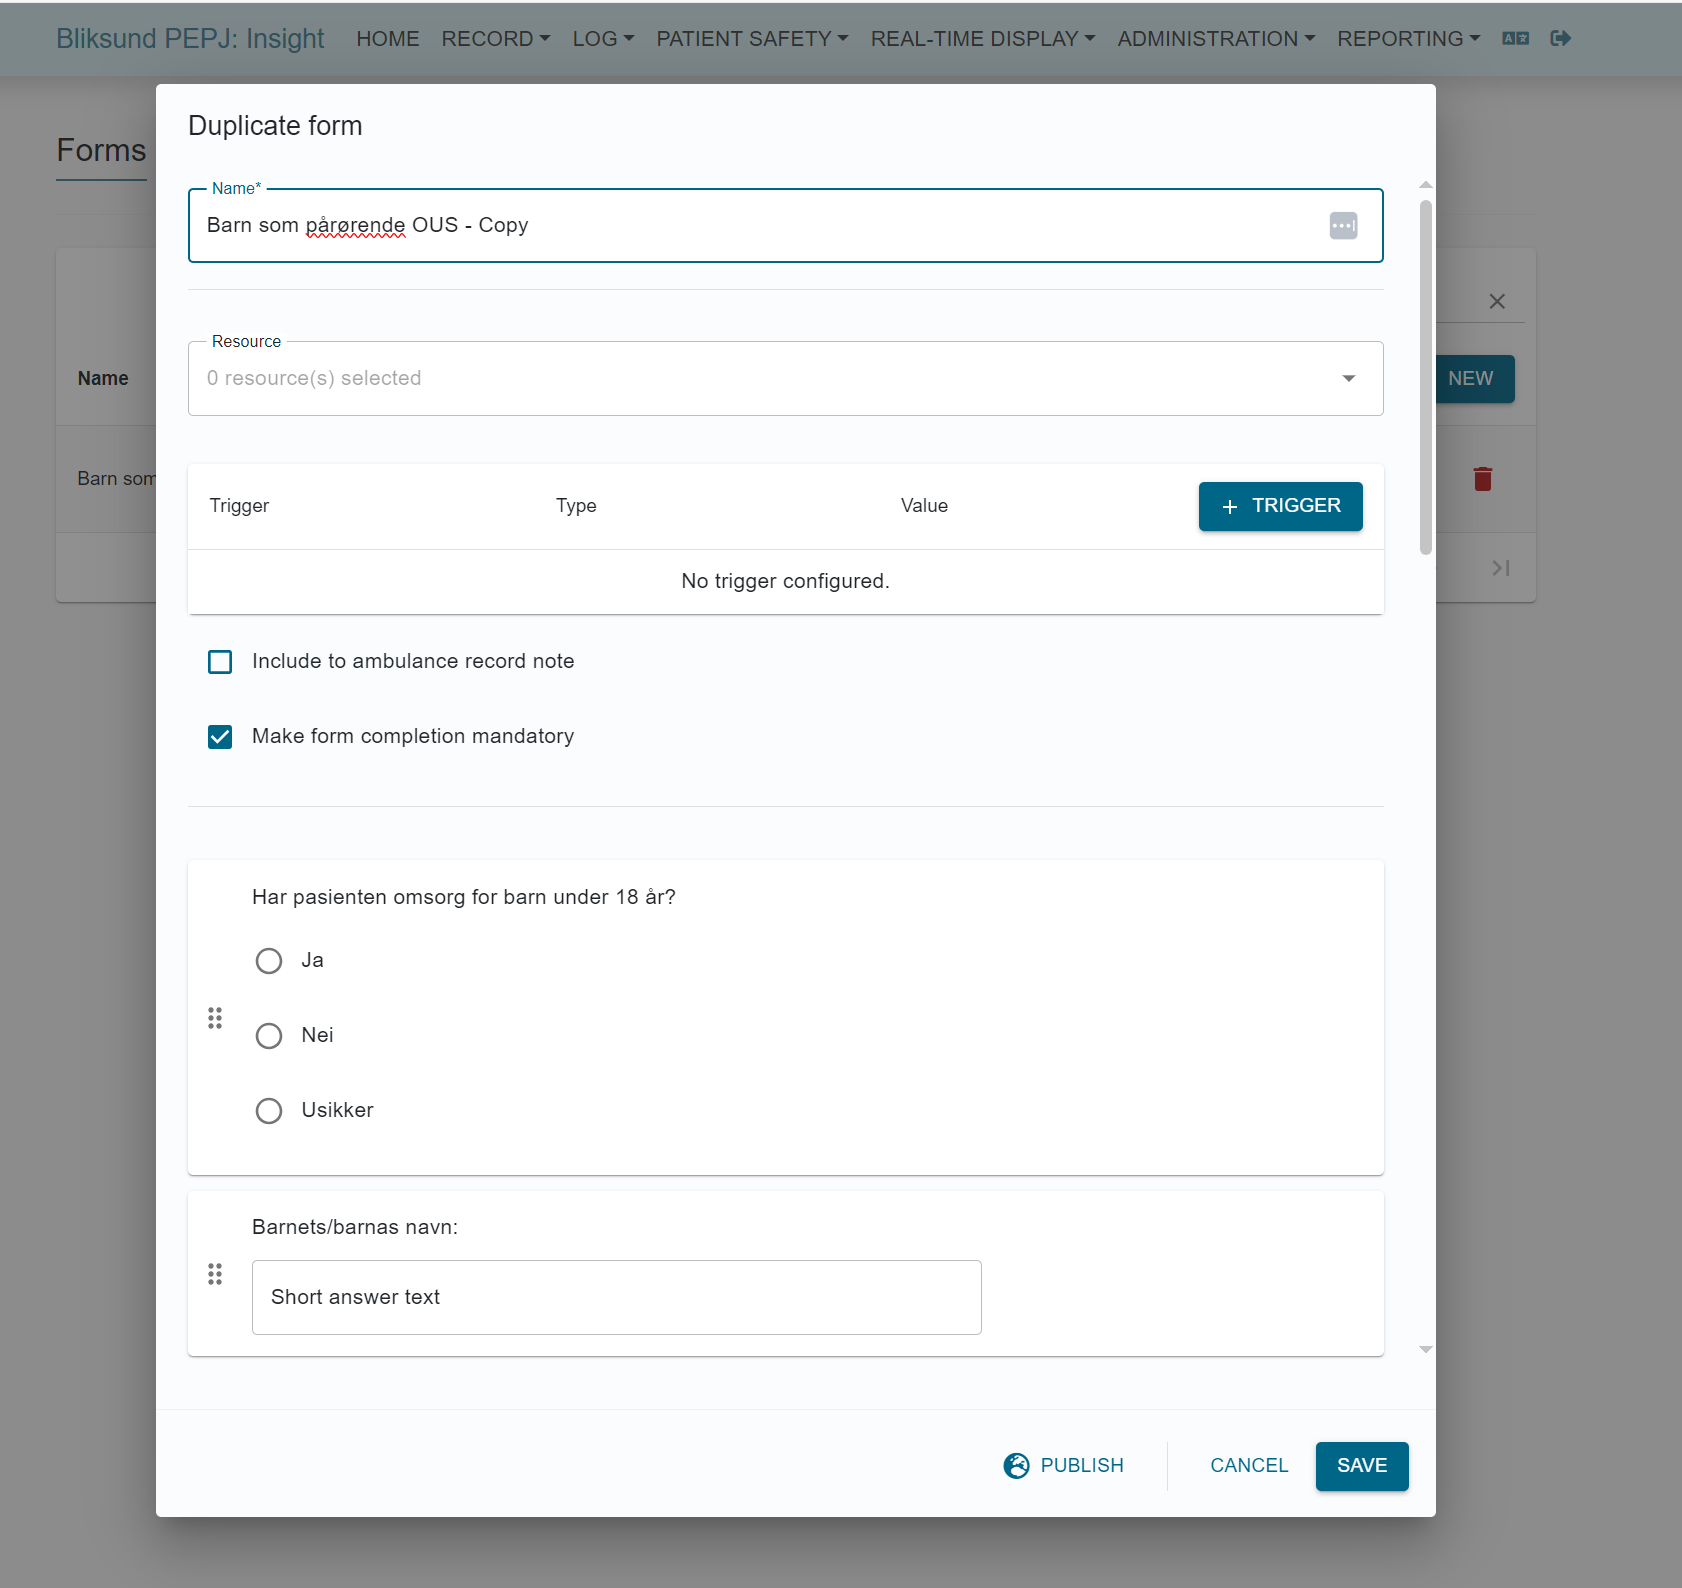
The duplicated form can be modified as a new form and then saved or published.
Export and import published form
*Introduced in release 28*
We've implemented a new feature on the form configuration page, providing users with the ability to download published forms in JSON format and upload JSON files for enhanced form configuration convenience. This feature significantly improves usability by allowing for seamless form management across environments. Please note that the downloaded JSON files contain the form's contents but exclude triggers and resource connections.
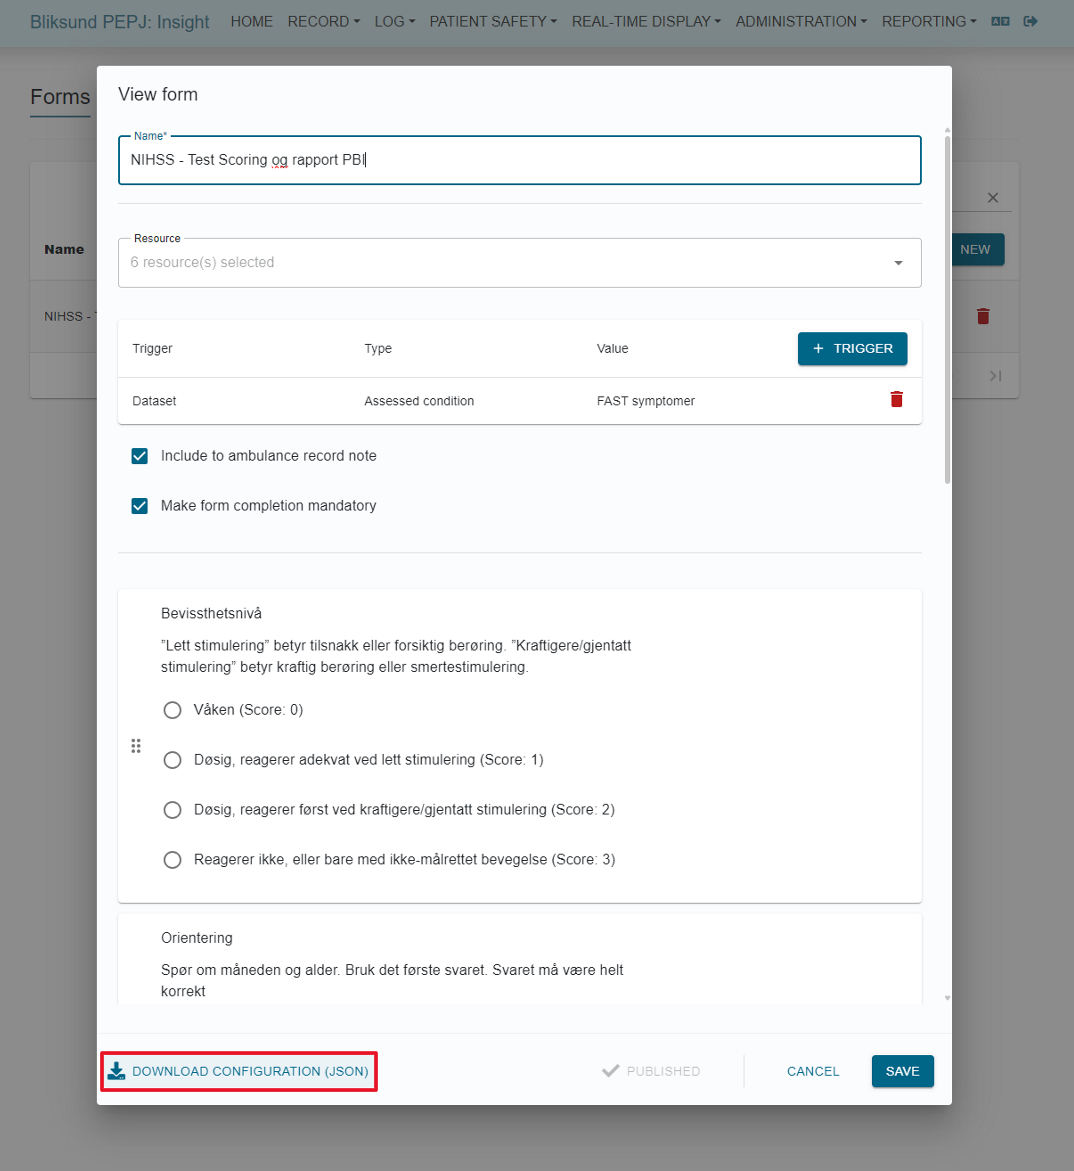
To export a published form, click on the View button and then select the Download configuration option to export the form configuration into a JSON file.
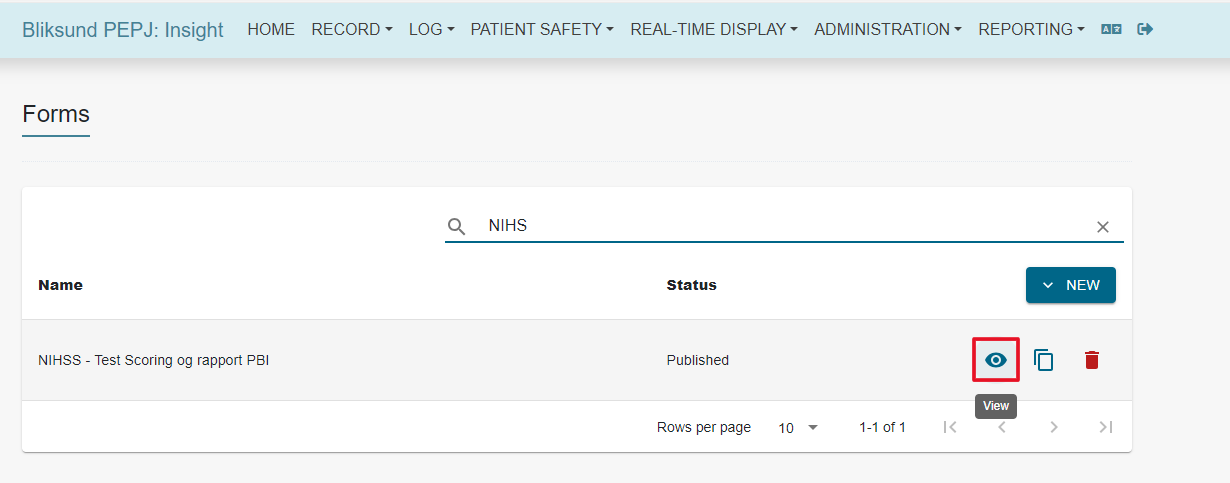
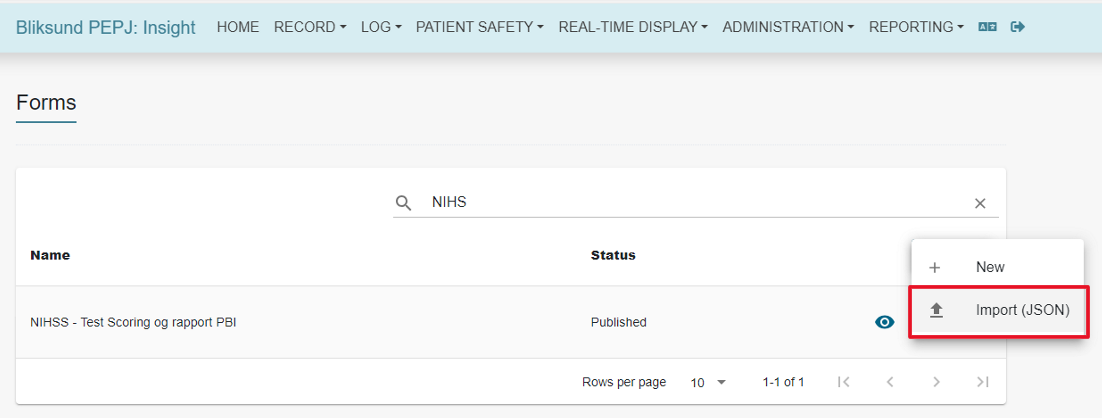
To import a published form, click on the New button on the form configuration page and then select the Import option in the dropdown.

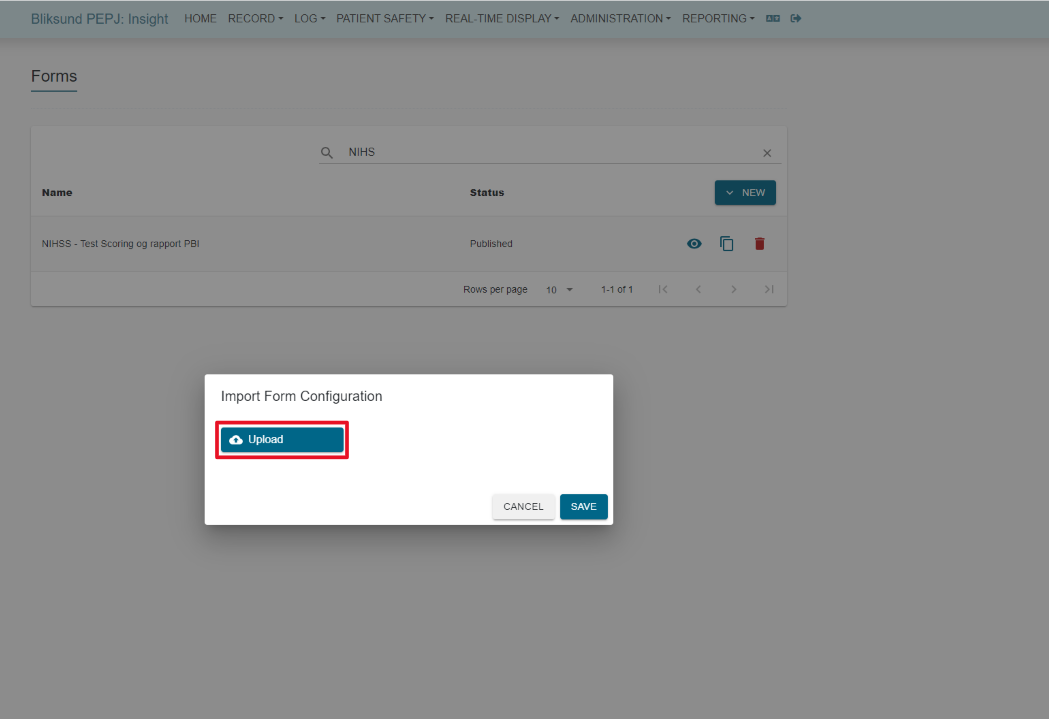
Click the Upload button in the import configuration pop-up, select the JSON file (Exported JSON), review the contents, and then click Save.
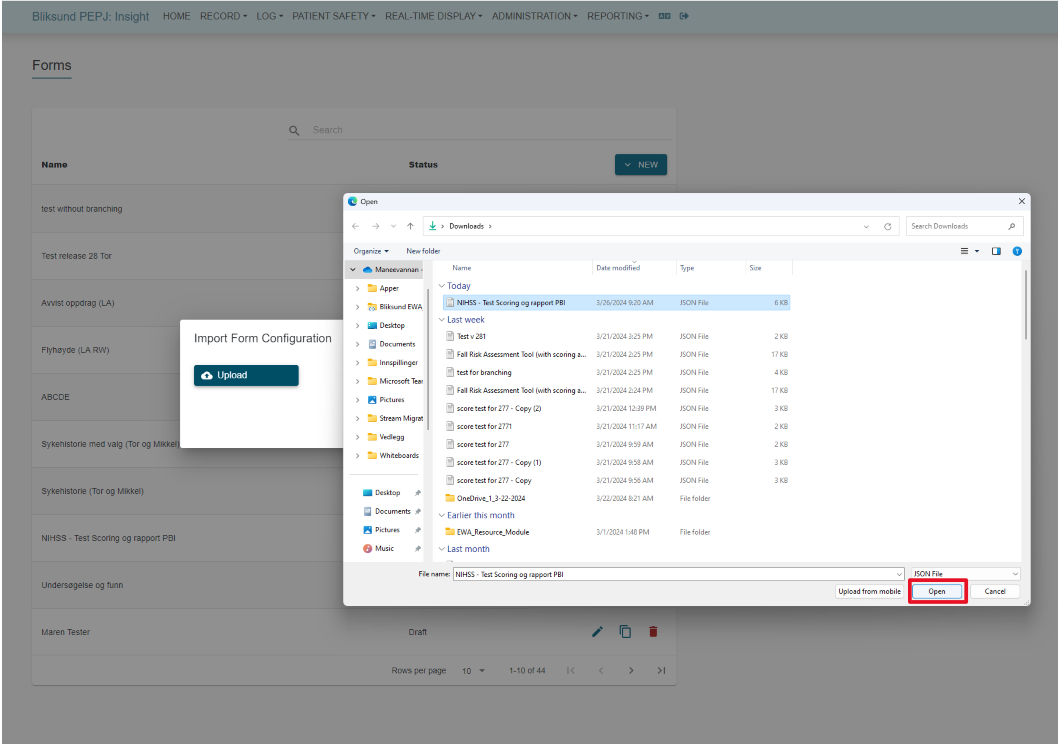
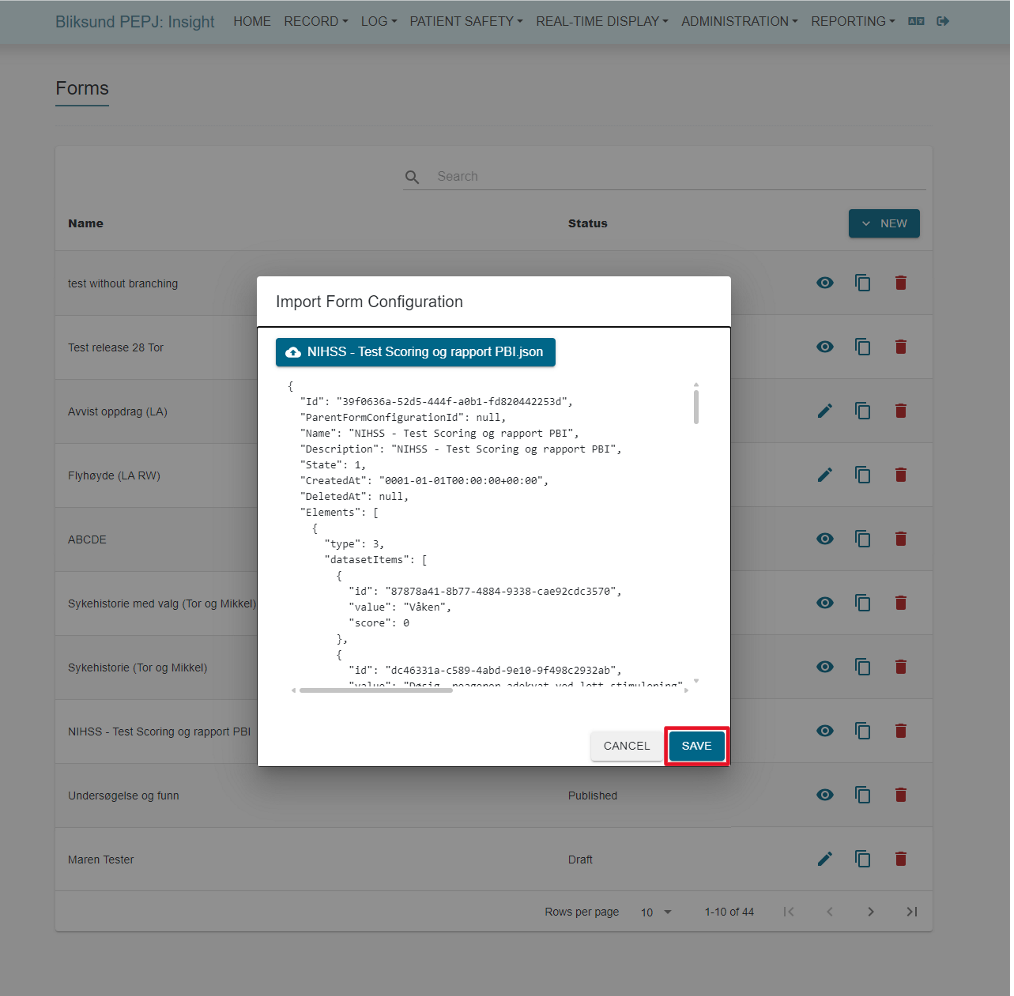
Upon import, the form will be in the published state. If users intend to make modifications to the imported form, it is advisable to utilize the duplicate function. This allows modifications to be made in a draft state before publishing.
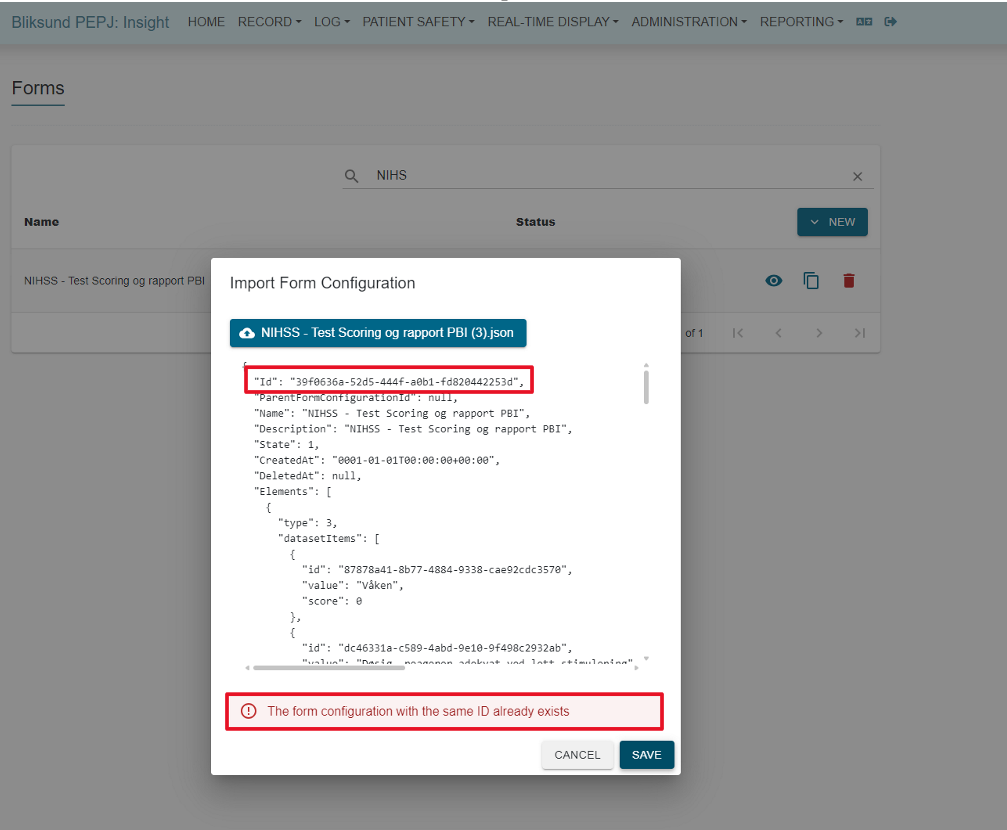
The form configuration ID exported in the JSON is the same across environments. If an attempt is made to import a JSON file with an existing form configuration ID, it will result in the following error message.
Branching Conditions For Sections
*Introduced in release 30*
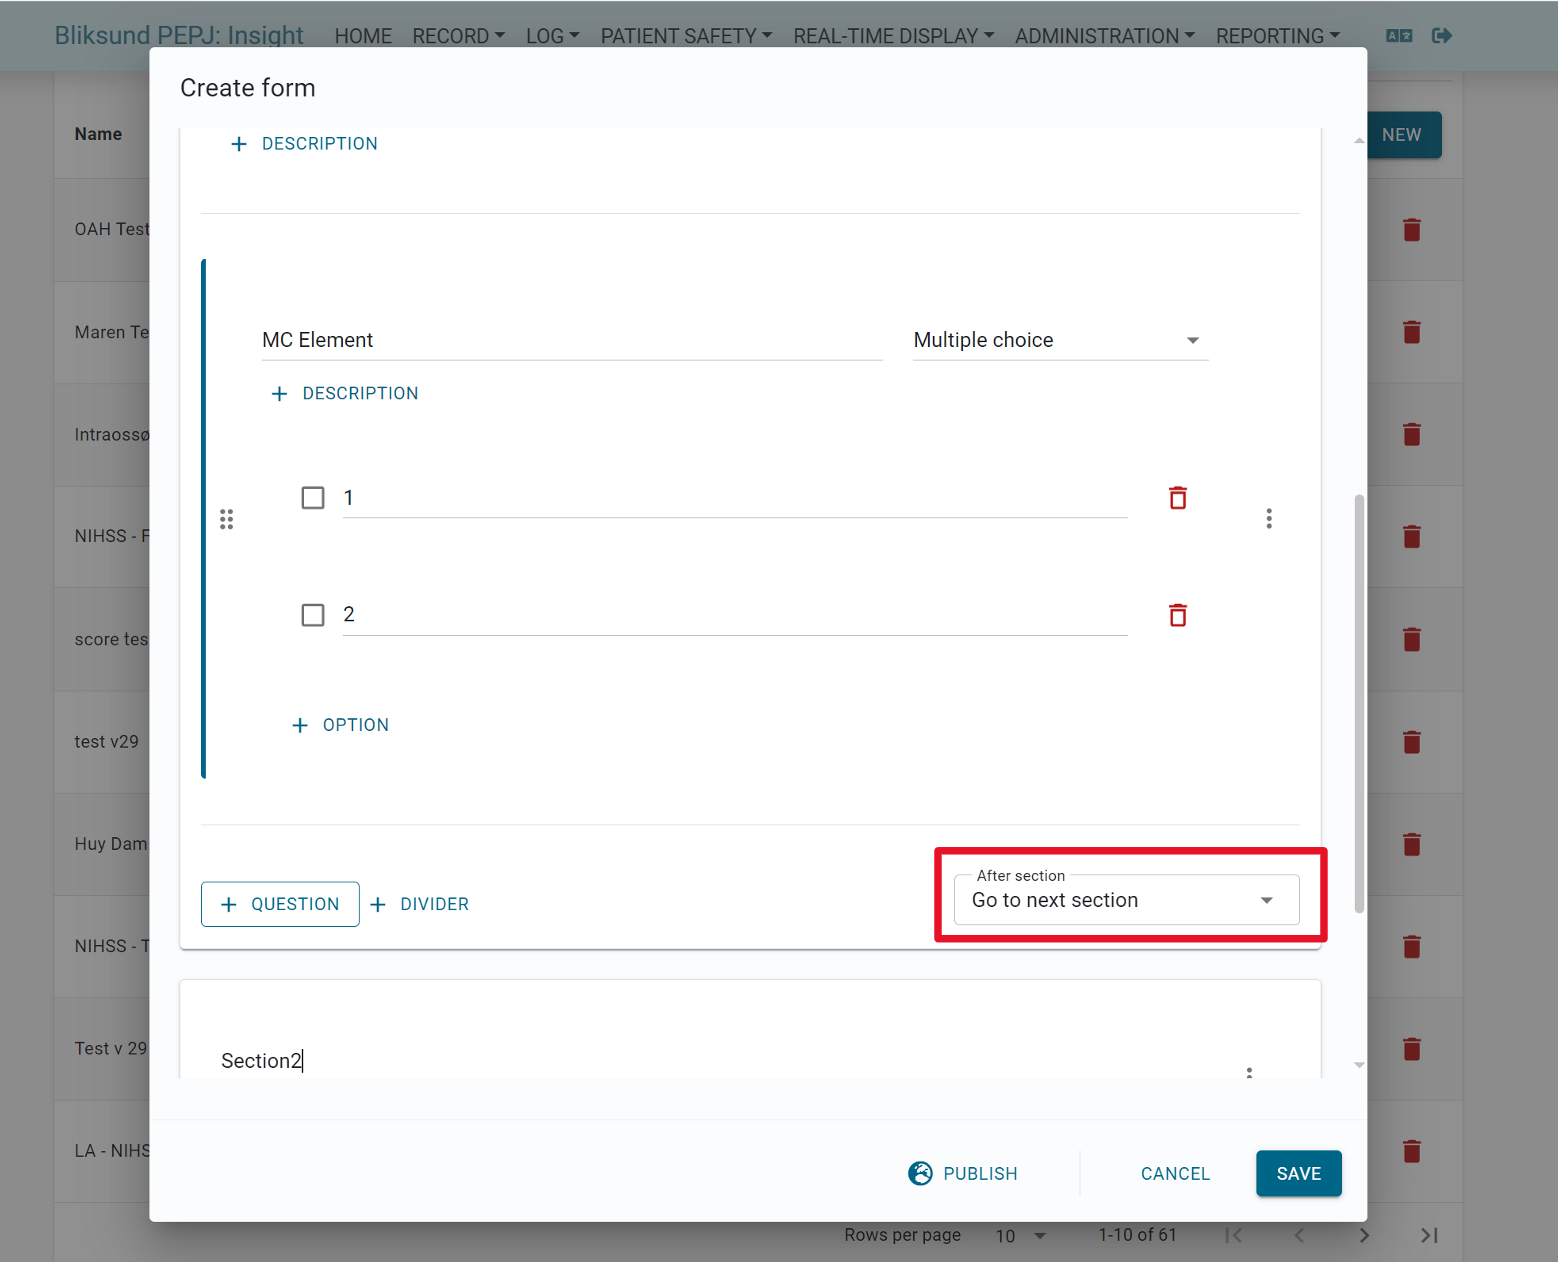
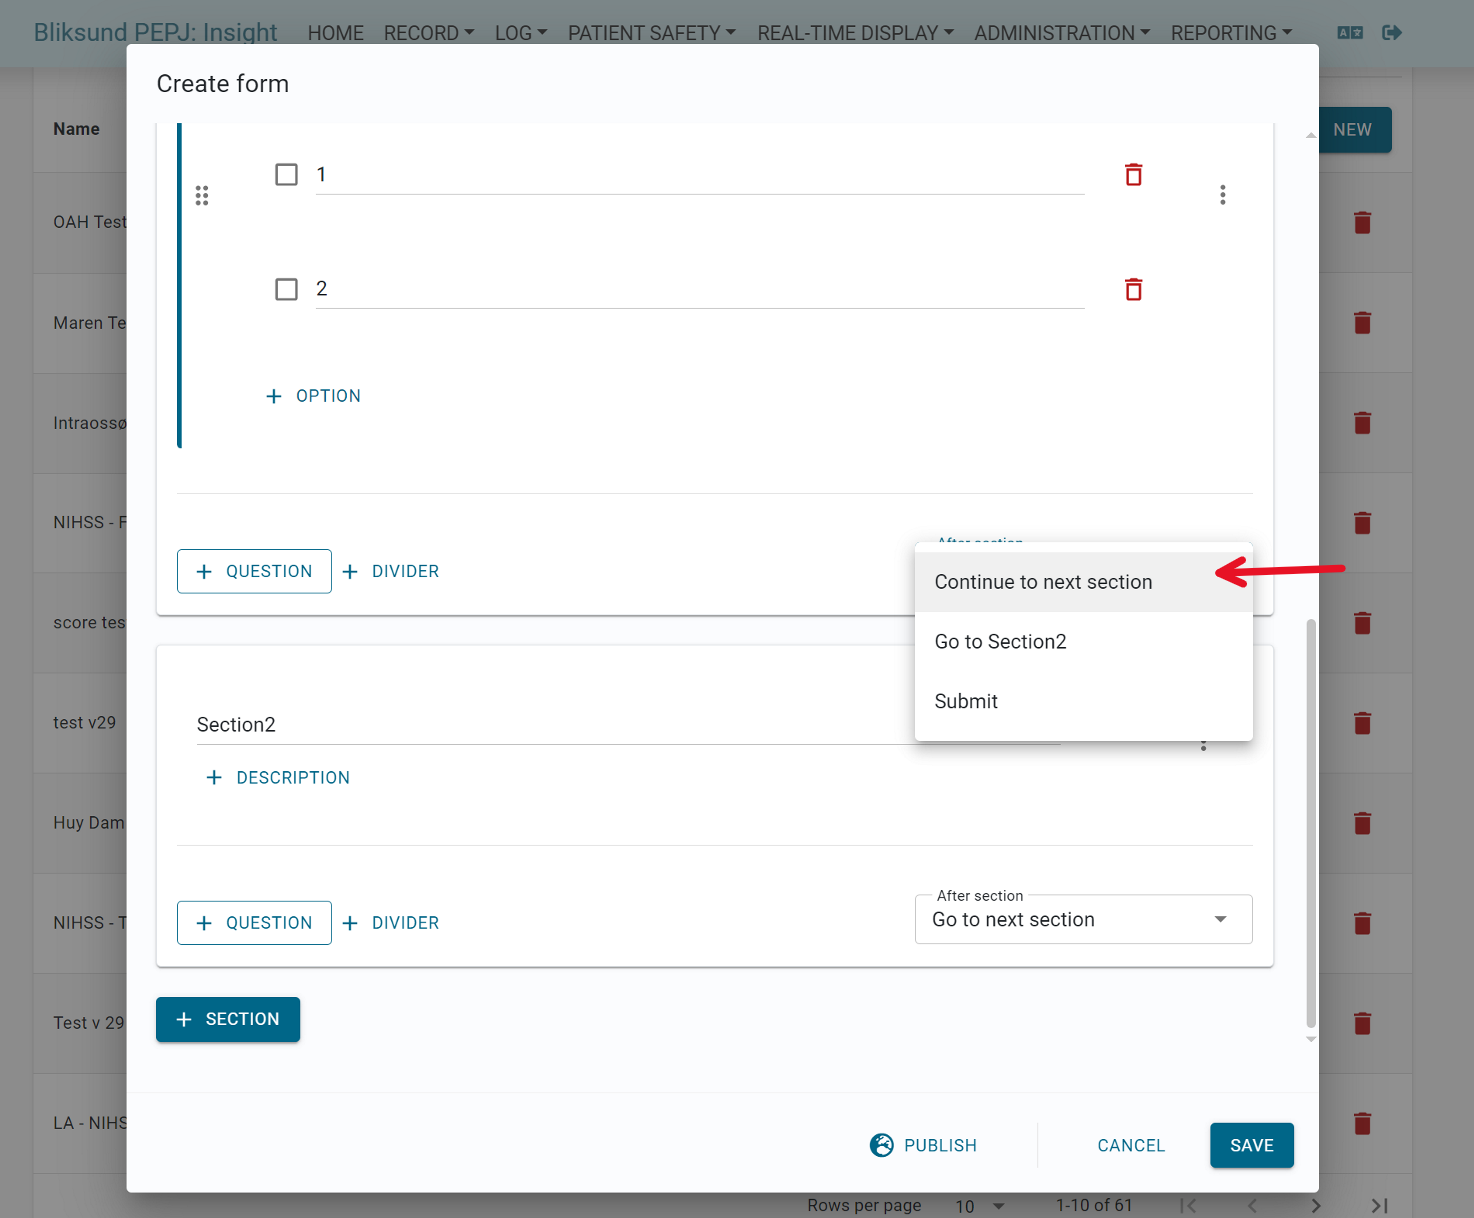
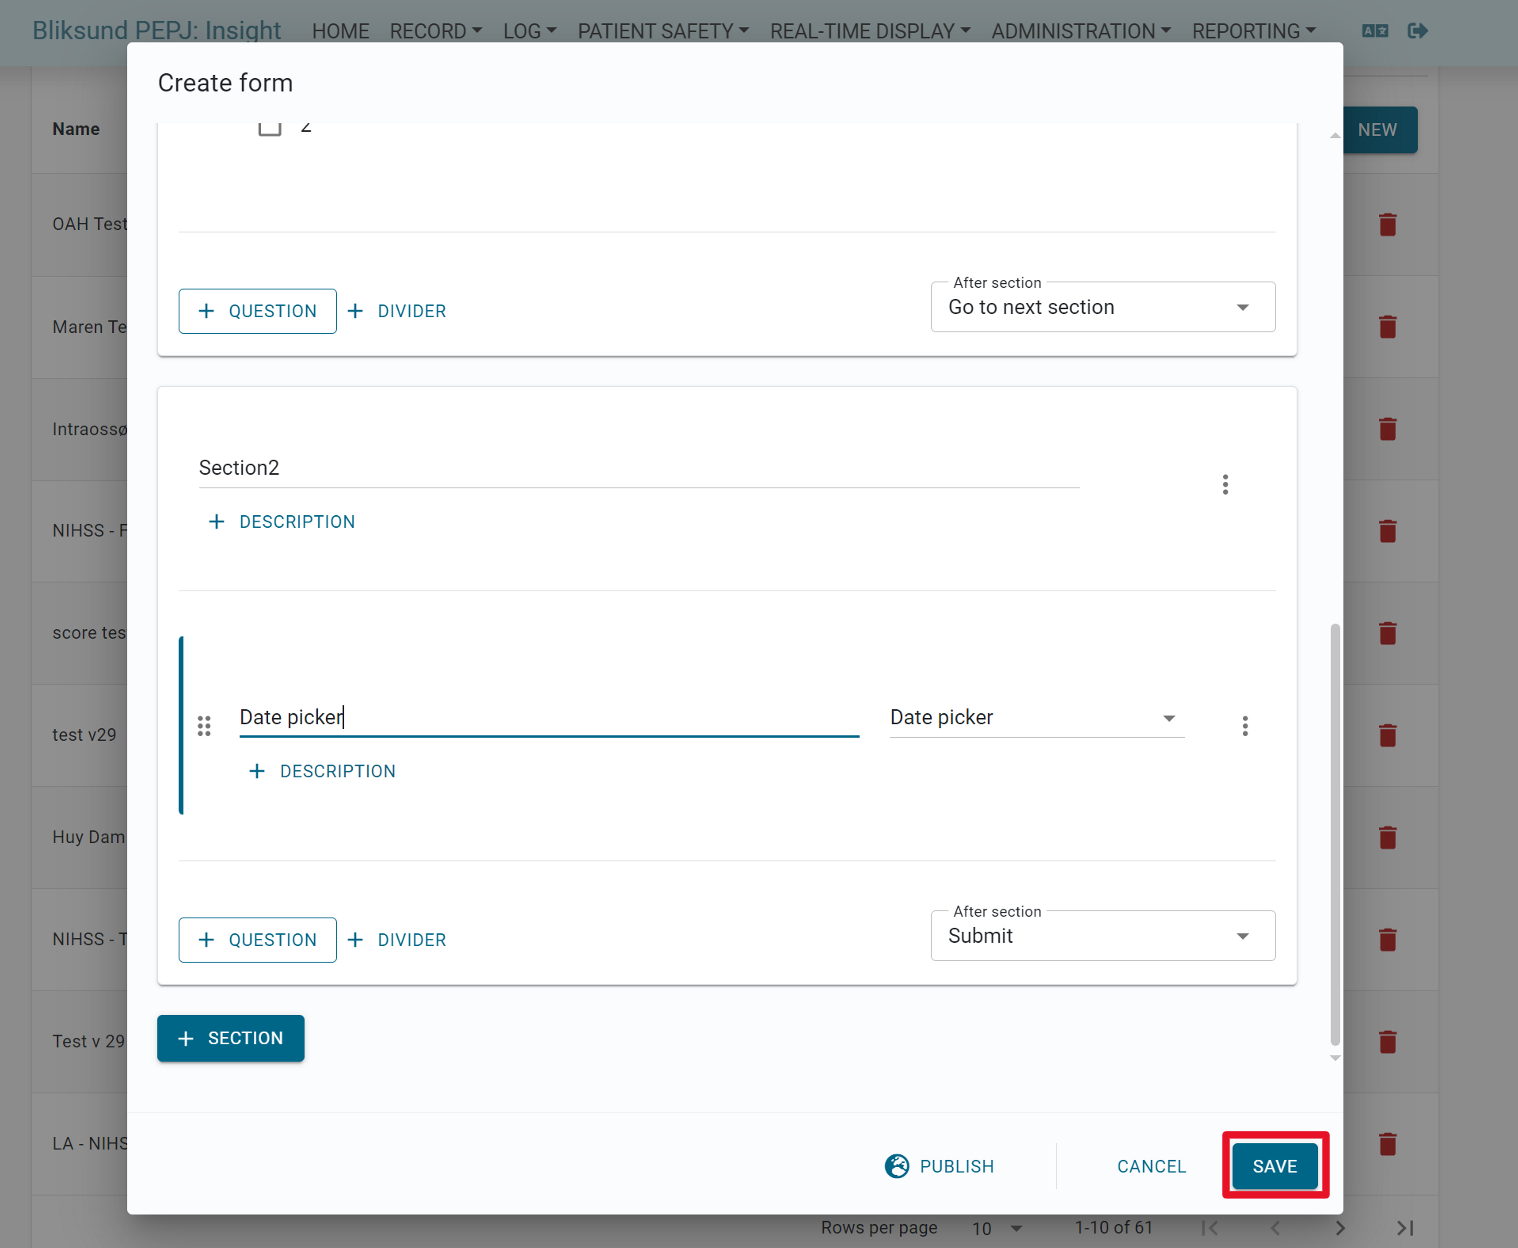
We have introduced a new feature that allows users to set branching conditions for sections. This enables users to customize the flow after completing a specific section, including options to navigate to different sections or submit the form.
To set branching conditions for sections, create a new form with multiple sections and elements. Then, select the "after action" option for each section and save the configuration.
Preview Form In Form Configuration
*Introduced in release 30*
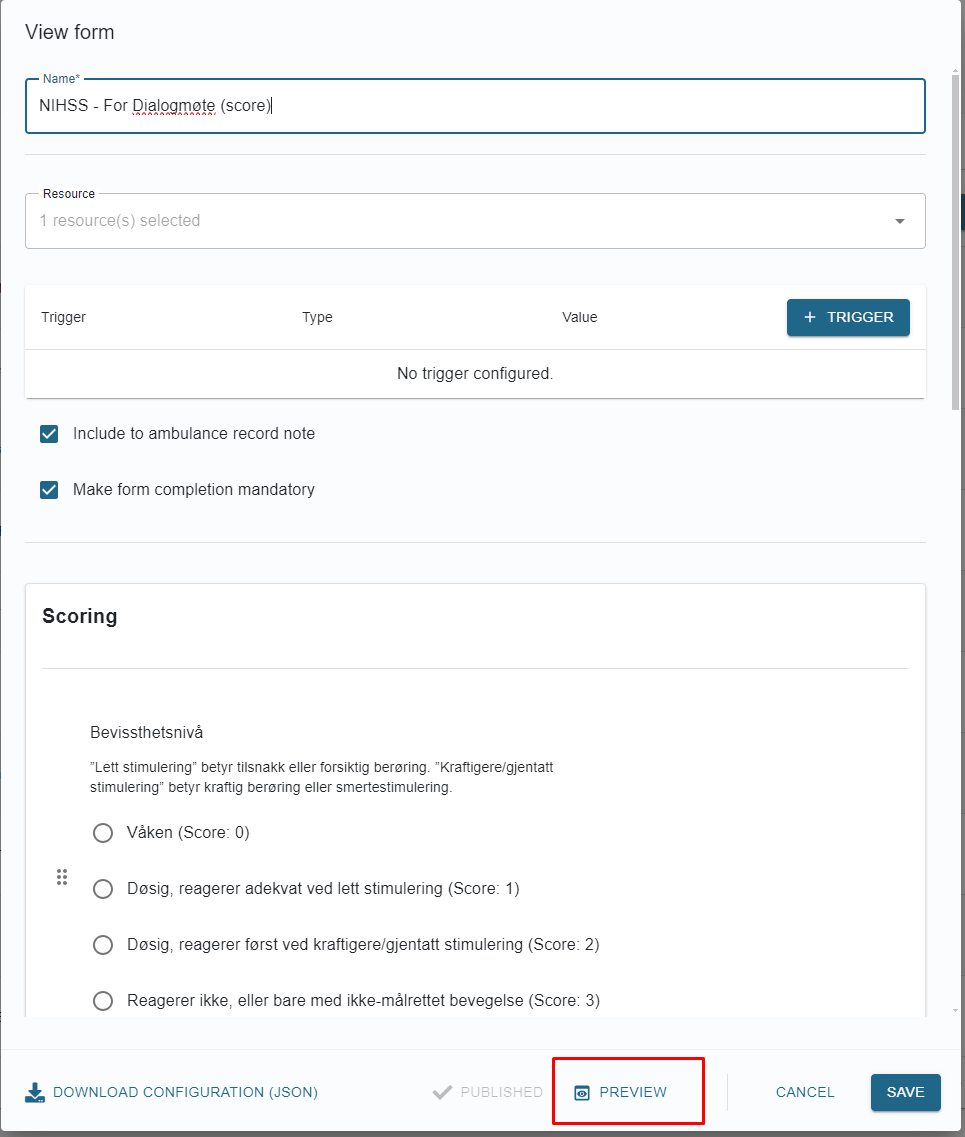
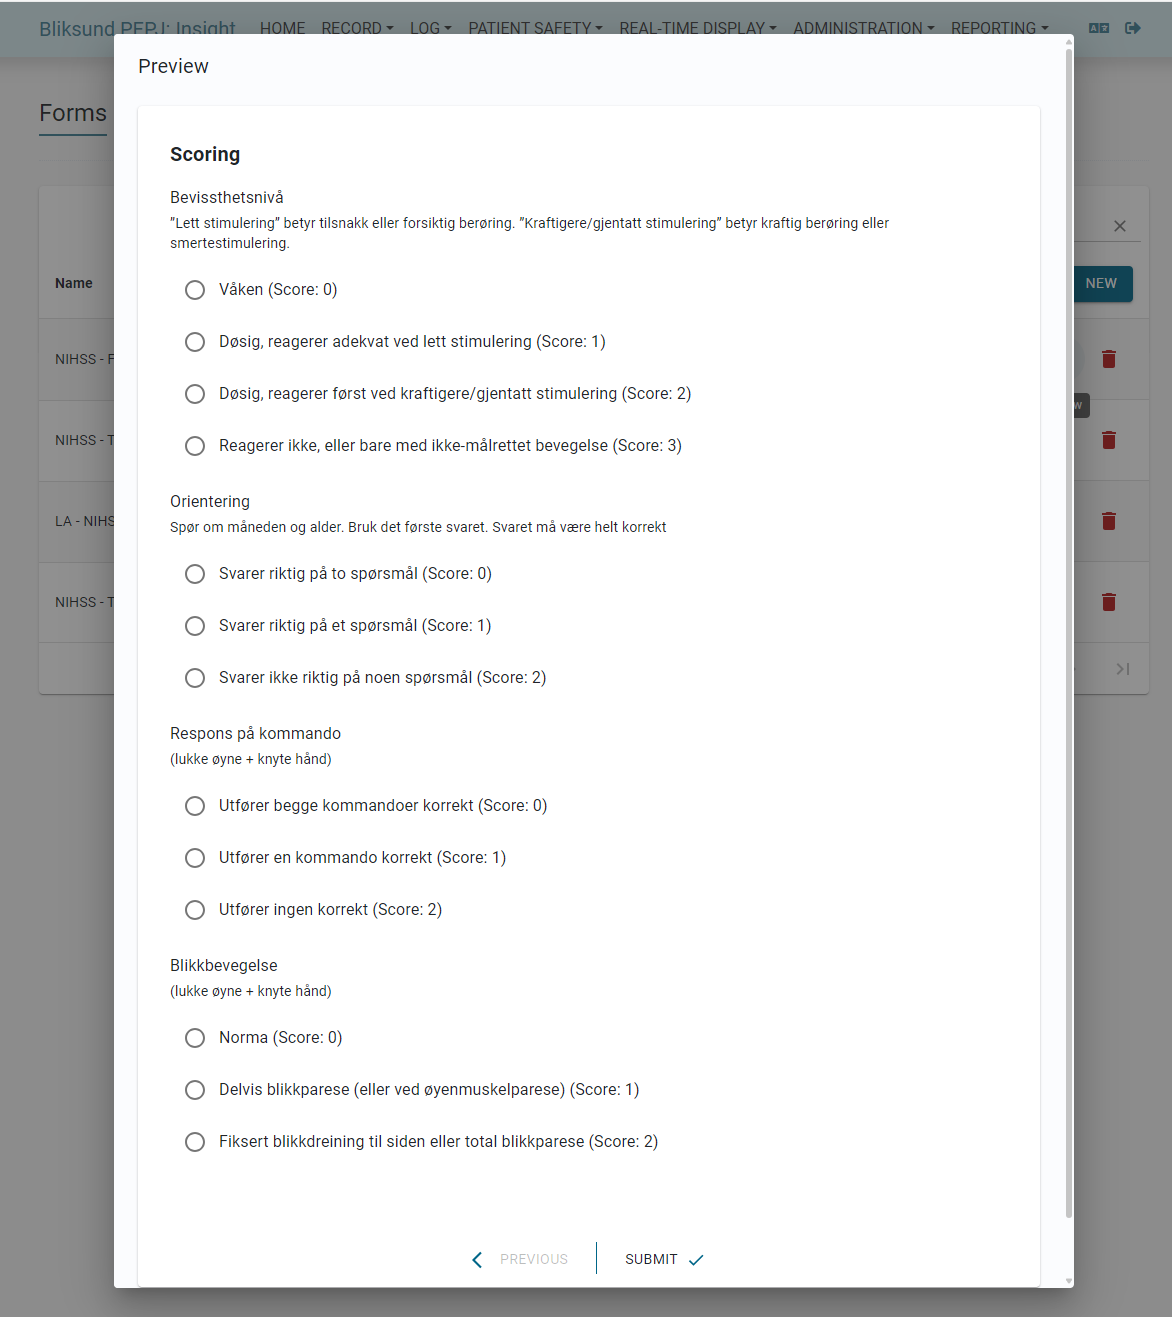
We have introduced a preview option on the form configuration page. By clicking the 'Preview' button, users can now preview forms while creating new ones or view forms in draft and published states. This feature enables users to see how the elements and conditions will appear and function during form completion.
To preview a form, simply click the 'Preview' button in the create/edit or view form flyout.
Configure form elements mandatory to fill
*Introduced in release 31*
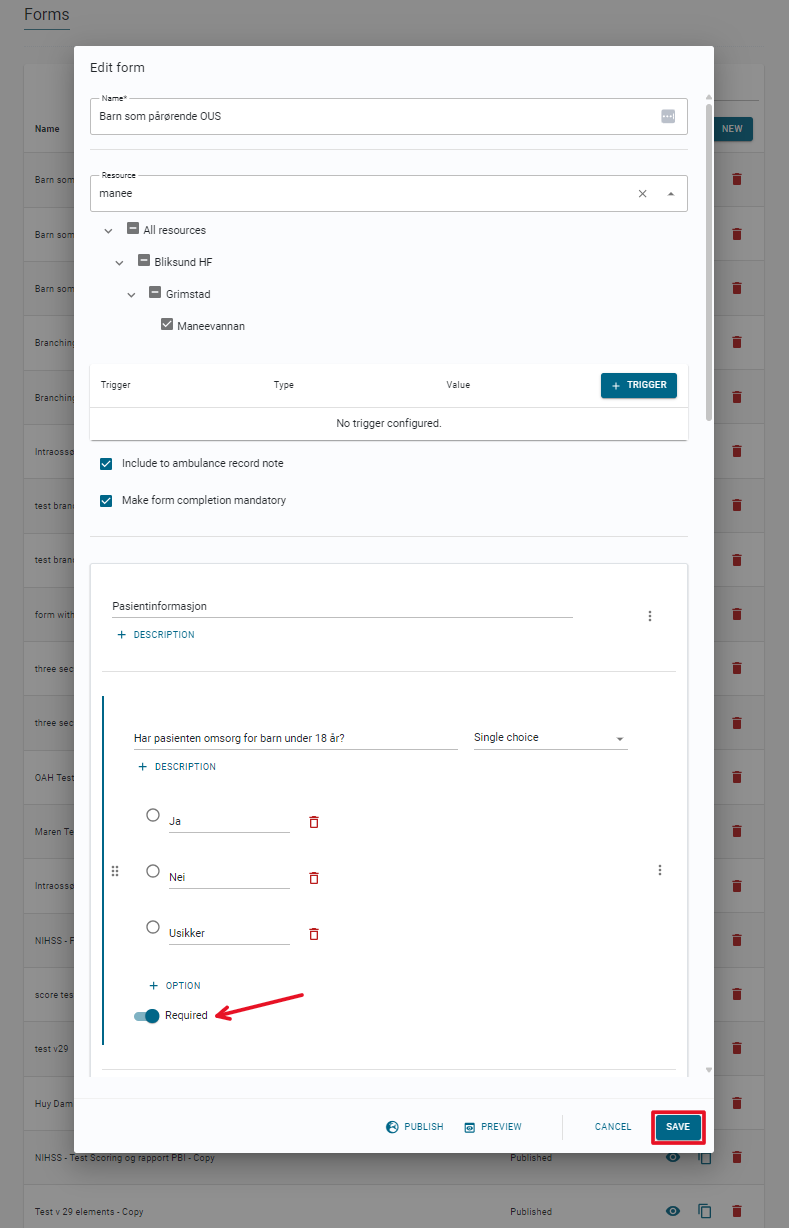
We have introduced an option to make the form elements mandatory to fill. You can specify whether a field should be required by toggling the "Required" option ON for new or drafted forms. Once the form is published it is not possible to change this option.
When creating or editing a form on the Form Configuration page in Insight, you can make elements mandatory by toggling the "required" switch to ON and saving the configuration. Once a field is marked as mandatory, users must complete it in the EWA Client before submitting the form.
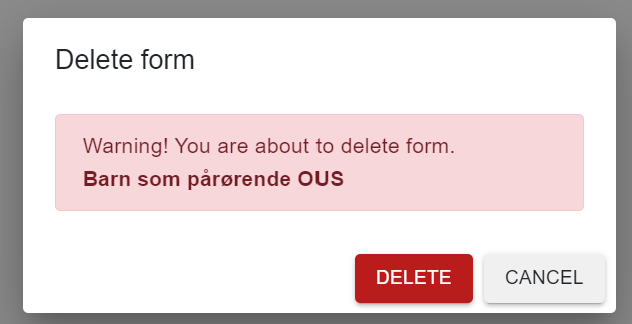
Delete form
To delete a form, click on the Delete button next to the form that needs to be deleted and confirm delete in the confirmation popup.
Performed forms
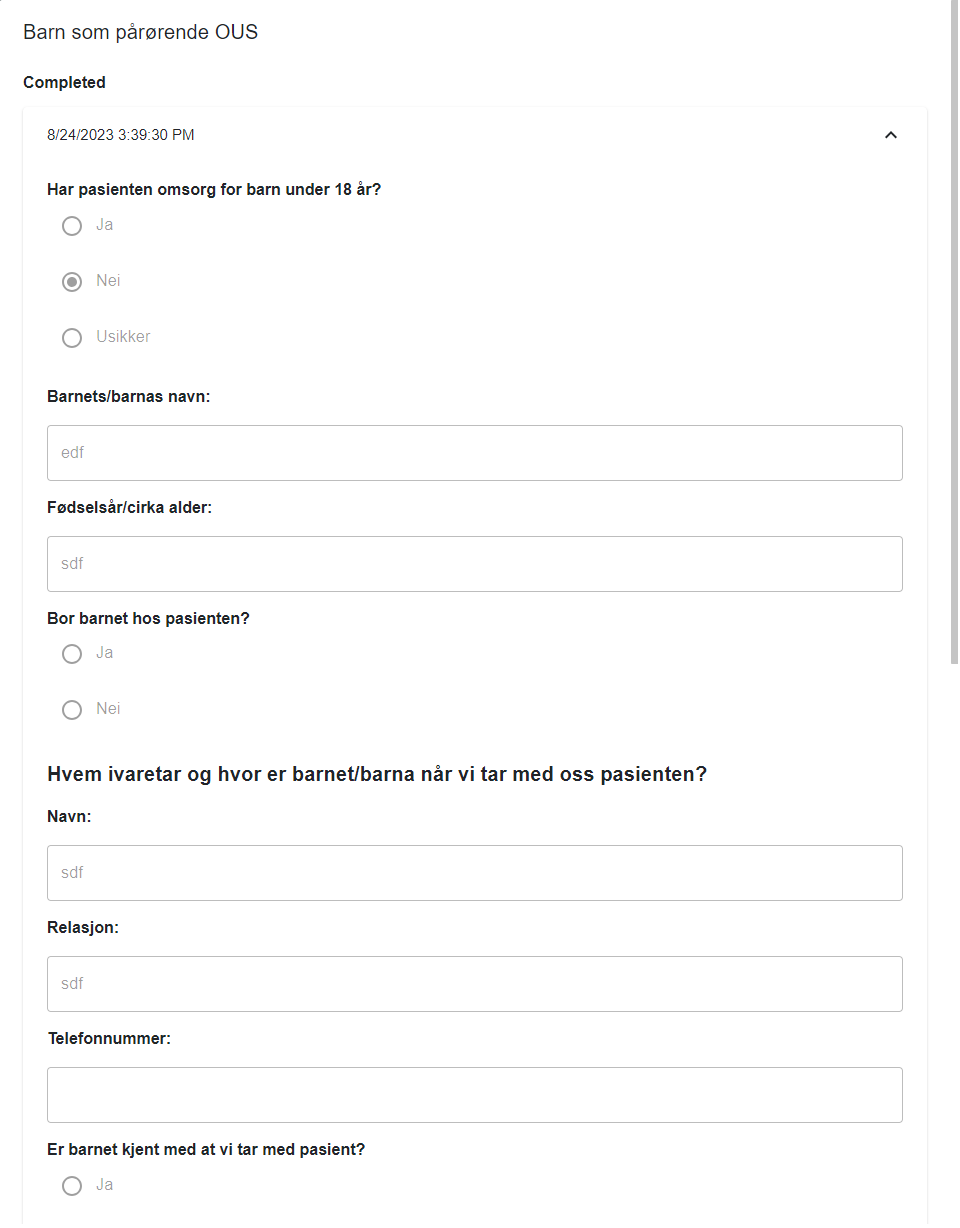
The new tab named 'Forms' is added to the Journal details page which is visible when a form response is filled in missions from EWA client. The performed forms are listed in the tab and grouped by state.
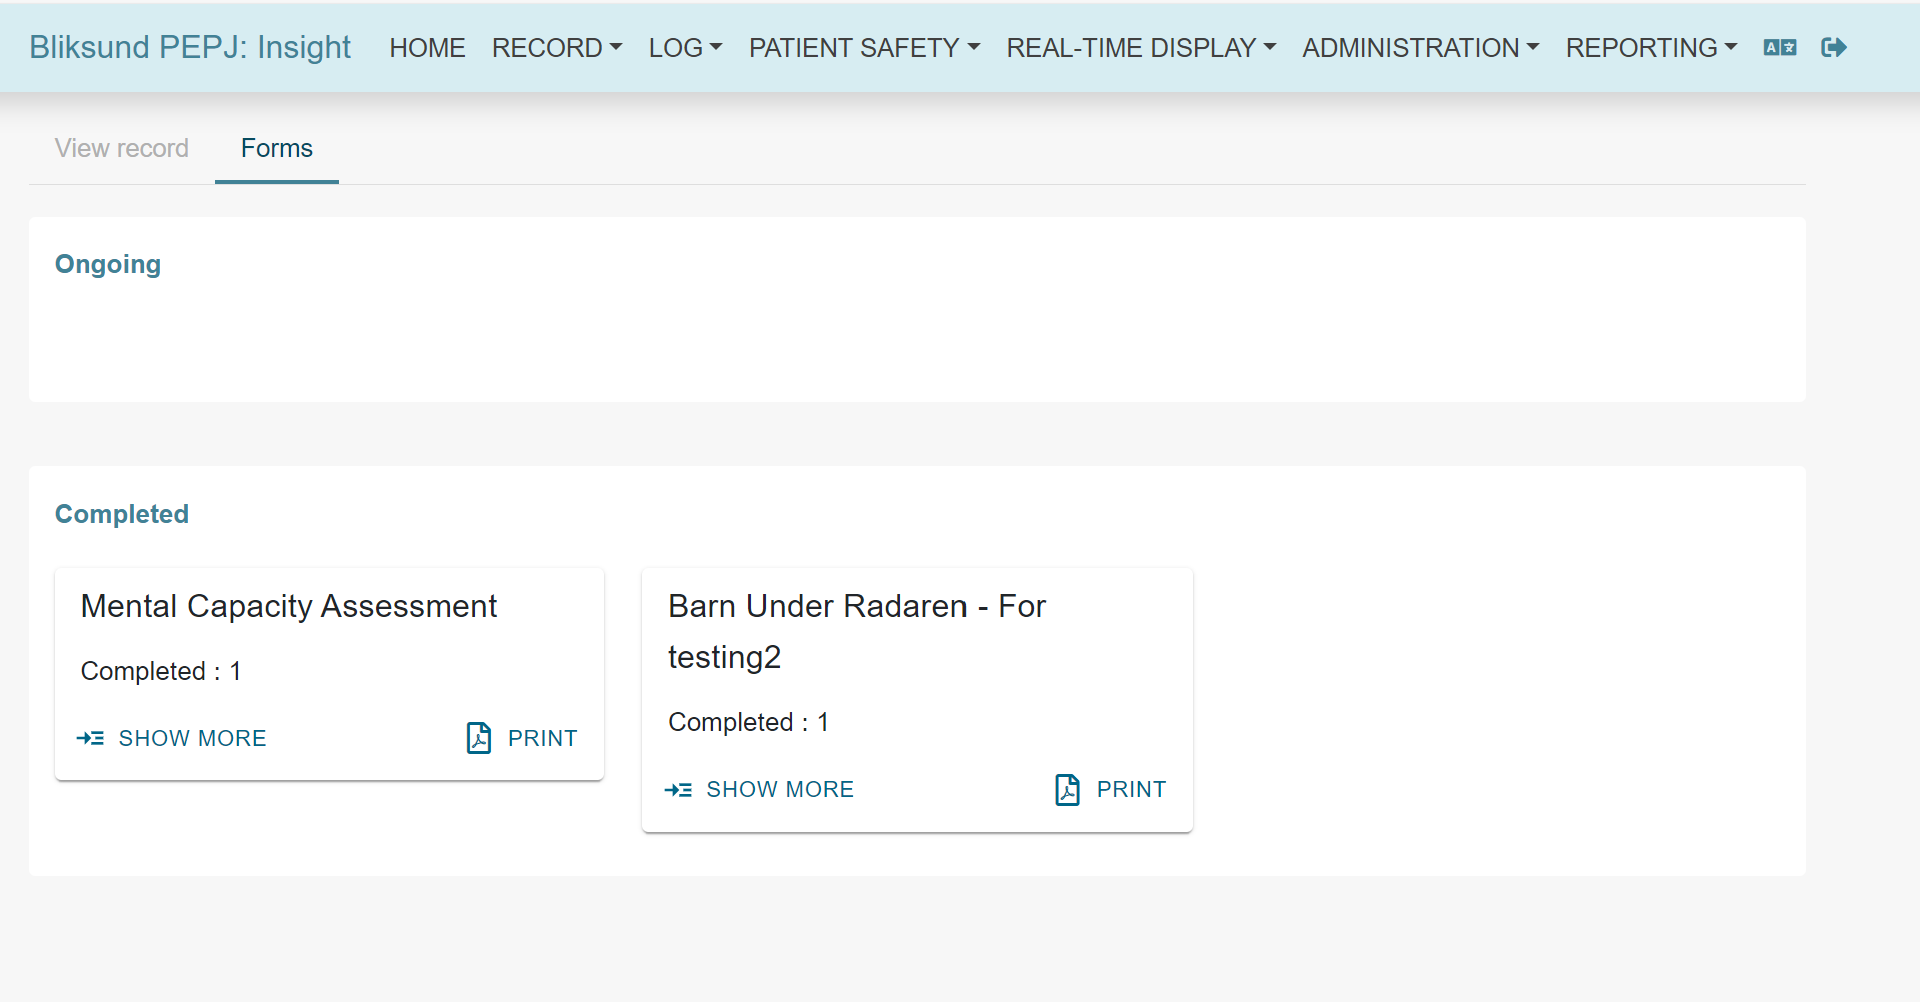
The details of each performed form can be viewed by clicking on the 'Show more' button.
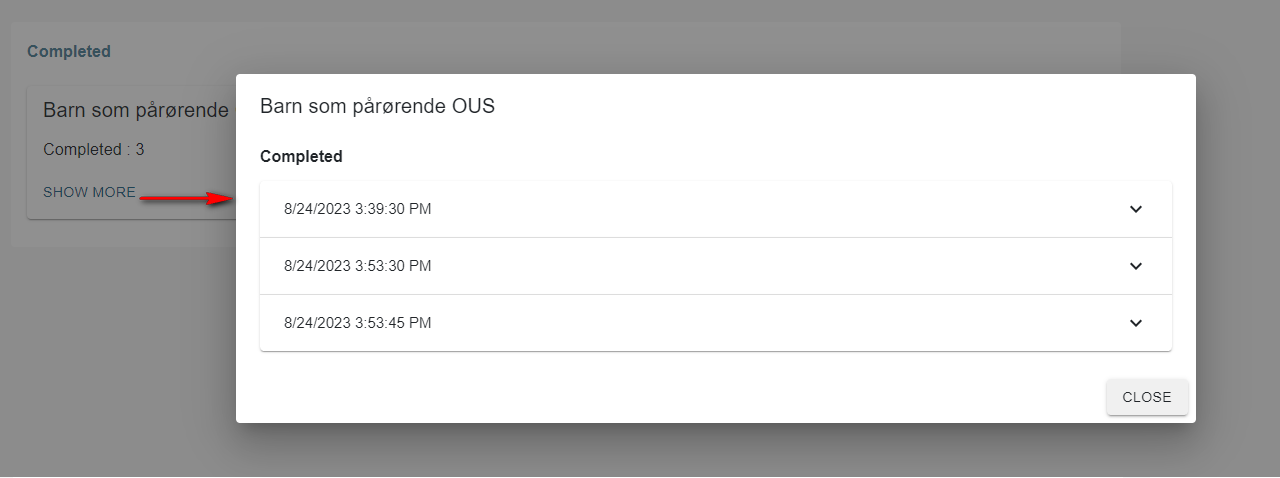
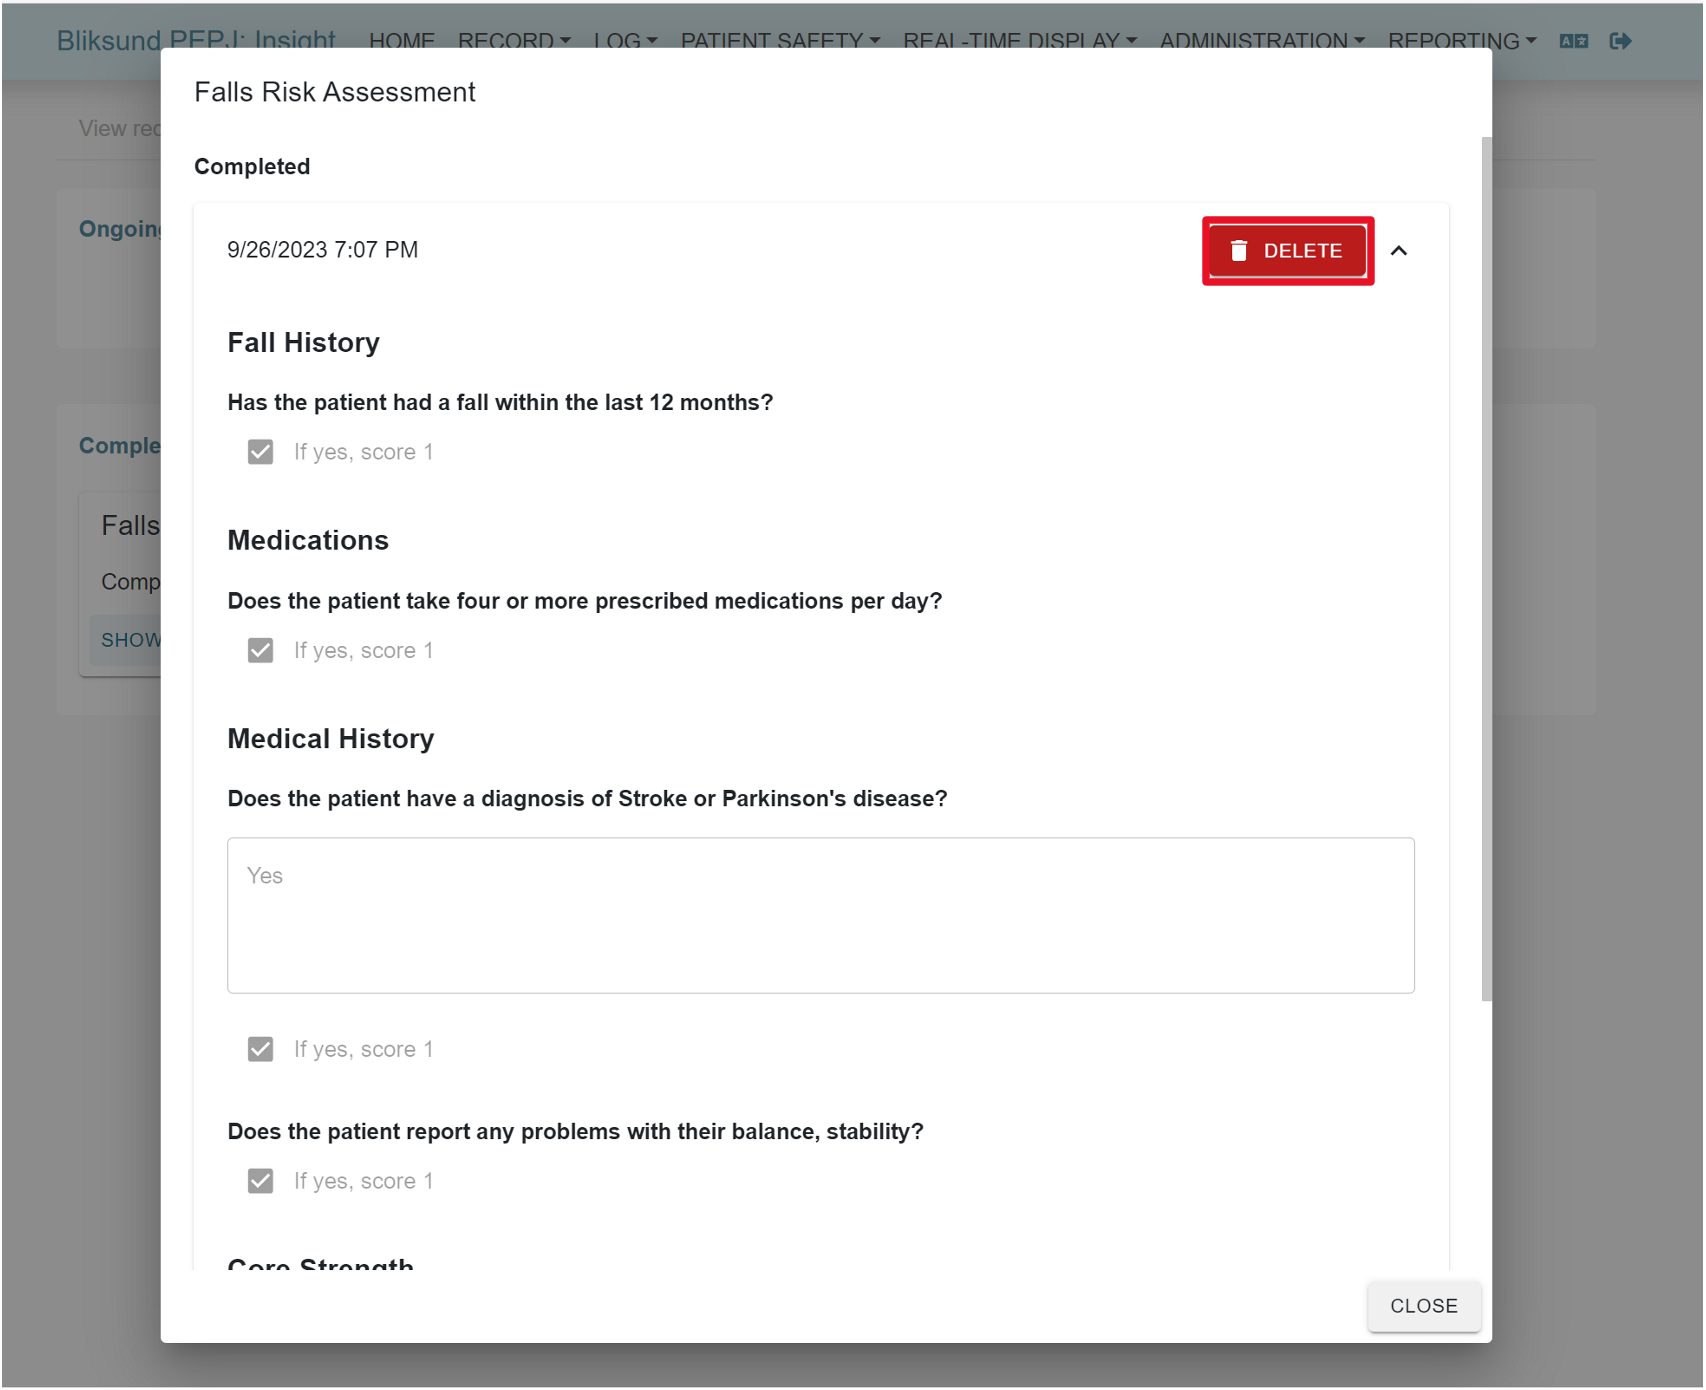
They show as expandable sections, click on each of them to see the details. The completed form can be deleted from insights.
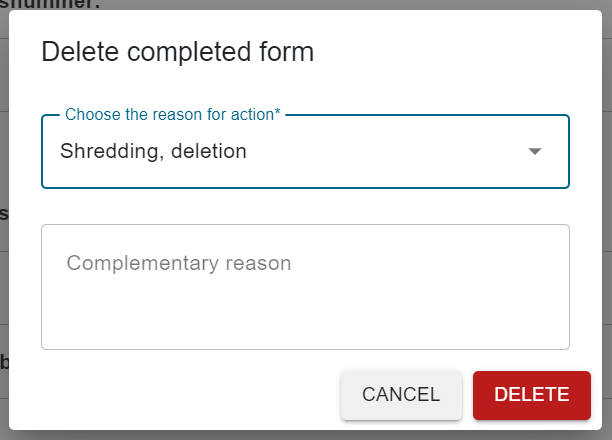
Completed form response can be deleted from journal details by providing a reason for deletion.
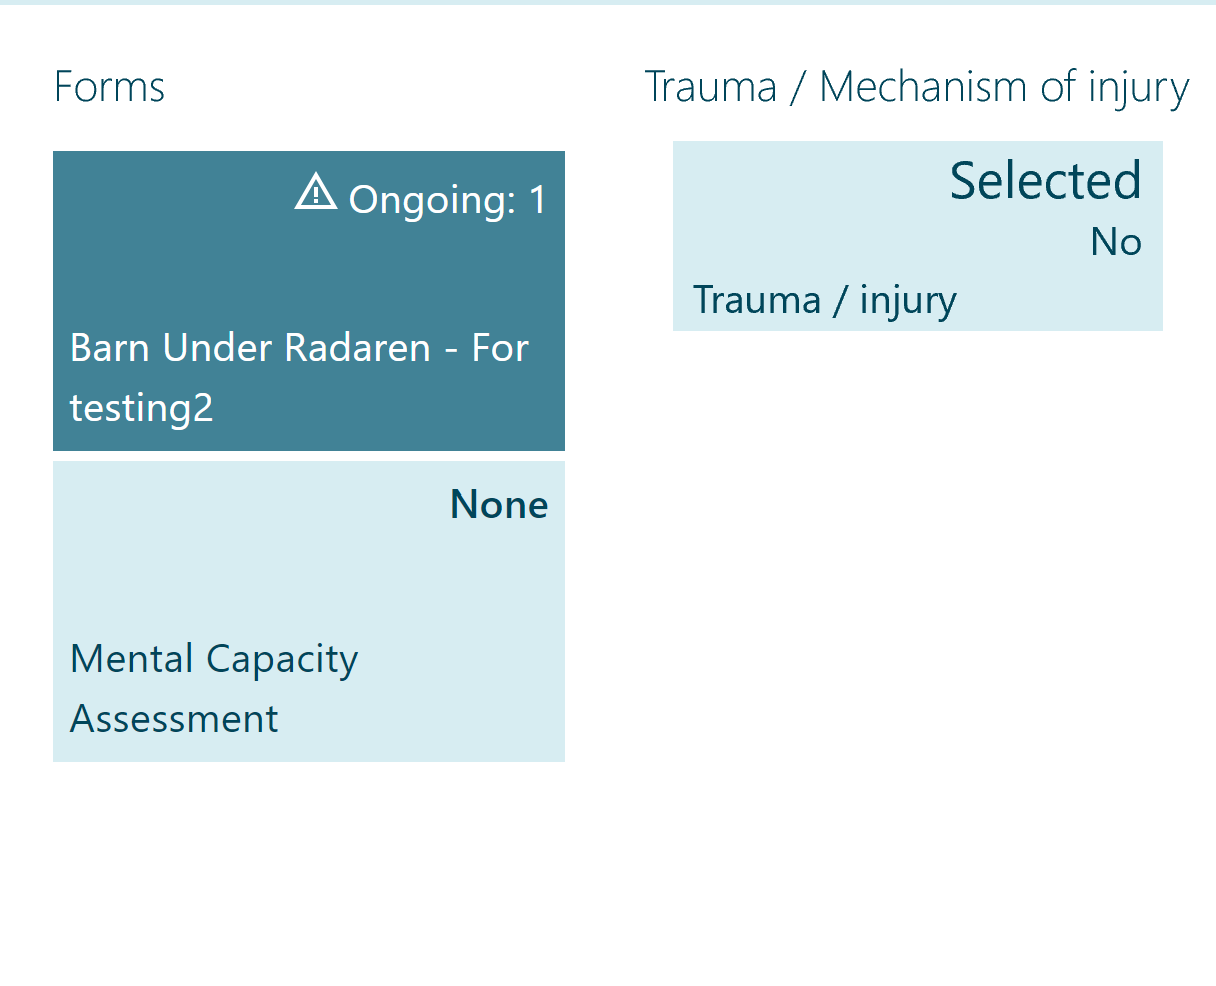
Fill in a form response in EWA Client
Once the form feature flag is enabled valid forms are created and assigned to the resource from the form configuration page. The form feature configuration can be synchronized into EWA Client.
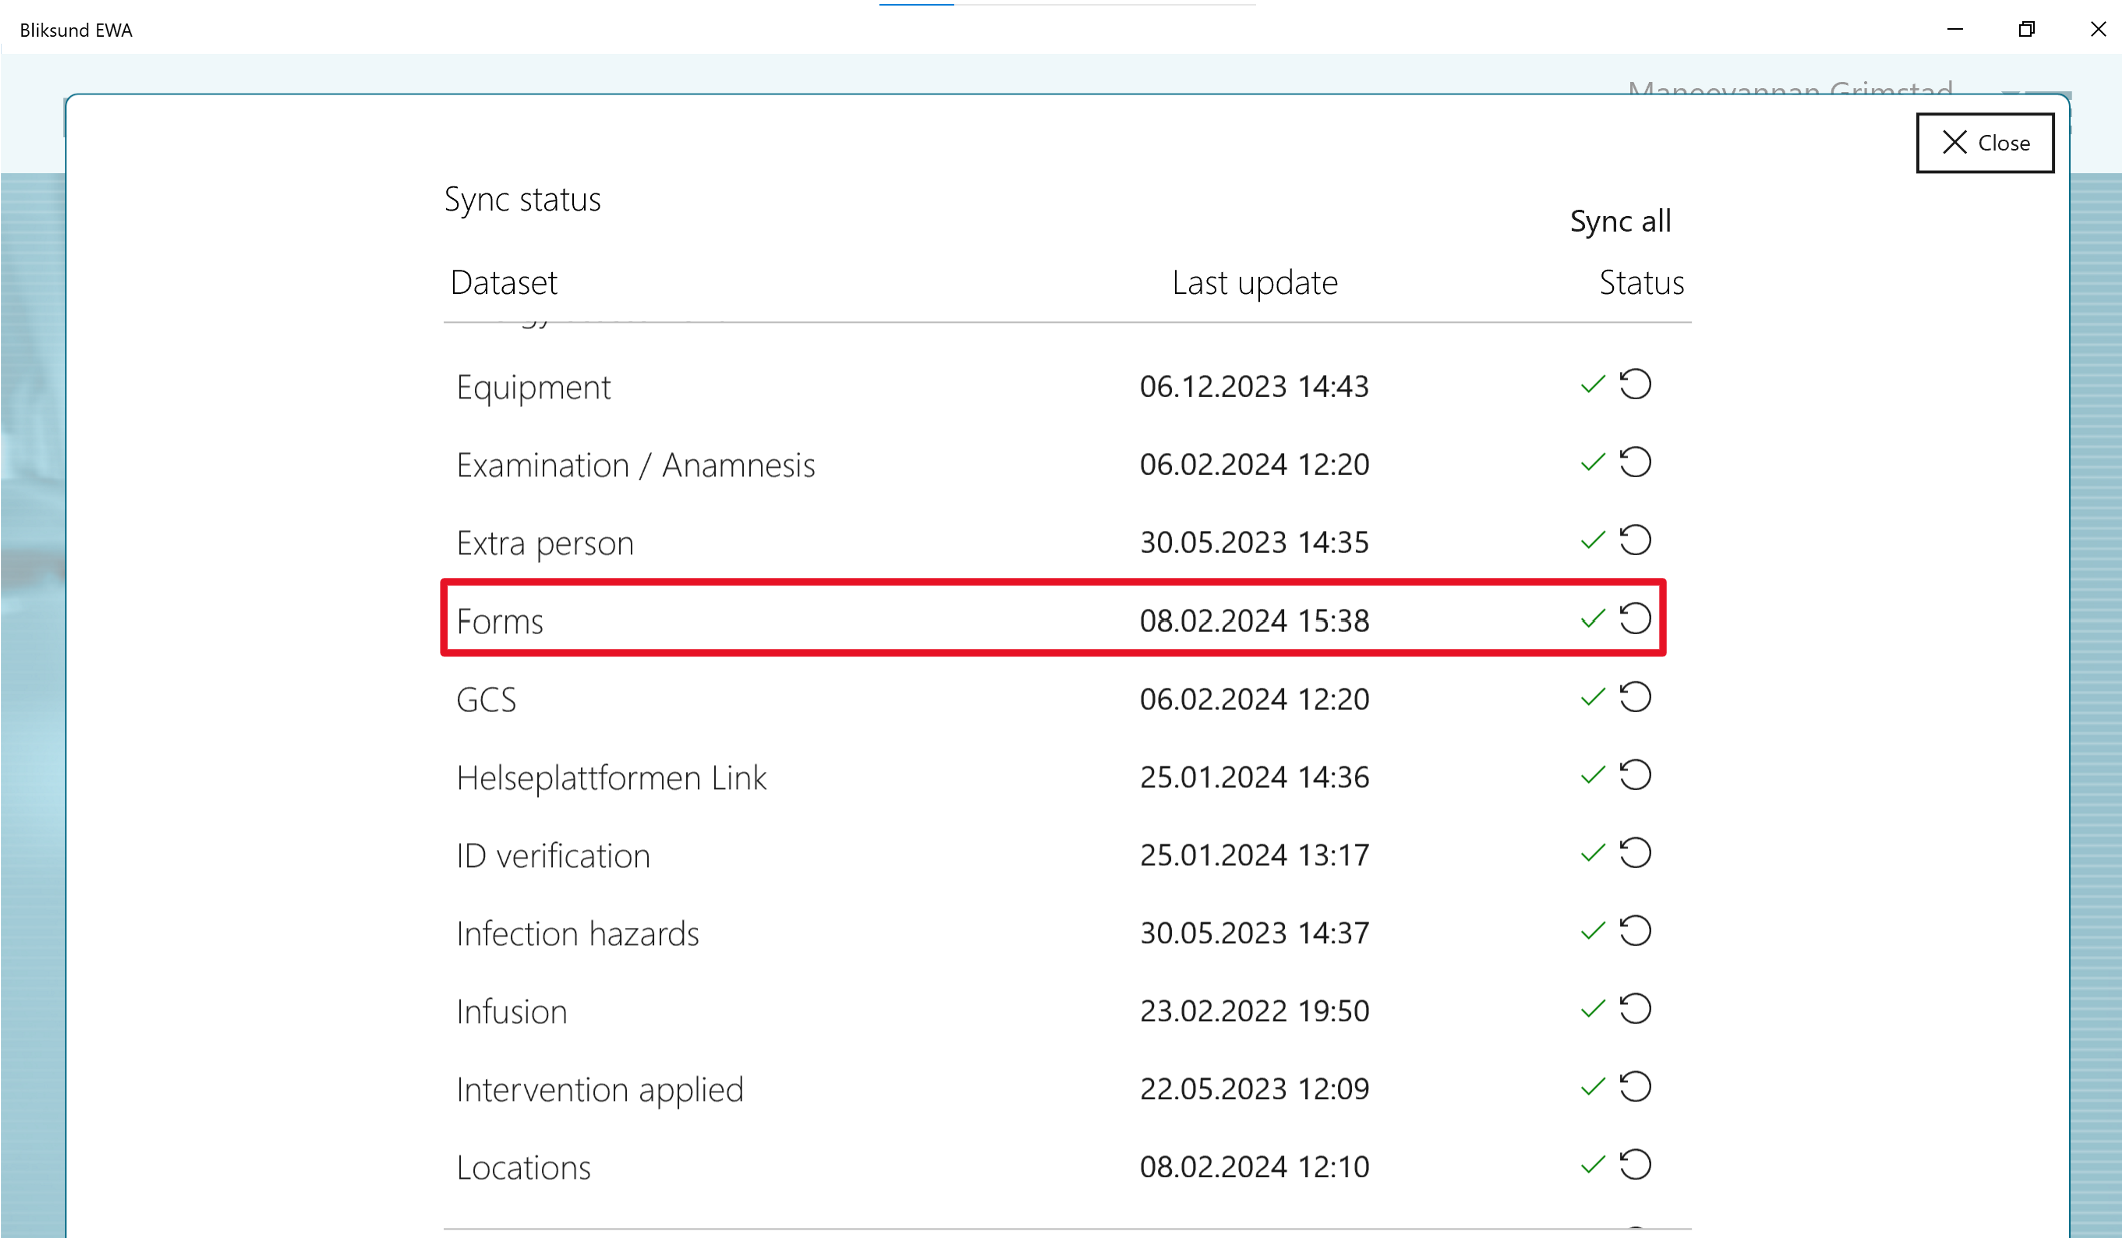
The new forms are displayed based on the triggers set for the forms on the form configuration page. If no triggers are set for a form it will be displayed for all the resources with the form feature flag enabled.
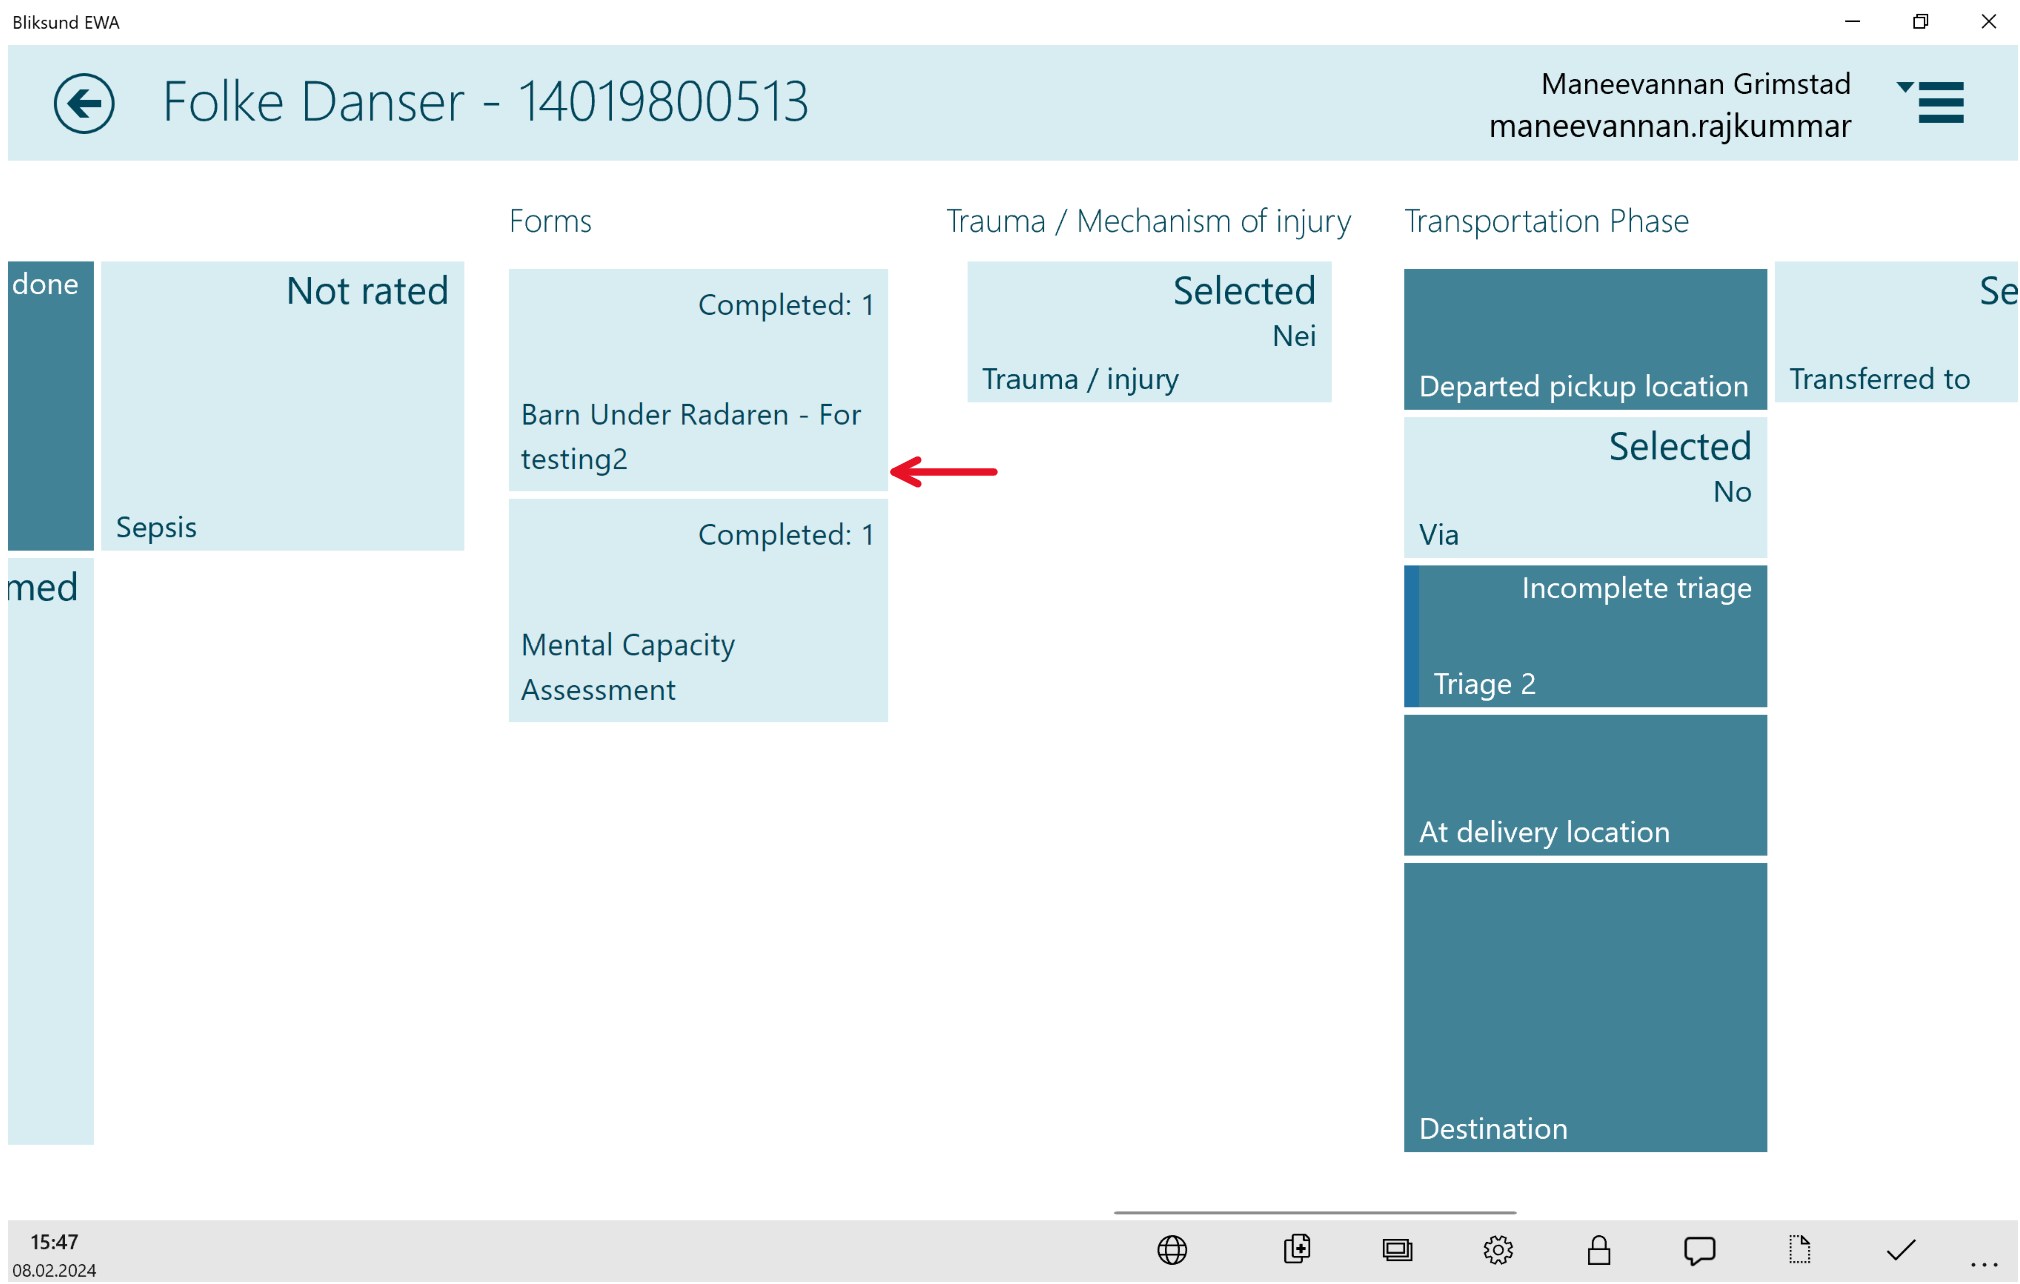
Complete form
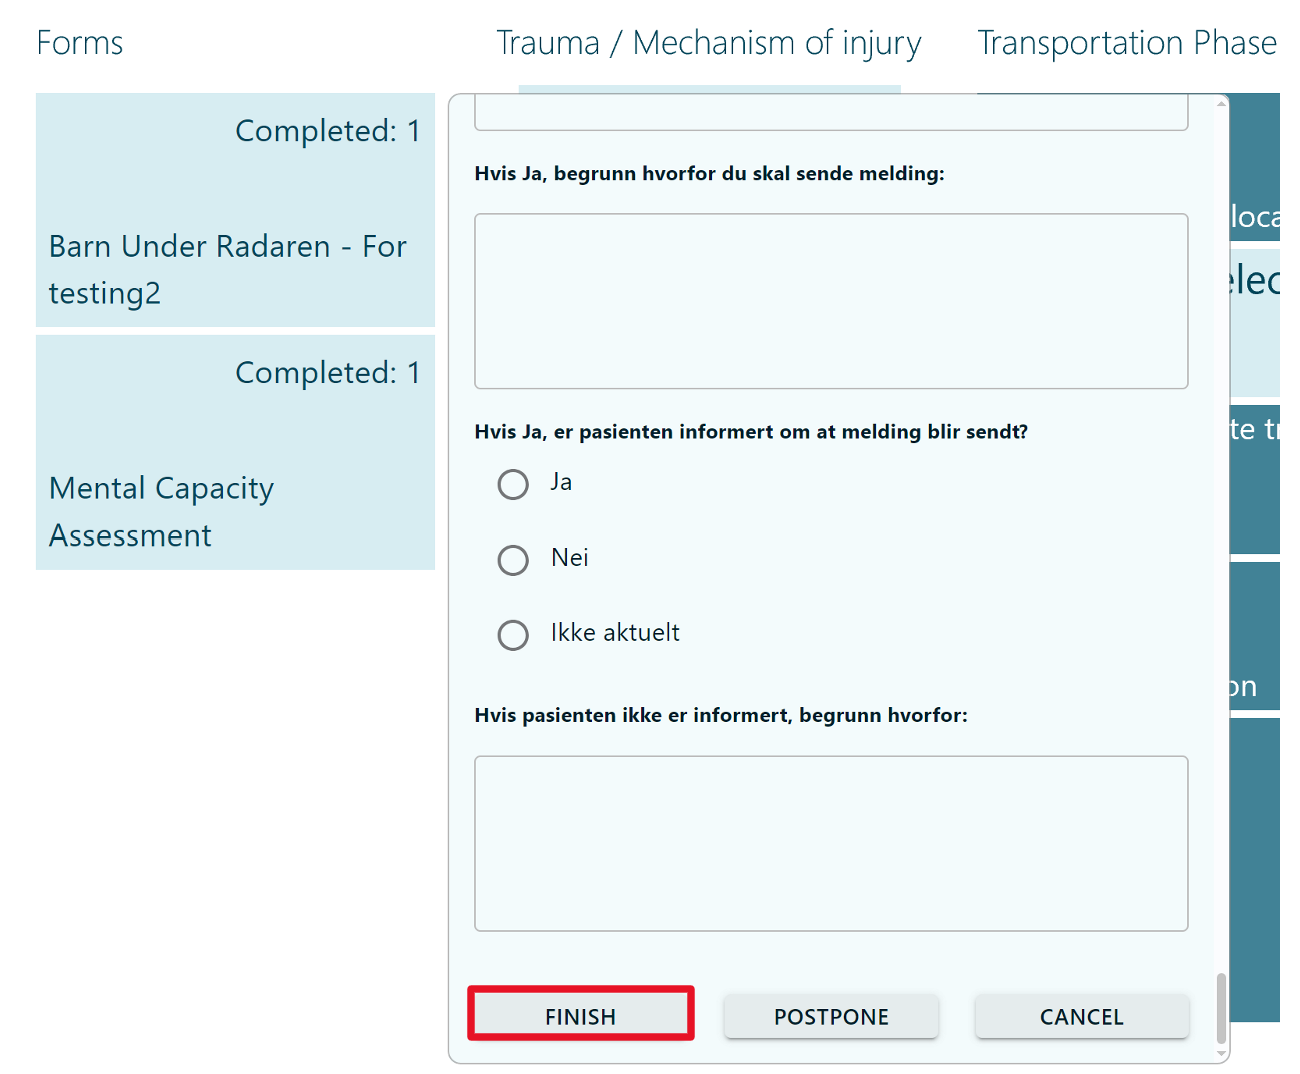
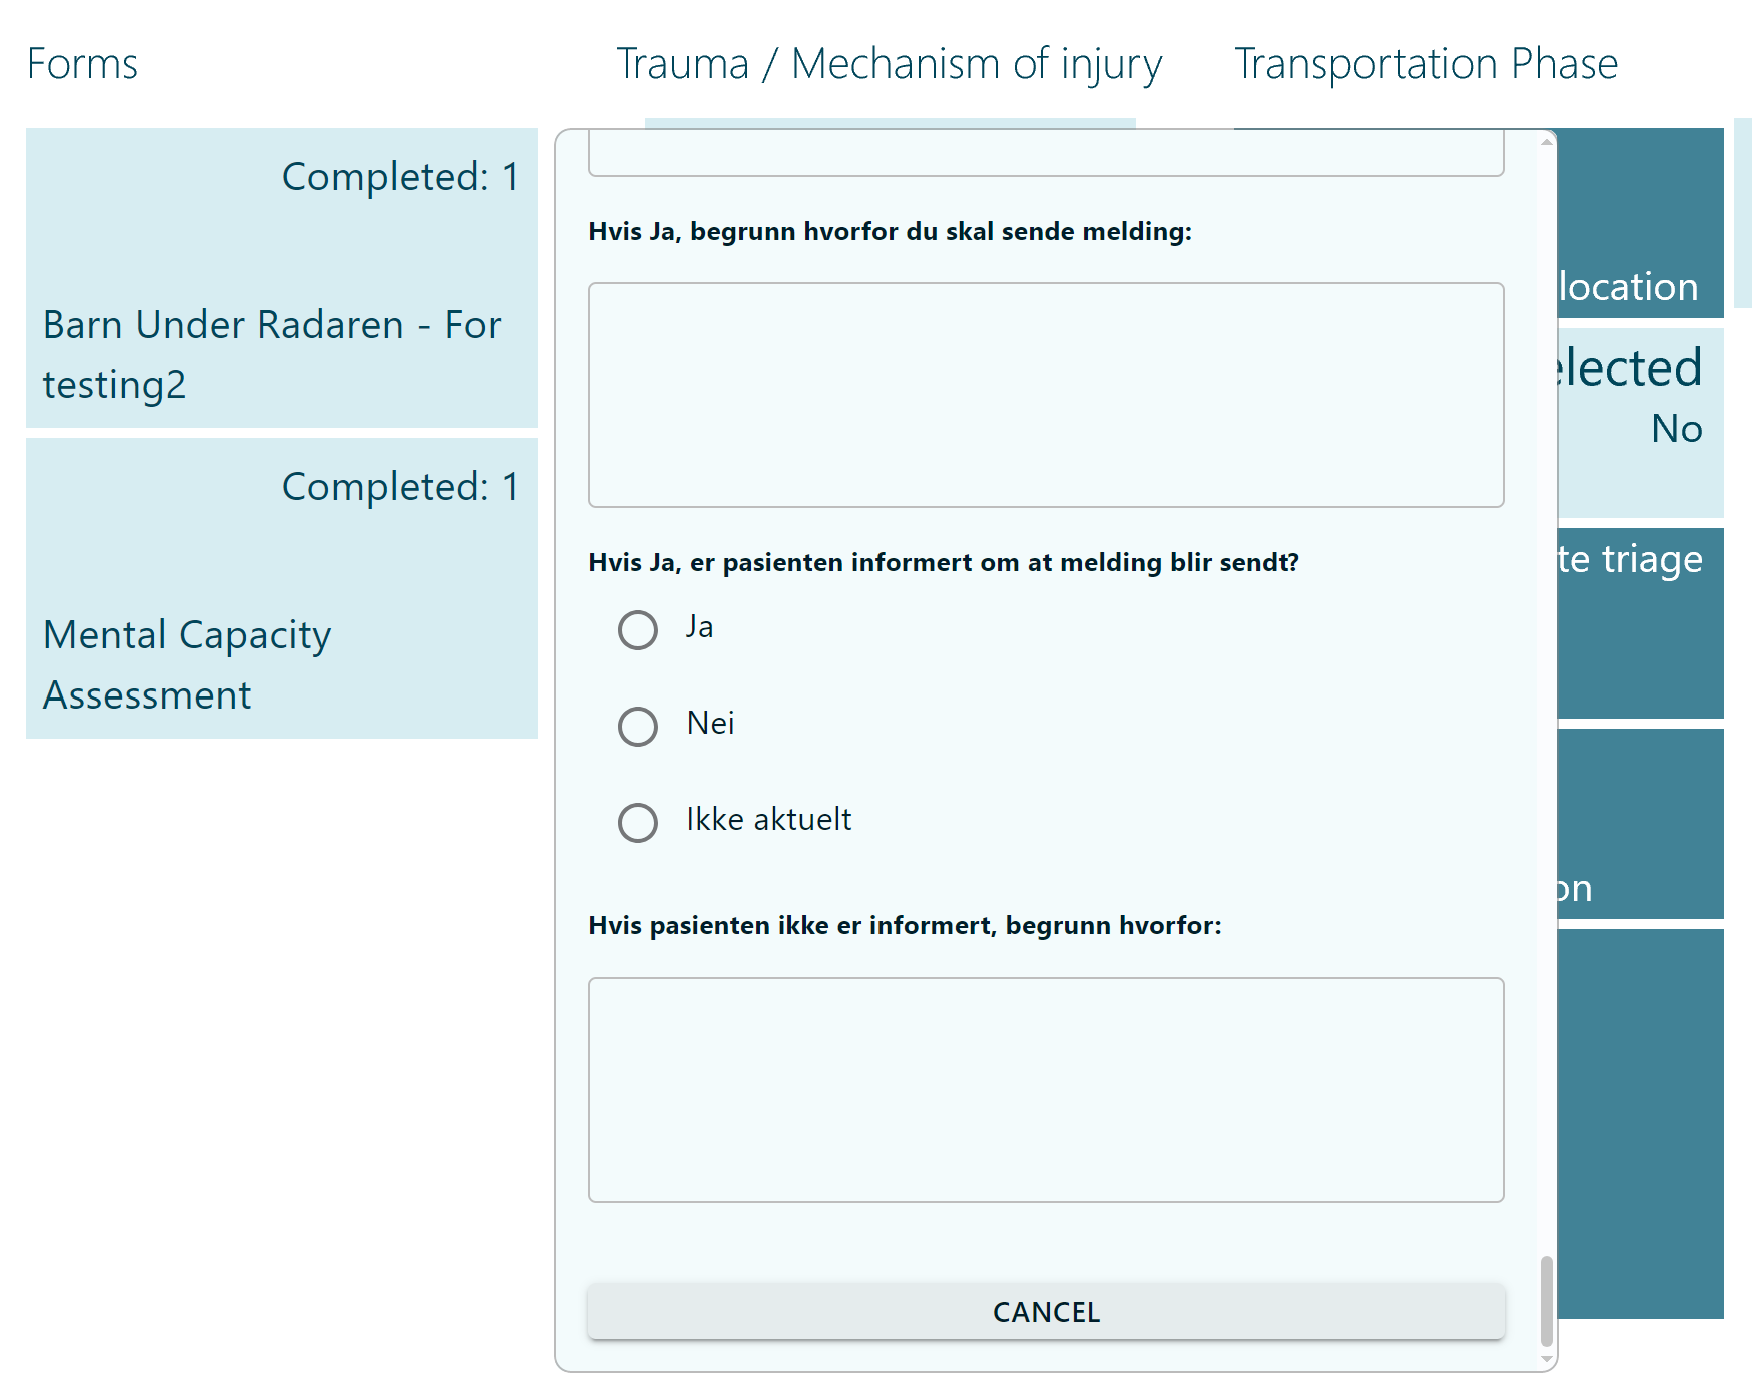
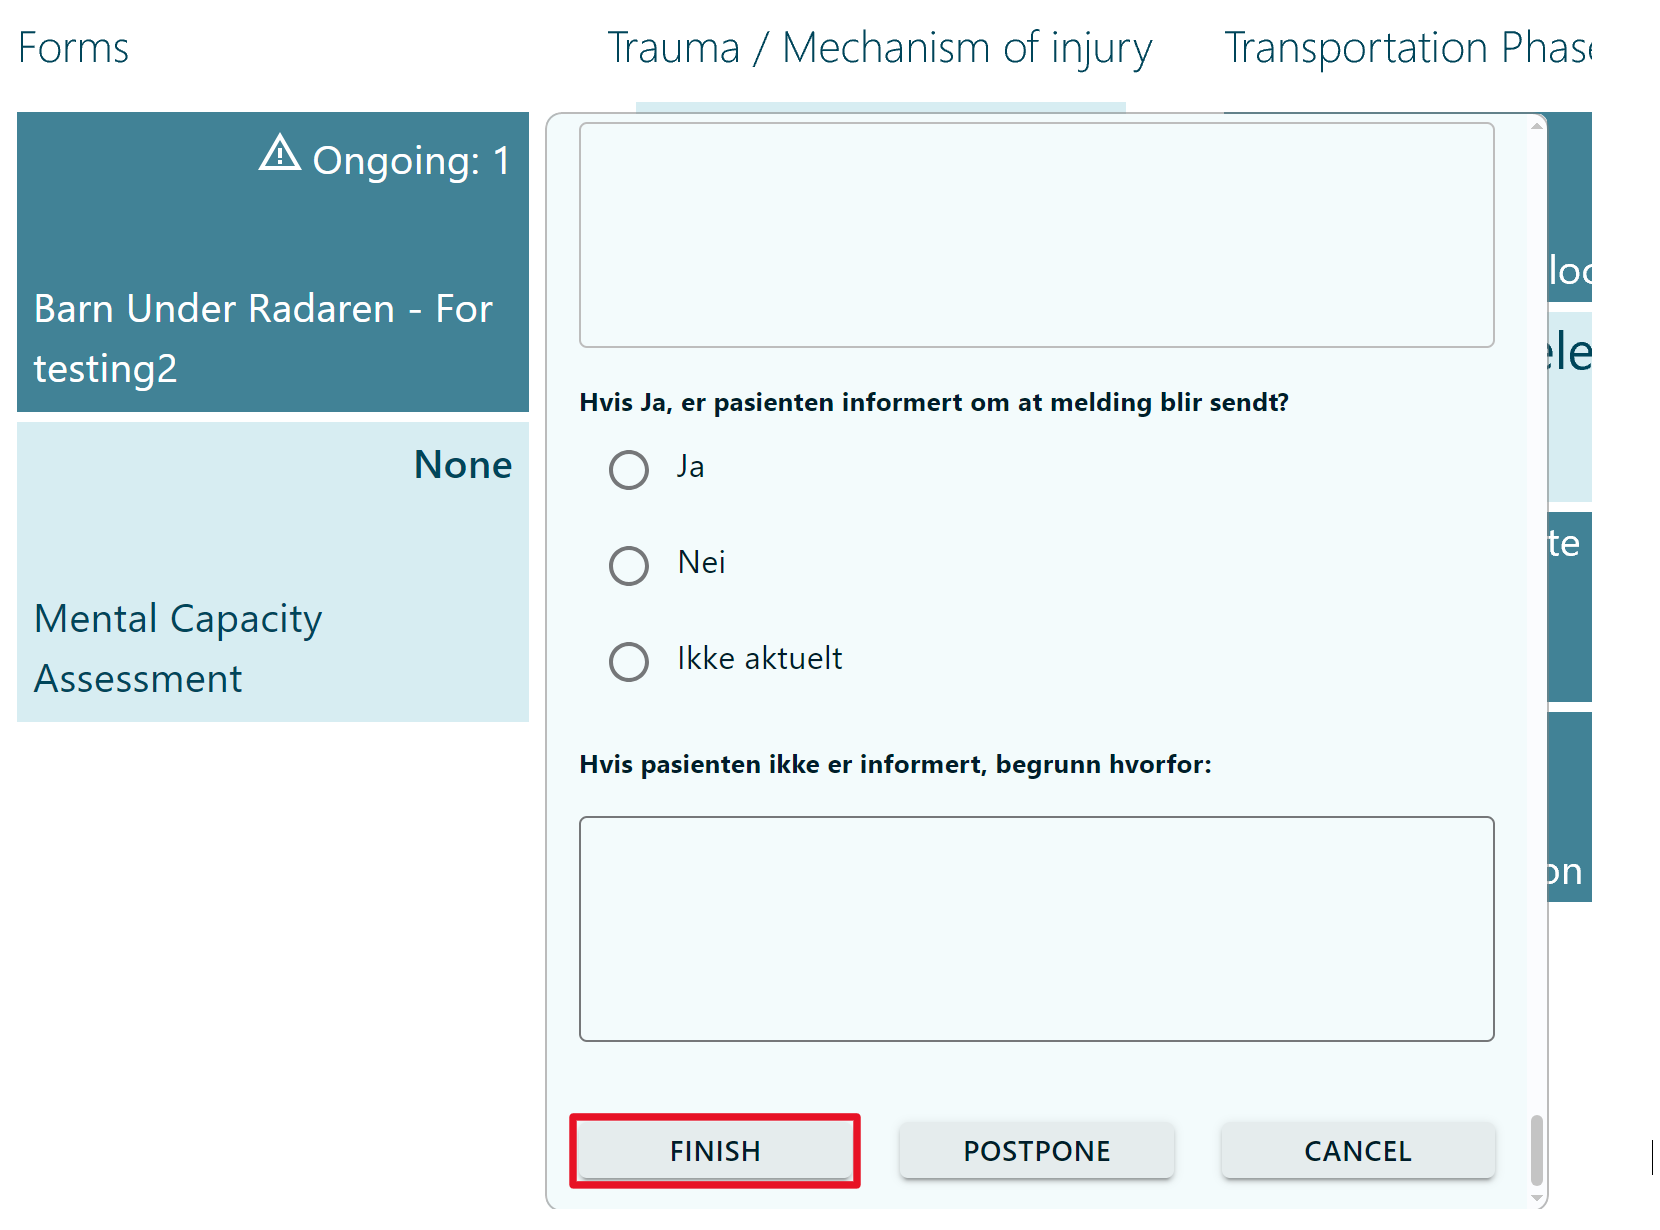
The form can be completed by filling in the form response in the form flyout and by clicking the 'Finish' button.
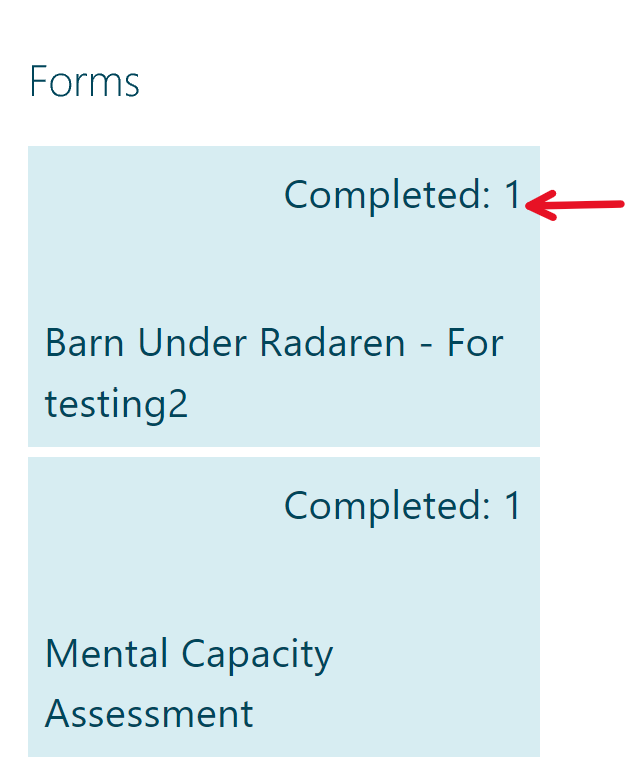
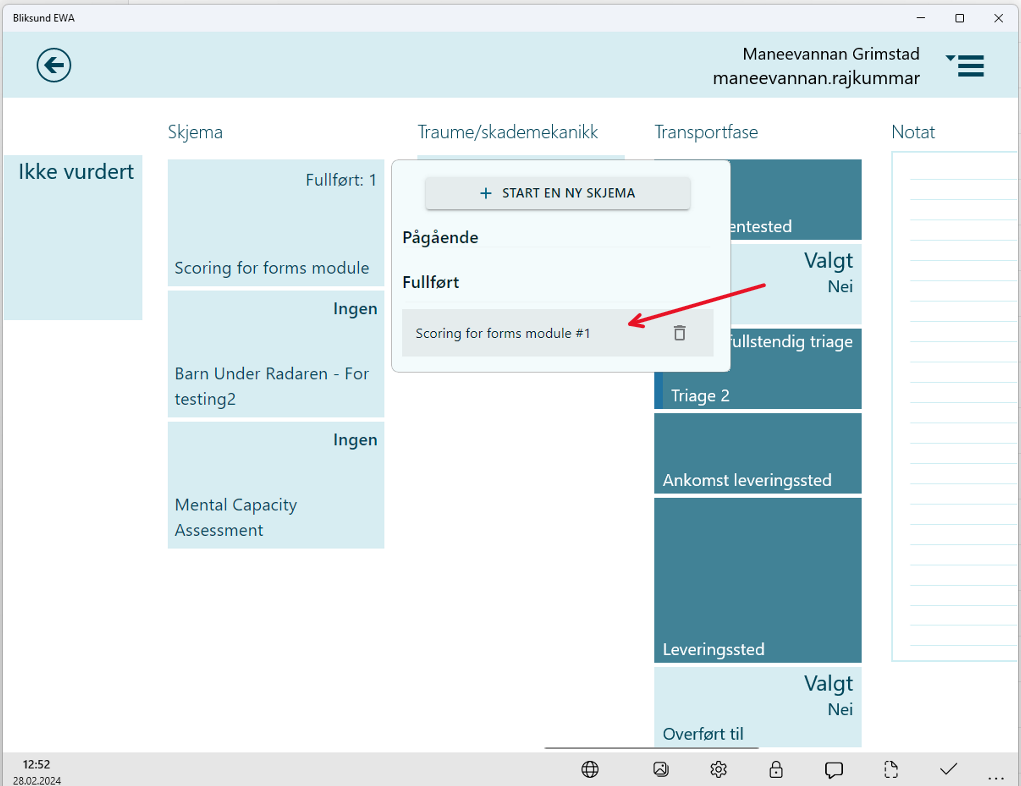
Once the form is completed the count increases concerning the number of times the checklist is completed and it is displayed in the tile.
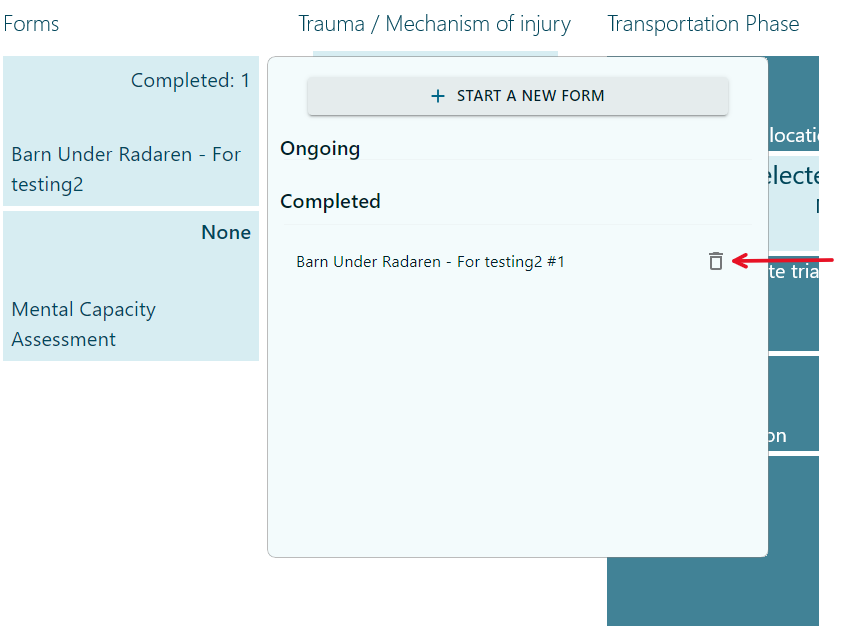
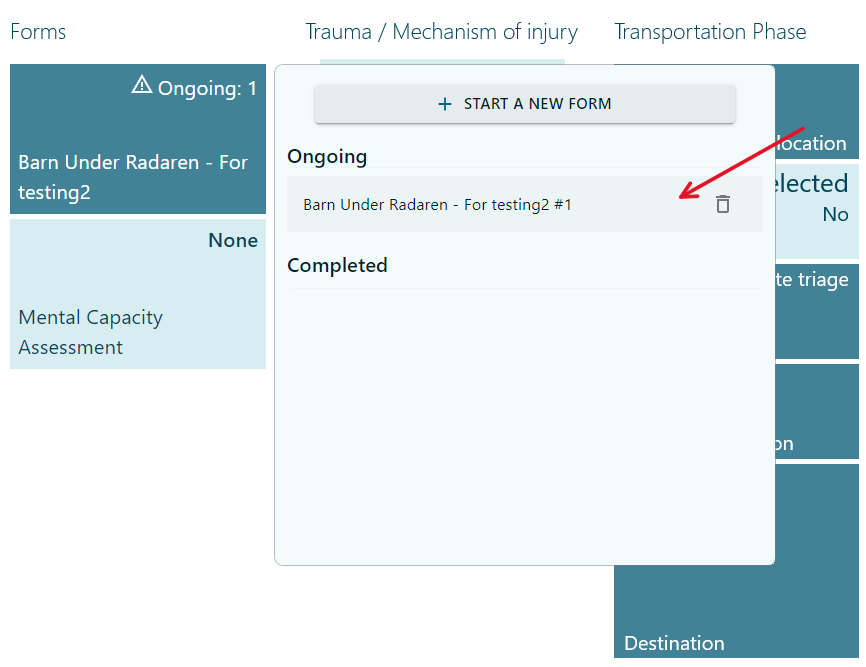
The completed form will be listed in the form flyout and the form response can be viewed by clicking on the completed form.
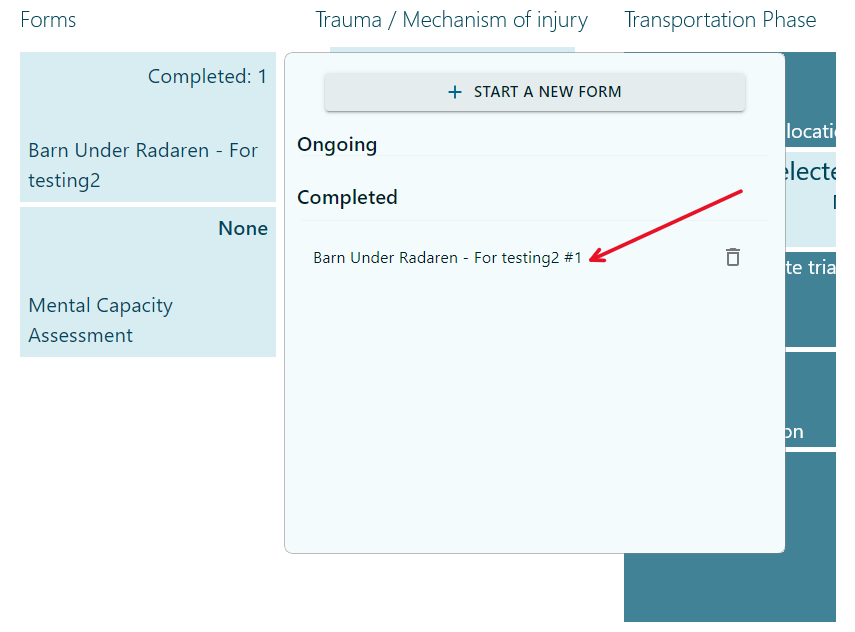
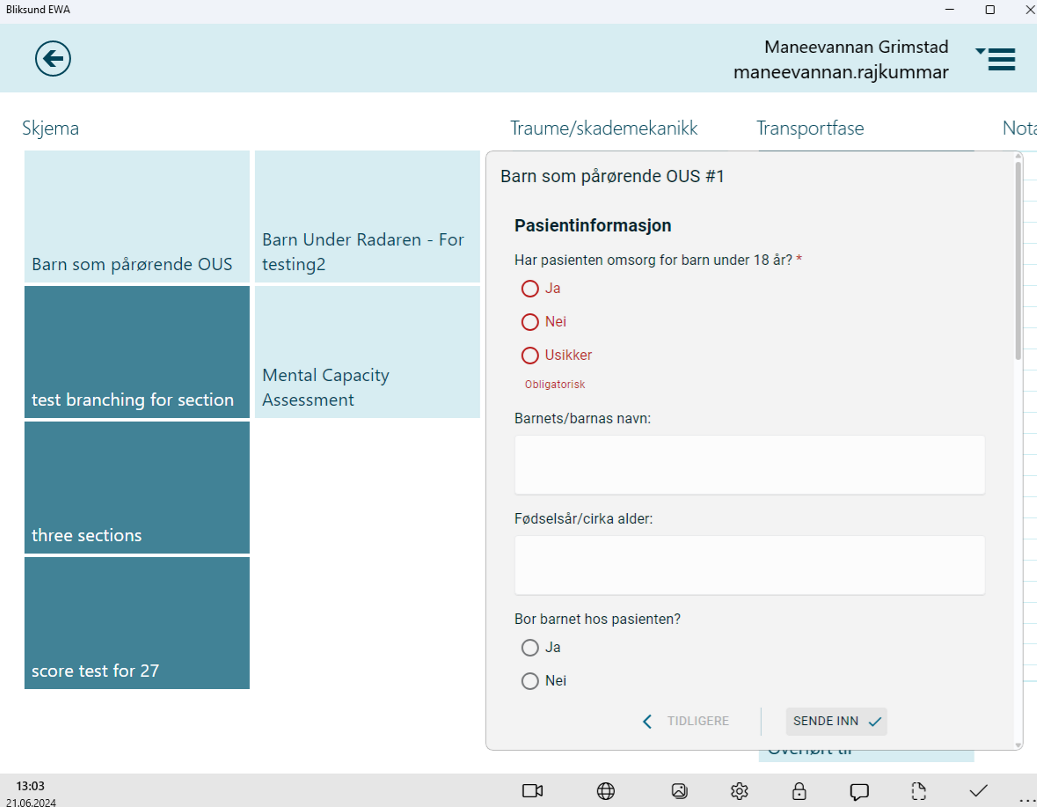
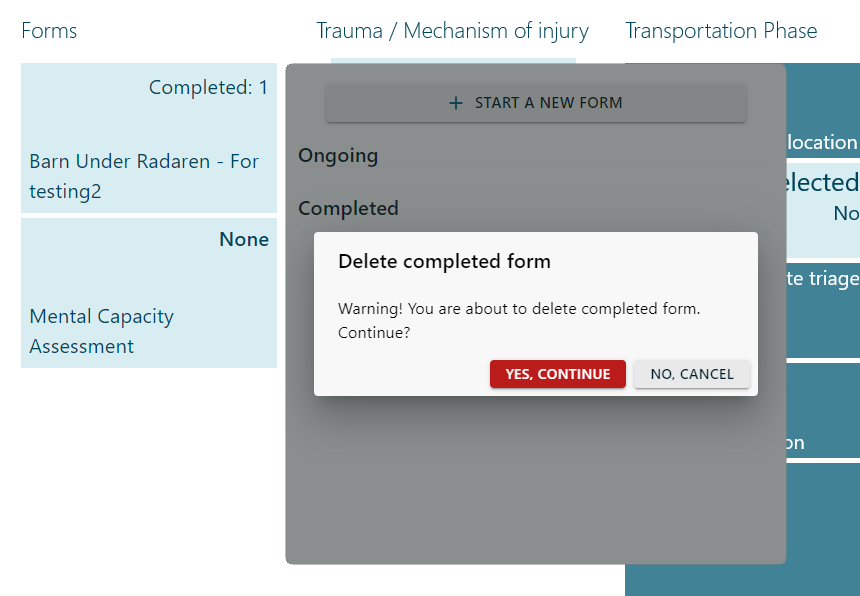
The completed form can be deleted by clicking the delete button and confirming the deletion in the confirmation dialog and it will be removed from the mission data.
Postpone form
The unfinished form can be postponed for completion later. The form can be postponed by clicking the 'Postpone' button in the form response flyout.
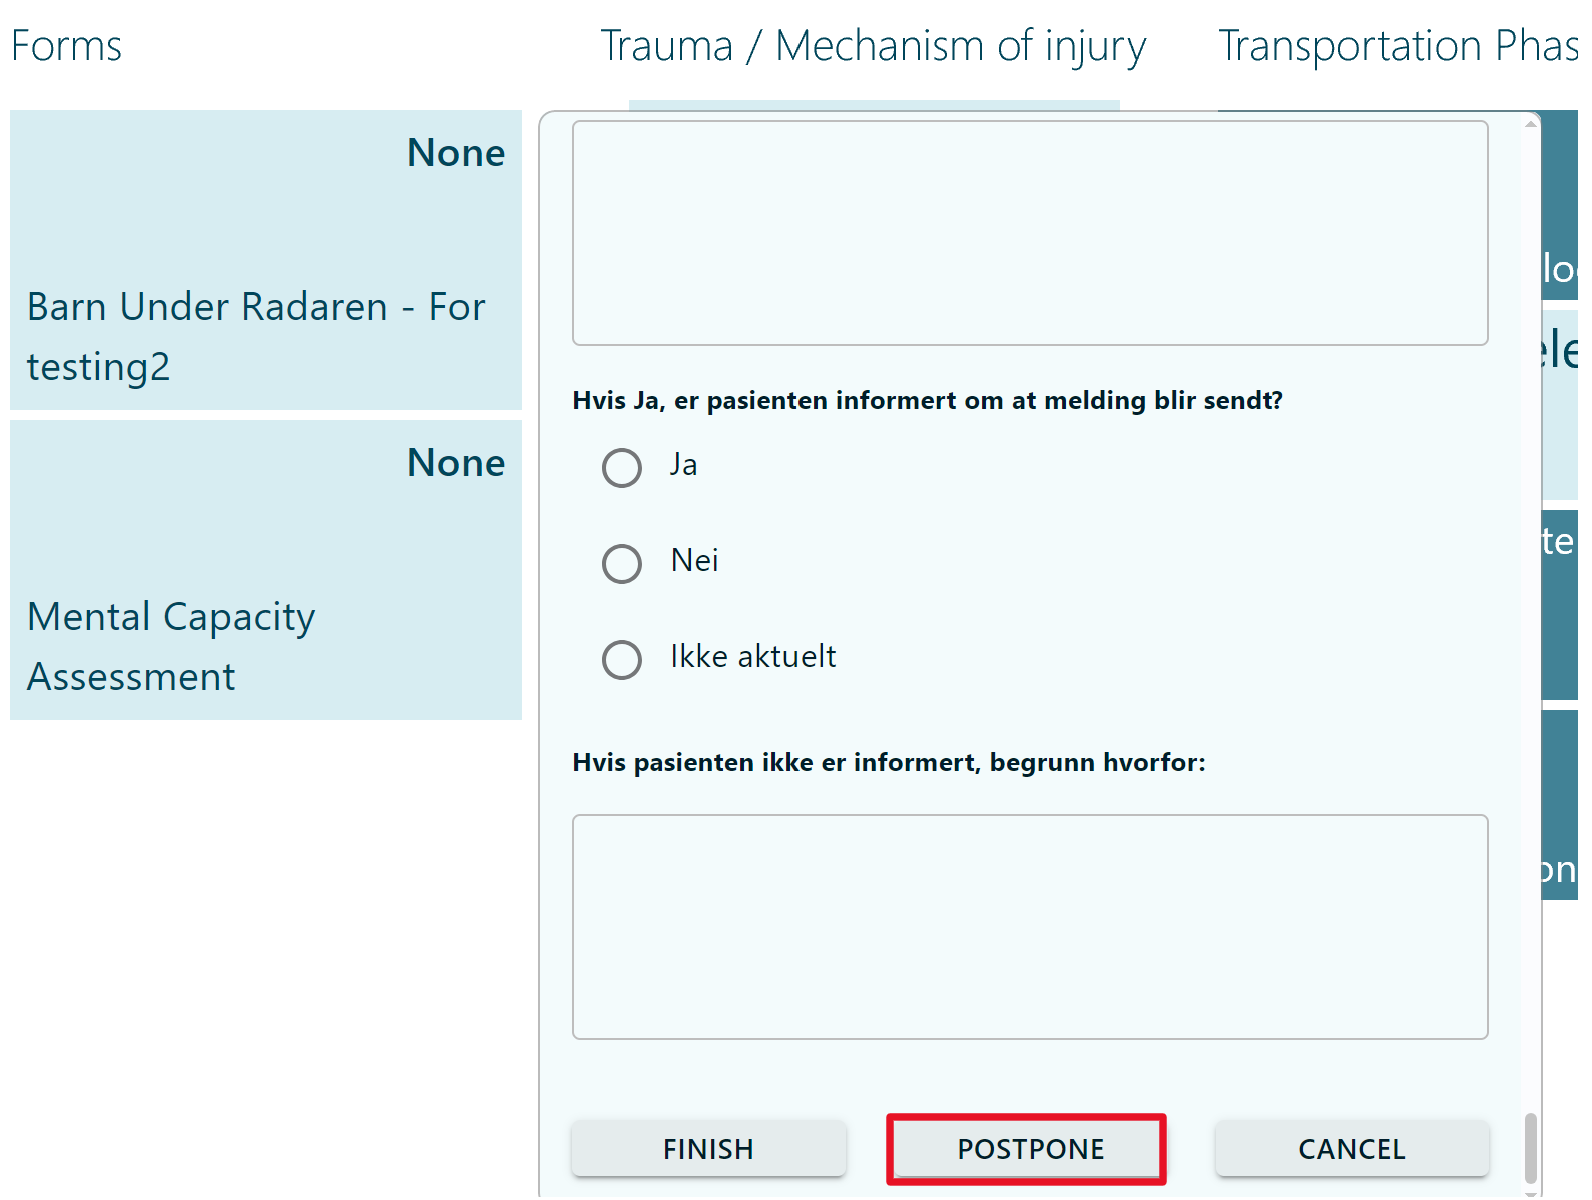
The postponed form will be listed in the form flyout after postponing it. Postponed forms can be opened and completed by clicking on the name of the form in the list.
Complete form with score
*Introduced in release 27*
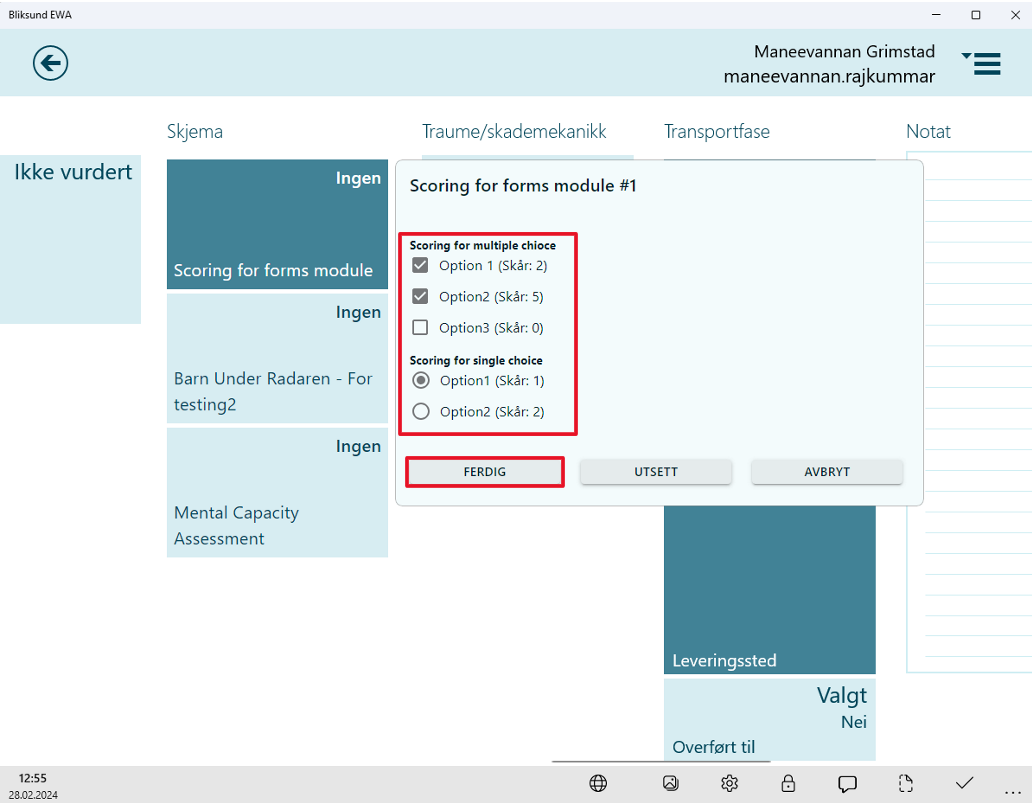
Once a form is created and published with scores configured, the forms with scores should be available after syncing EWA Client.
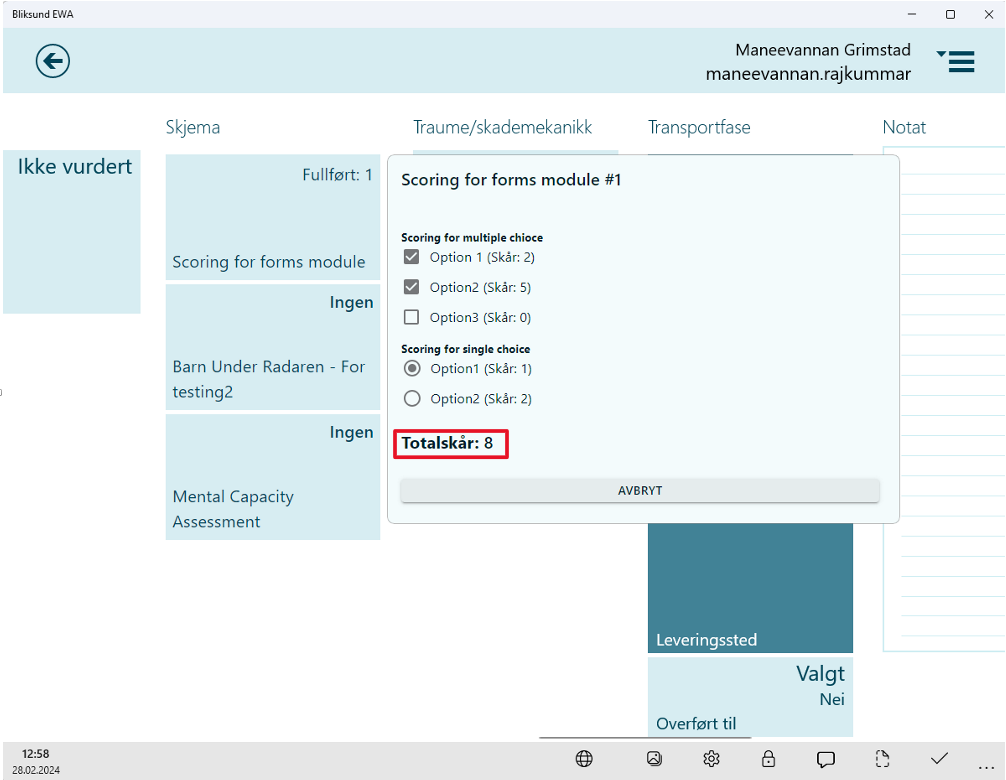
The score for options is displayed in the form response and the total score is displayed after completing the form.
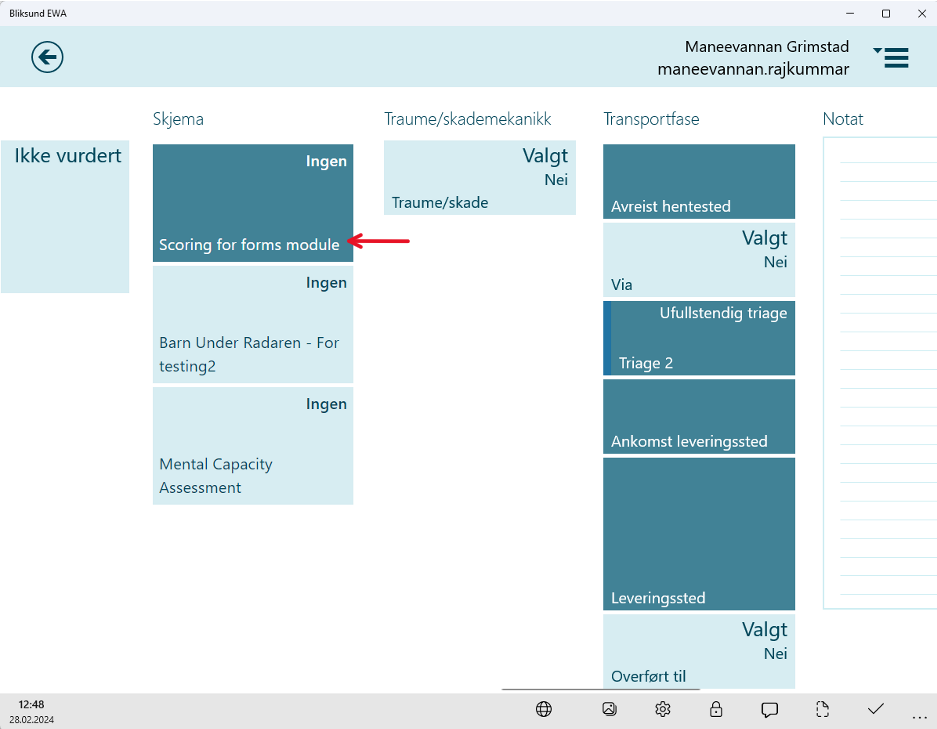
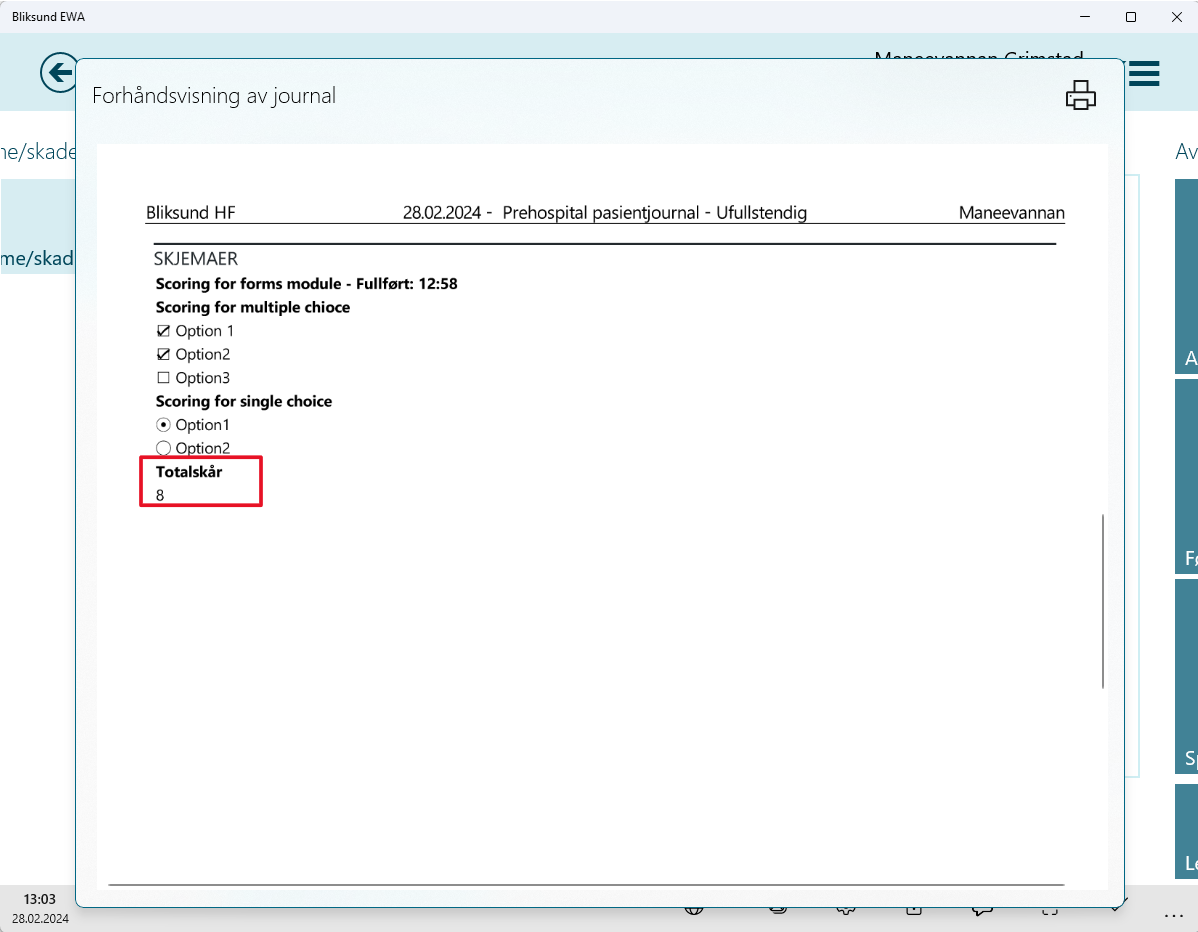
The total score calculated is included in the print module.
Form response with new Element Types and branching
*Introduced in release 29*
After creating and publishing the form with single-choice questions featuring branching conditions and newly integrated element types such as select boxes, multi-select boxes, date pickers, time pickers, date-time pickers, and number fields, the forms with new updates should be available after syncing EWA Client.
New forms submitting logic in EWA Client
*Introduced in release 33*
We've simplified the form submission process in the EWA Client, making it easier to use. Now, when filling out a form, users can save their input instantly by clicking outside the form, just like with other tiles in the EWA Client. The form will automatically be marked as complete once all required questions are answered. If any mandatory fields are left blank or you have incomplete sections to respond, the form will remain incomplete until they are filled in.
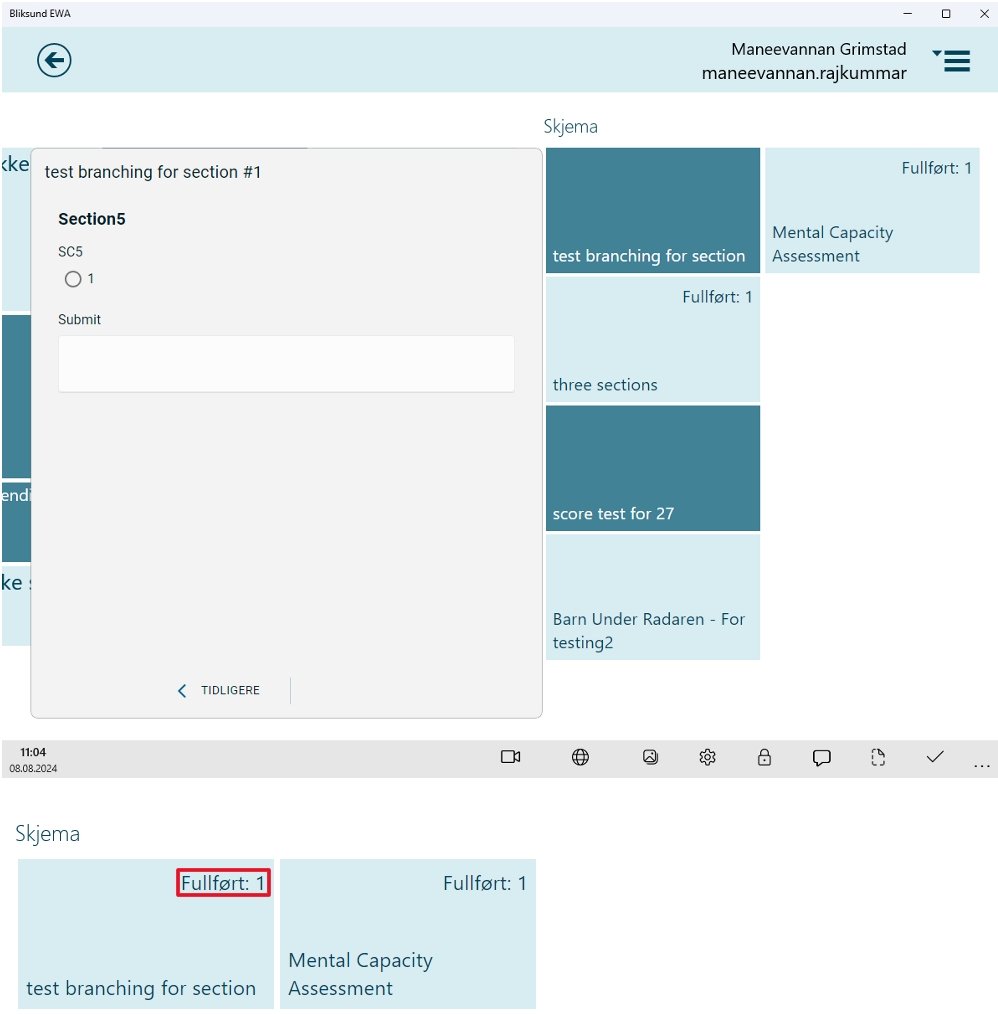
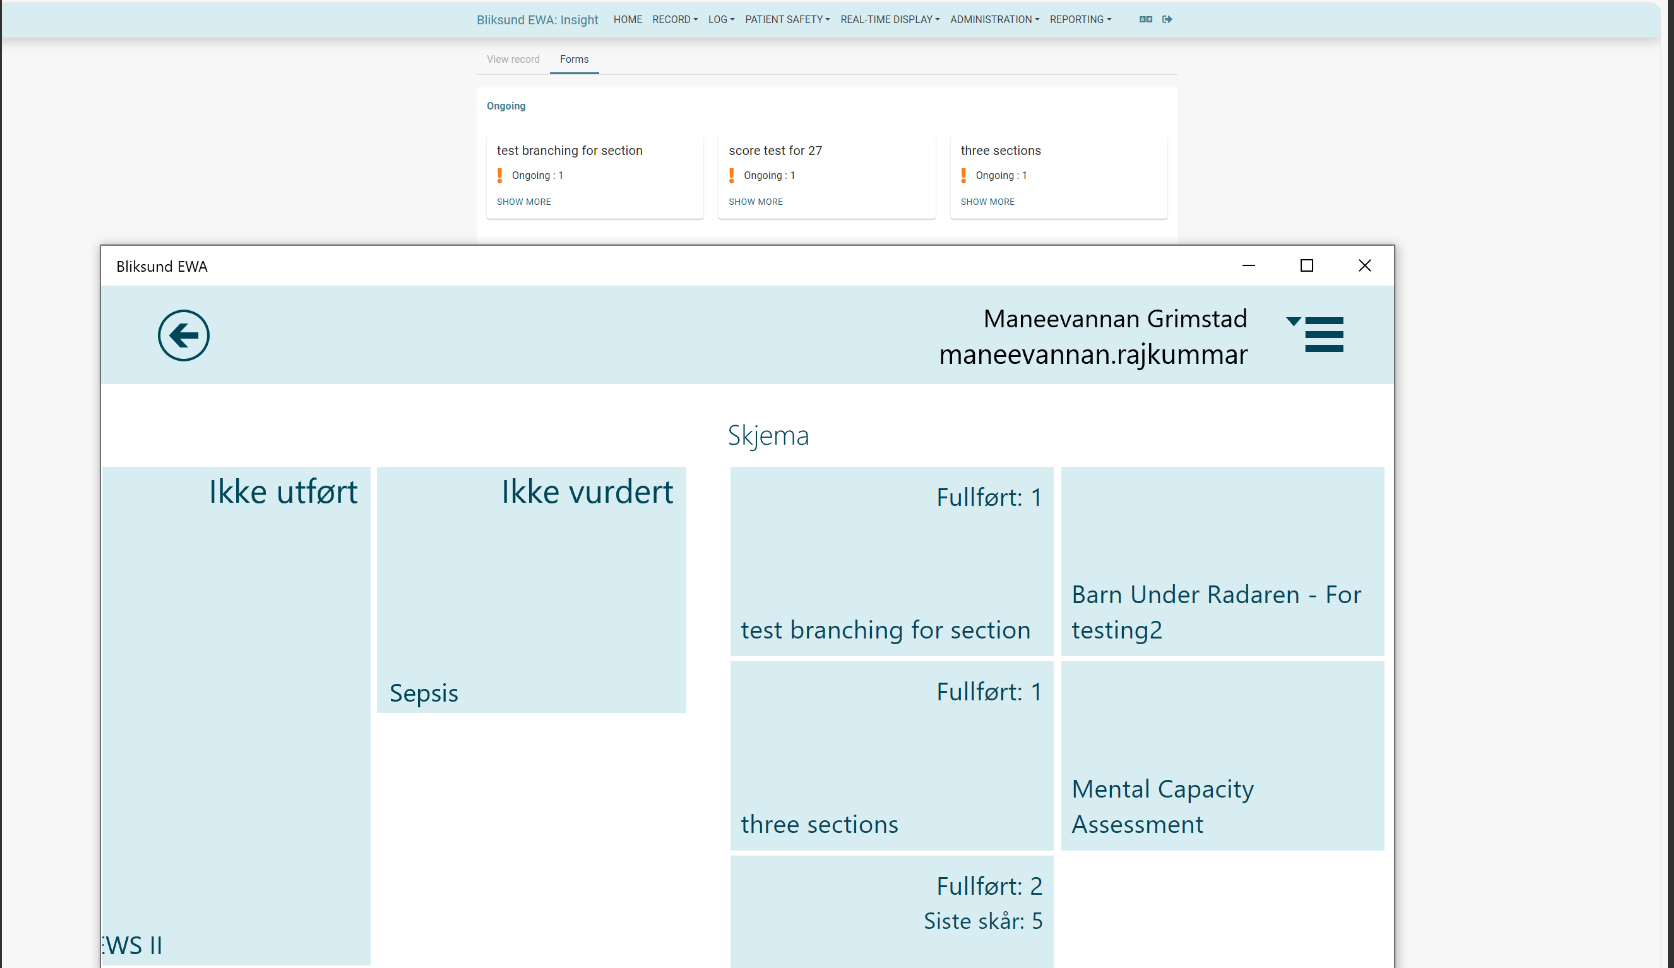
In the Insight view/edit journals page, completed forms will be ongoing until the record is completed. The time stamps displayed on the forms are the time when the record is completed.
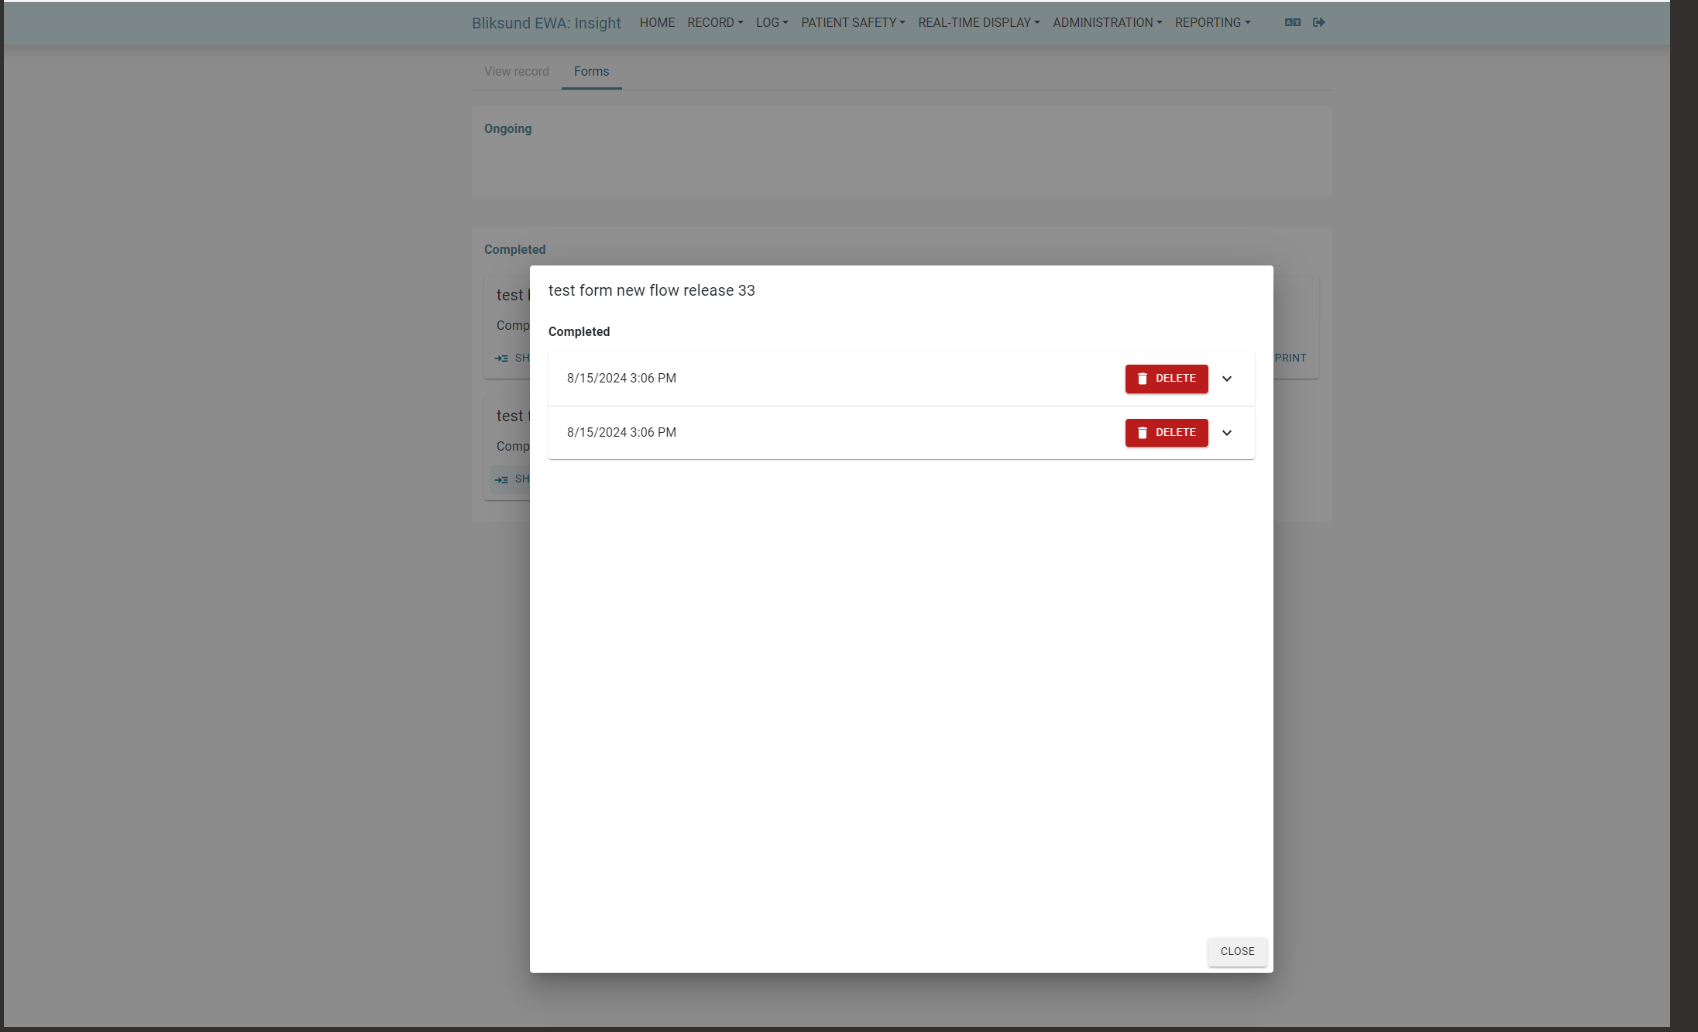
Print the completed forms
*Introduced in release 23*
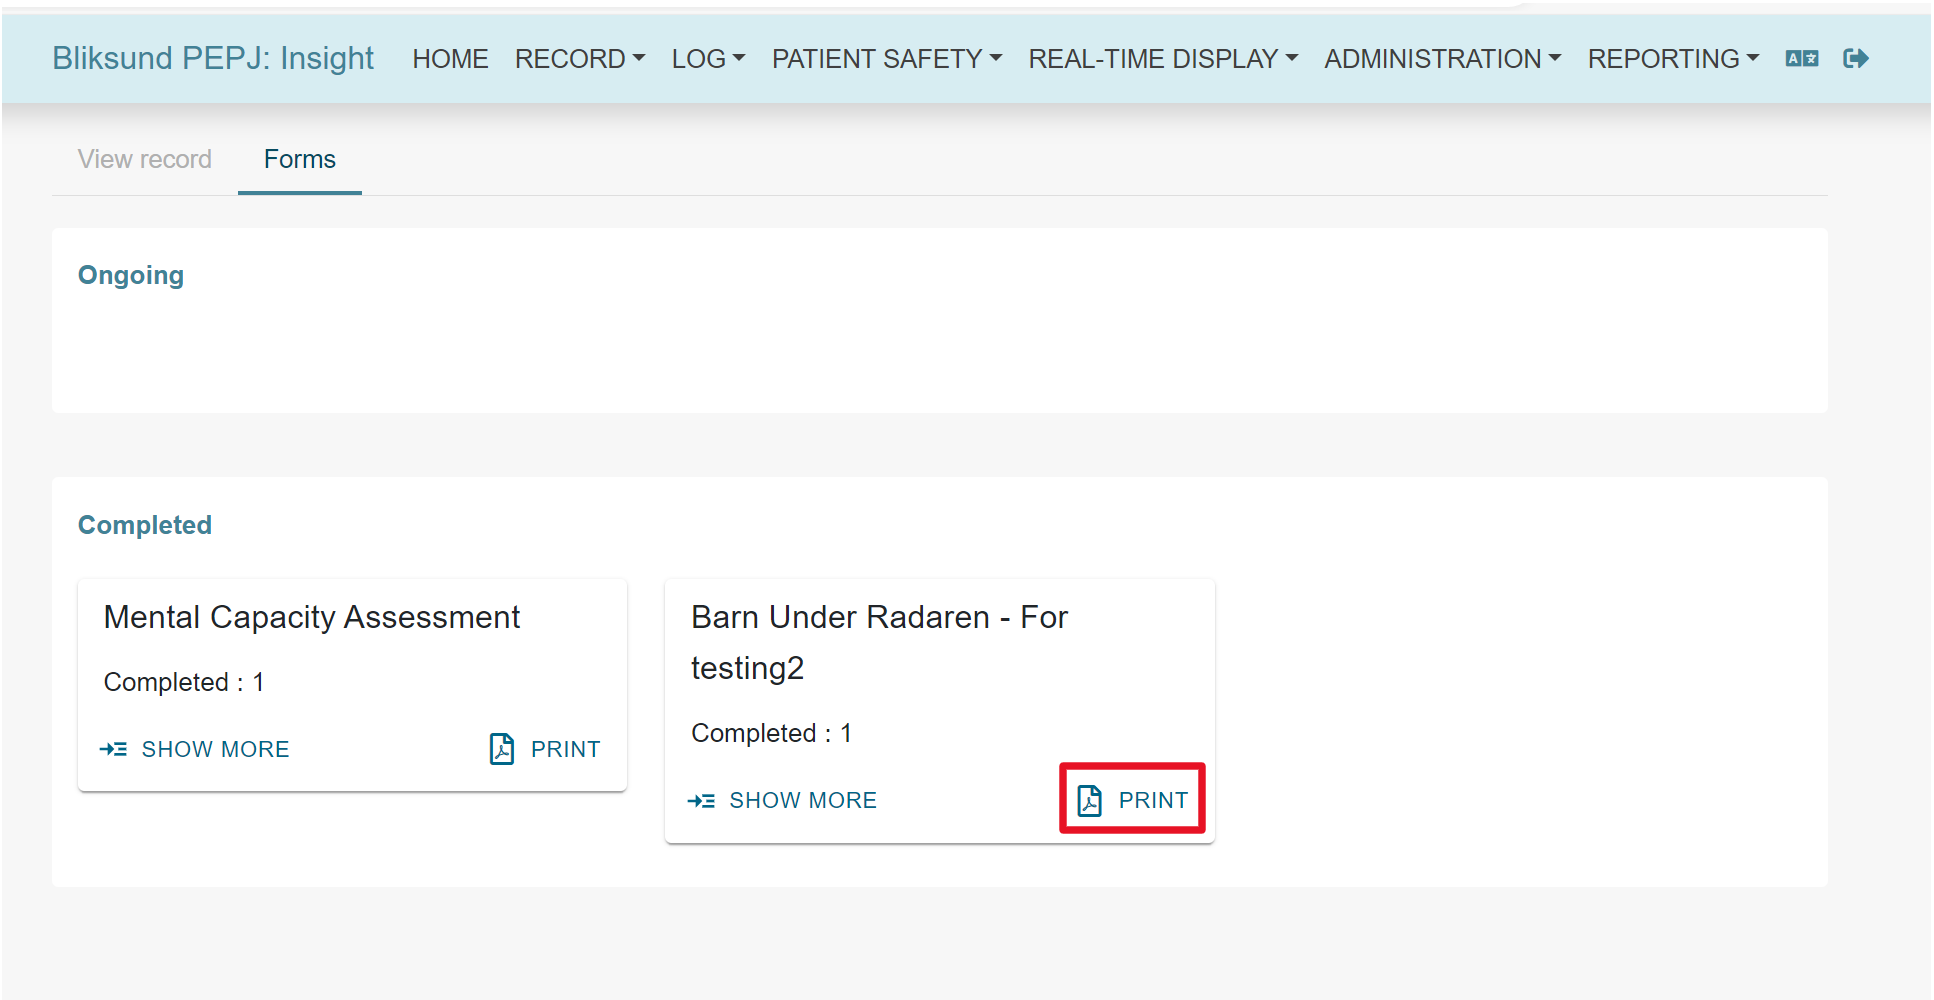
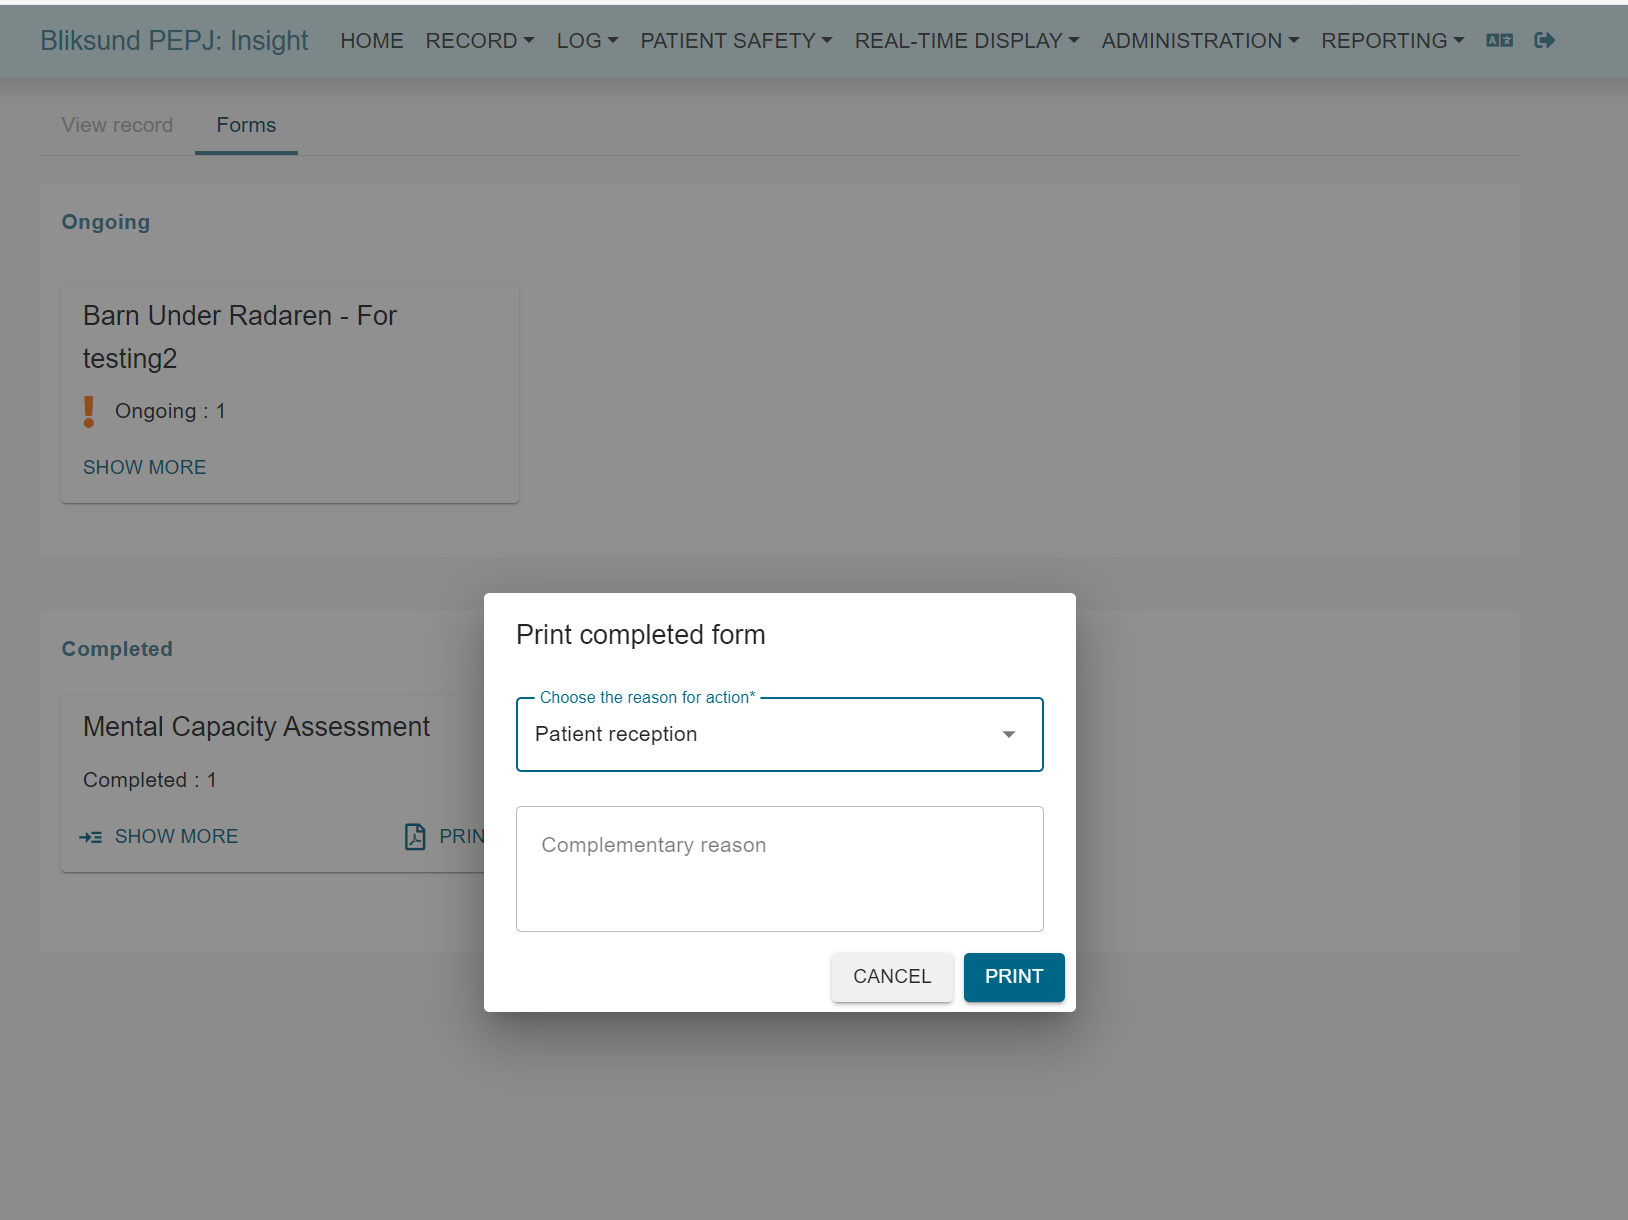
To print the completed form from Insight, Open the record with completed forms by clicking the view or edit button on the journal search page in Insight. Navigate to the form details page by clicking the tab named 'Forms' in the Journal details page which is visible when a form response is filled in missions from EWA client. The performed forms are listed in the tab and grouped by state.
Click the 'Print' button for the completed form, select the reason for access and click 'Print' to confirm.

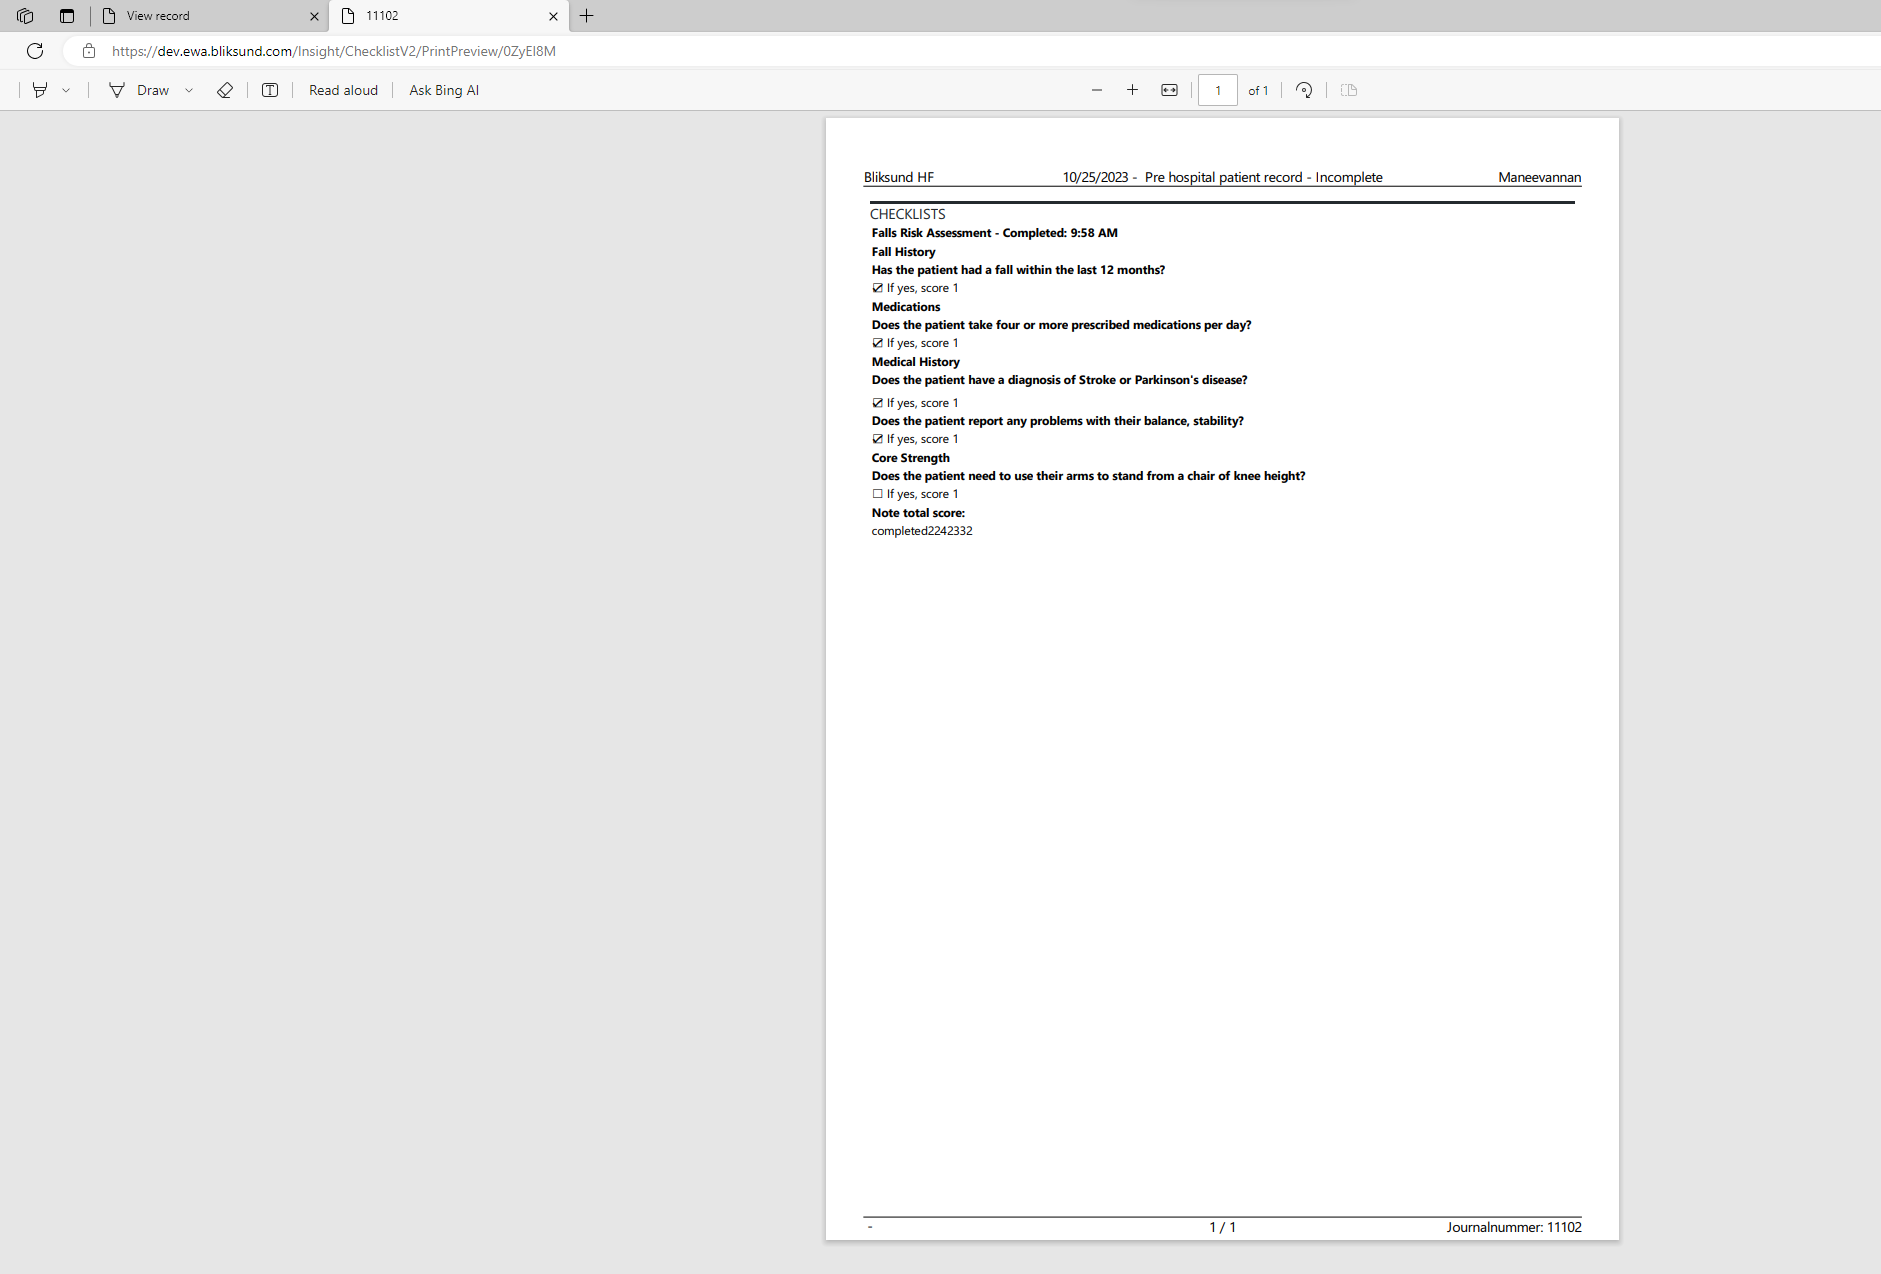
The form to print will be opened in a new tab as a PDF.
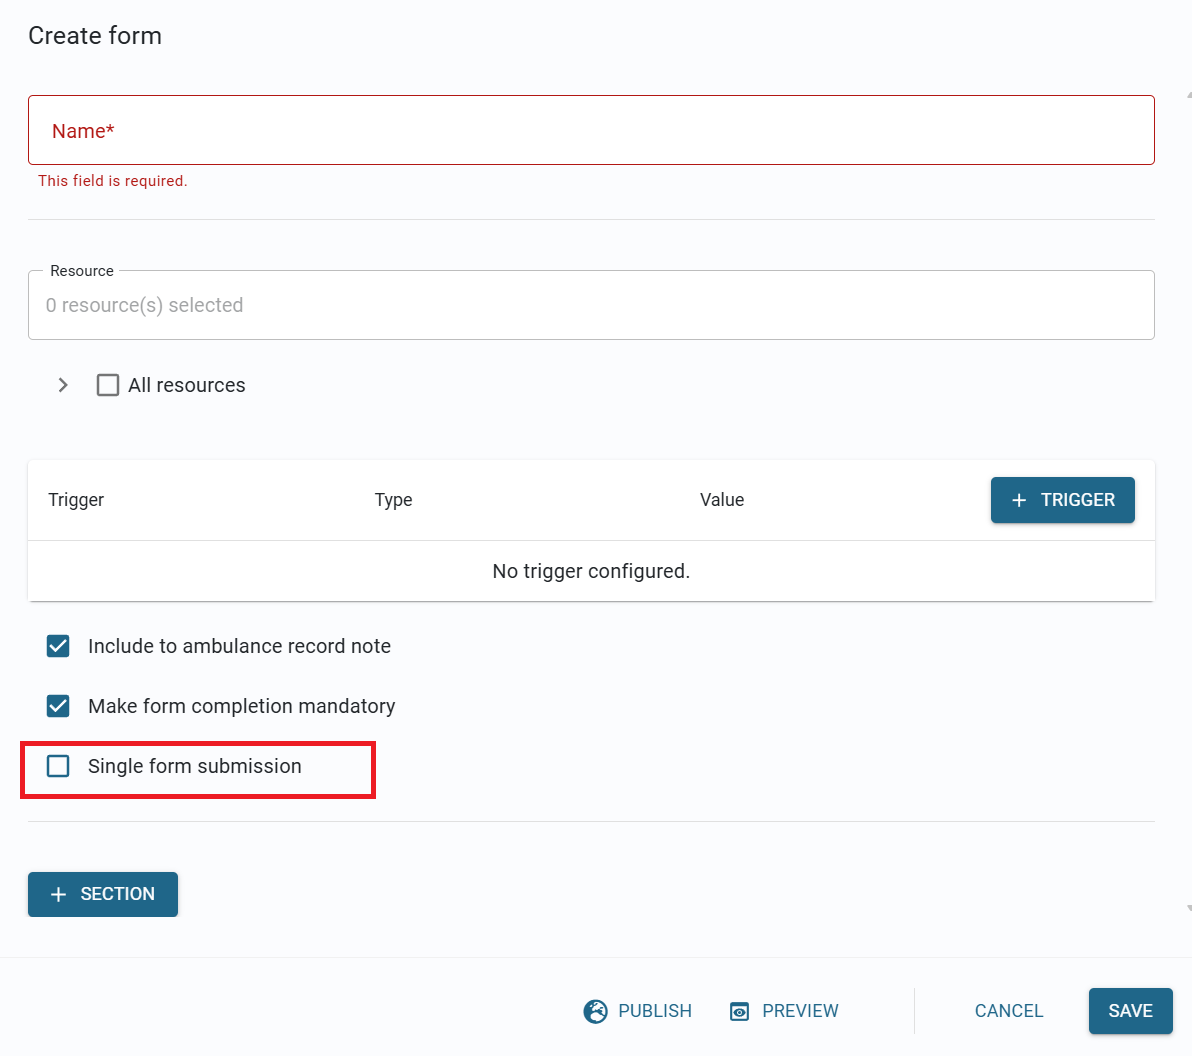
Single form submission
*Introduced in release 39*
To limit multiple responses to certain forms, we have added a new configuration option on the Forms Configuration page that allows administrators to control that thing. Now, if this option is selected, the form will allow only one response.
Text formatting options
*Introduced in release 40.2.0*
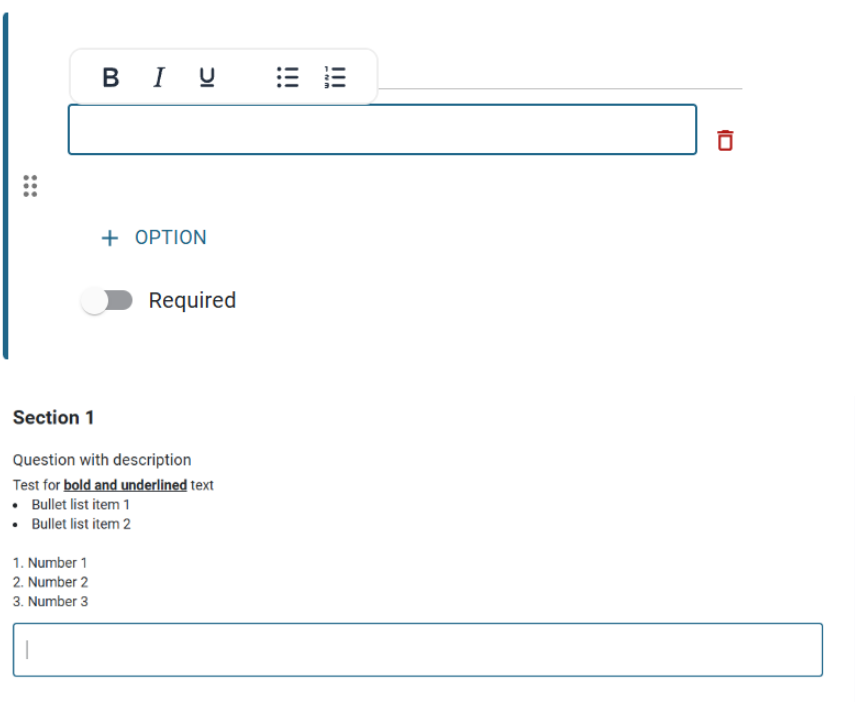
We have added formatting options for question descriptions in Forms/HoPC configuration pages, allowing users to customize text appearance for improved clarity and presentation. Currently, we only support the following formatting styles: Bold, Italic, Underlined , bullet lists, and numbered lists.
Re-order questions
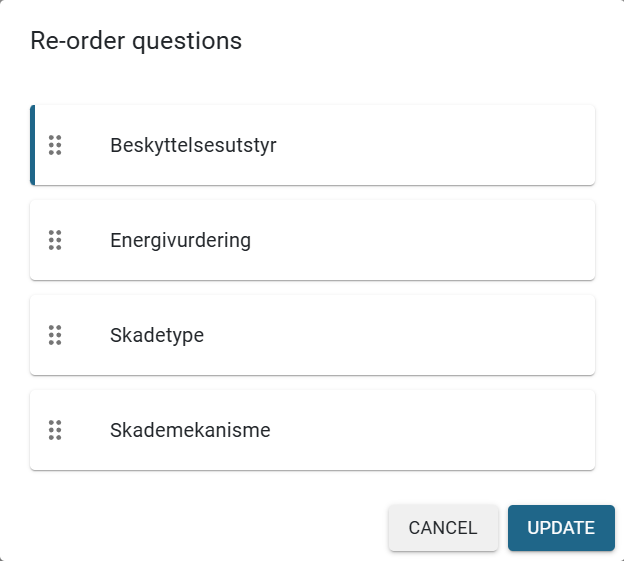
Due to the convenience, we have changed the way to move the questions within a section. According to that, the questions now can be re-ordered in the same way we are doing with the sections. The old way that allow to directly drag-drop the question now is disable.
New option for moving questions

Re-ordering dialogs
